Pick and Place Example
Following the previous object inspection example, this time we will explain a pick and place example using the Graph Wizard. The pick and place example is one of the most used examples of vision-based applications, and this example guides you through the process of storing the image of the object to be gripped through IndyEye, recognizing the object based on this, and linking it with Conty.
Warning
Before proceeding with the pick and place example, you must first check the test environment. Please check the surrounding environment that satisfies the following conditions before proceeding with the example. In addition, if you use different specimens from the examples, or if the test environment is significantly different, please adjust the parameter values of each module to improve specimen recognition.
- Space to maintain a constant amount of light
- Or a space with little environmental change due to lighting
- Specimen with no or little reflection
Object Image Storage and Recognition
In this example, the pick and place process is conducted using two types of confectionery products that are commonly found in the surroundings. First, place the object to be recognized, and then save the image through IndyEye. The saved image is used as a template for the detection algorithm. Click Wizard on the Detection tab and select items in the following order.
- Graph Initialization ⇒ Save sample image
Next, click on the ROI module to specify the region of interest of the image. After clicking the module and selecting TOUCH at the bottom, you can move the area of interest by touching the screen on the left side of the app. At this time, adjust the position and size of the region of interest so that the image fills the region of interest as much as possible. Then click the SaveImage module and enter a name to save. After setting up the above two modules, click the Run button to save the image. It is recommended that this process be conducted in advance for two specimens.
Now, the object detection algorithm for pick and place is first configured using a wizard. Select Wizard on the Detection tab and select items in the following order.
- Graph Initialization ⇒ Create new object recognition algorithm ⇒ Camera footage ⇒ Clearly ⇒ Recognize specific sample images ⇒ Object with many feature points ⇒ Using GrabCut algorithm ⇒ (Detection target inspection method - next stage) ⇒ Sort directions by long direction ⇒ Fit object position to work plane (example) ⇒ Gripper unused
When the graph configuration is completed, you can see the following figure.
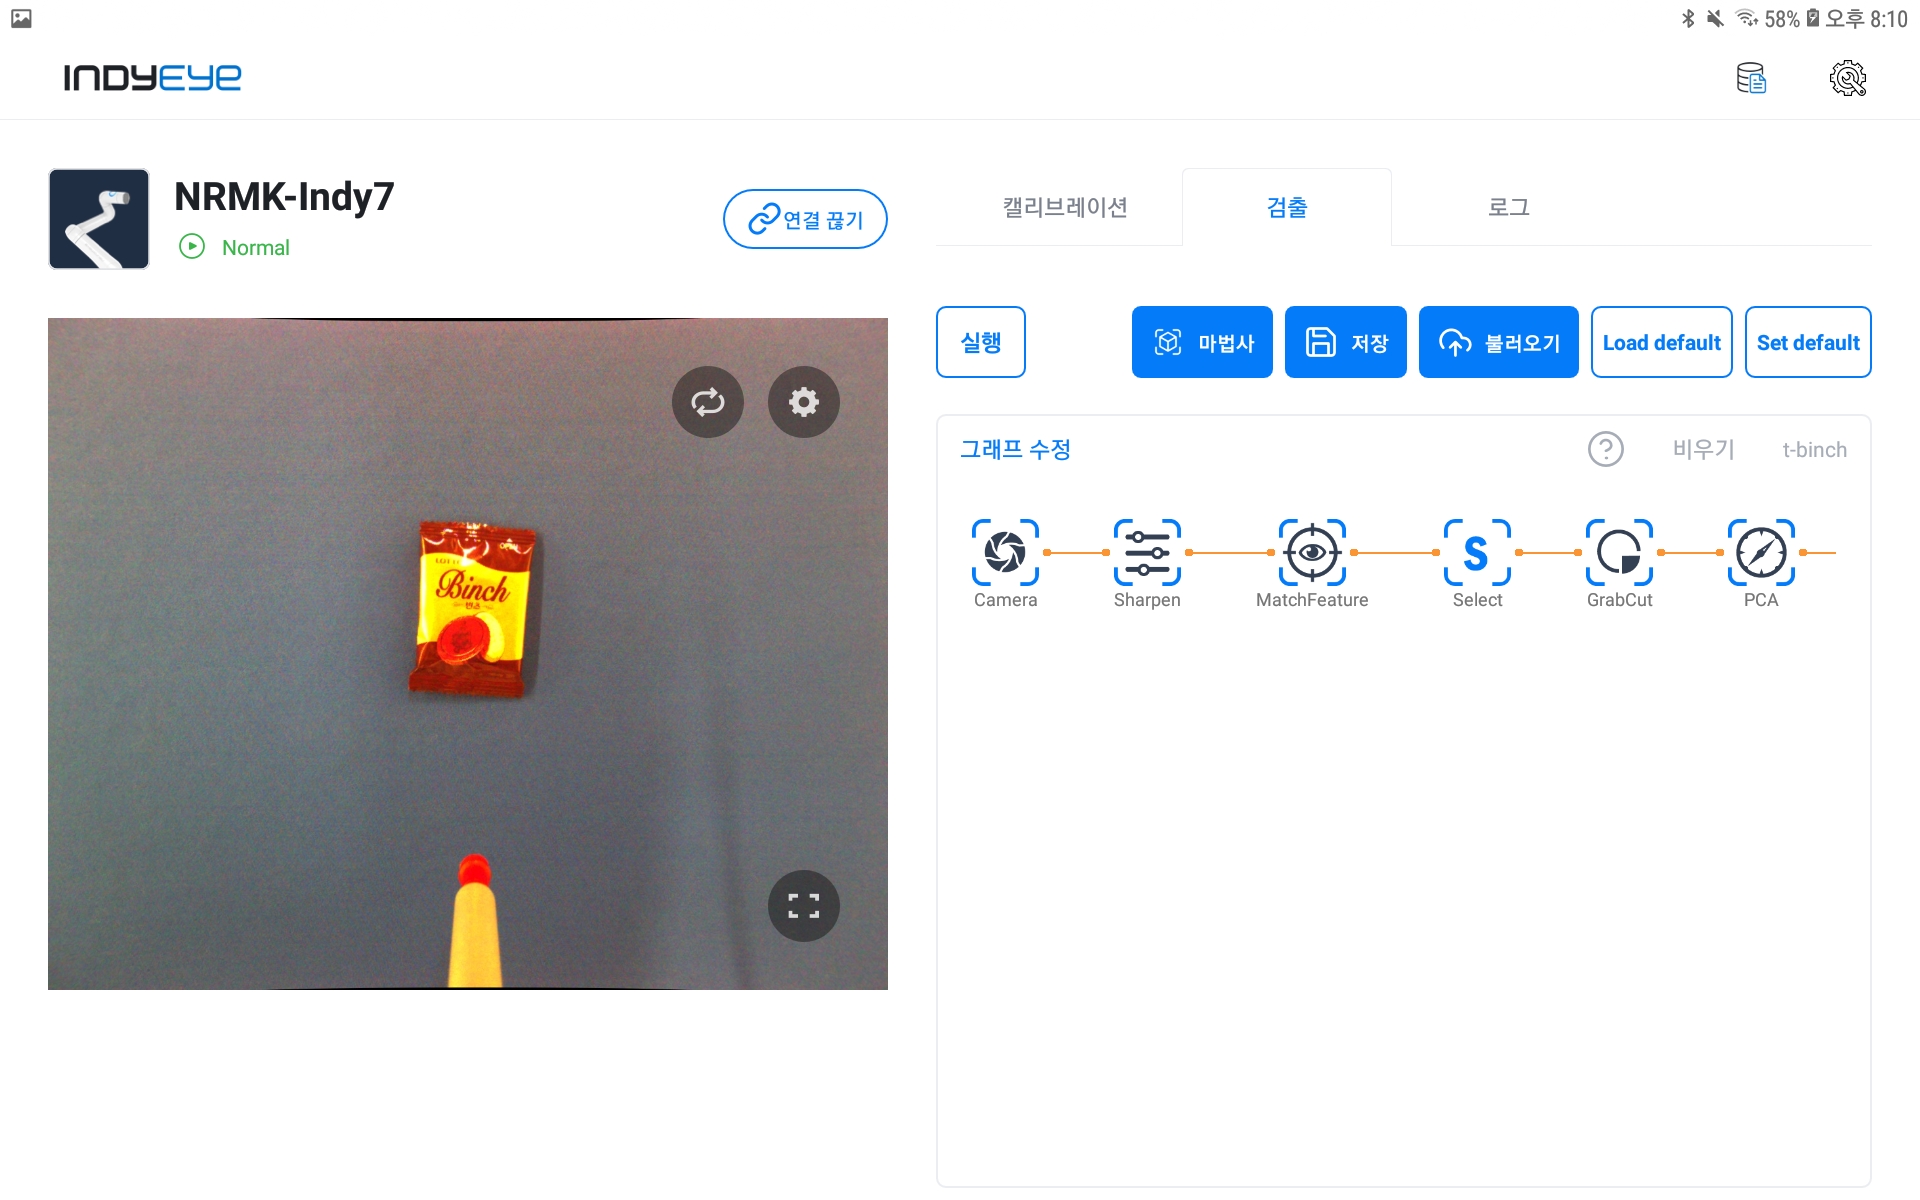
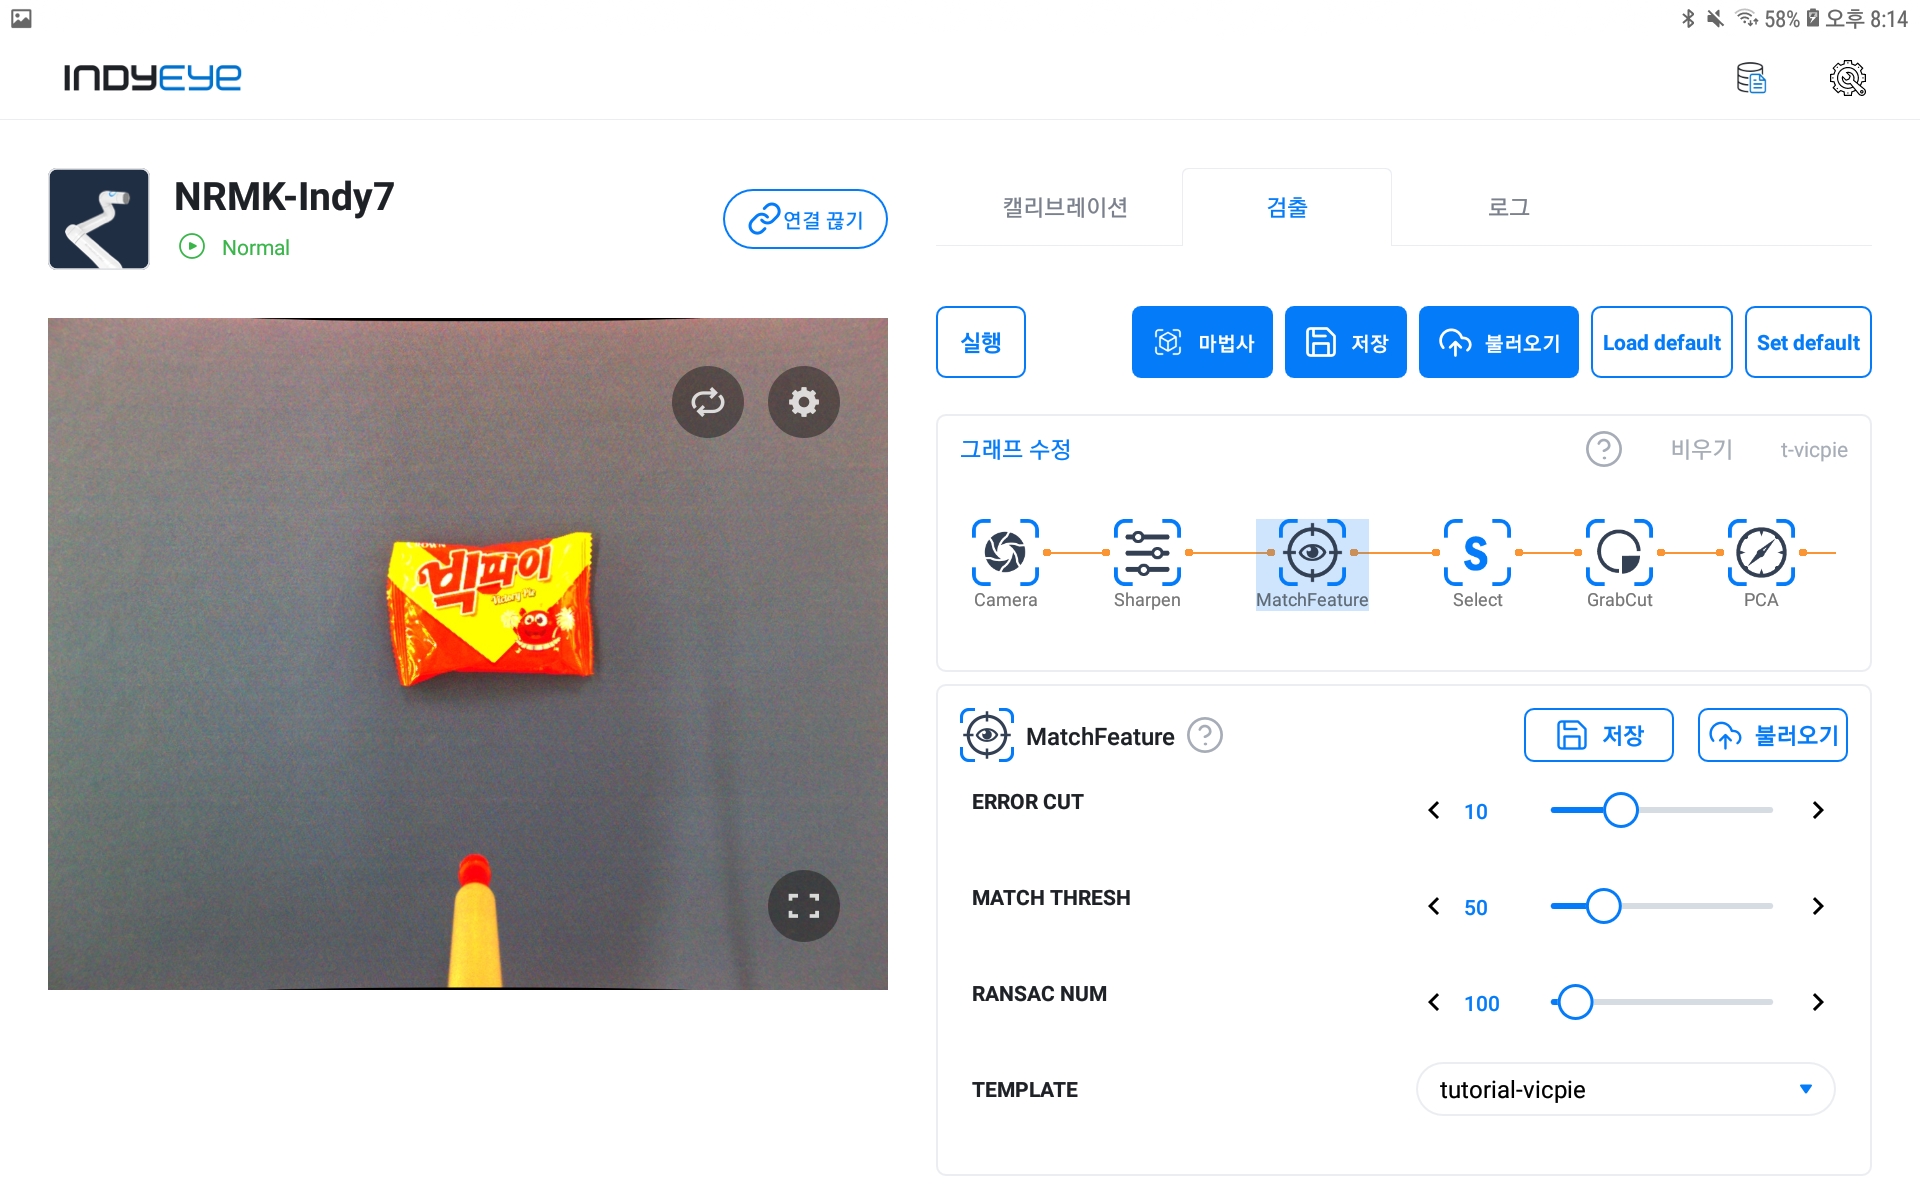
Graph construction complete
After entering the detailed settings of MatchFeature among the completed graph modules, select the name you entered when saving the image from the TEMPLATE drop-down item.
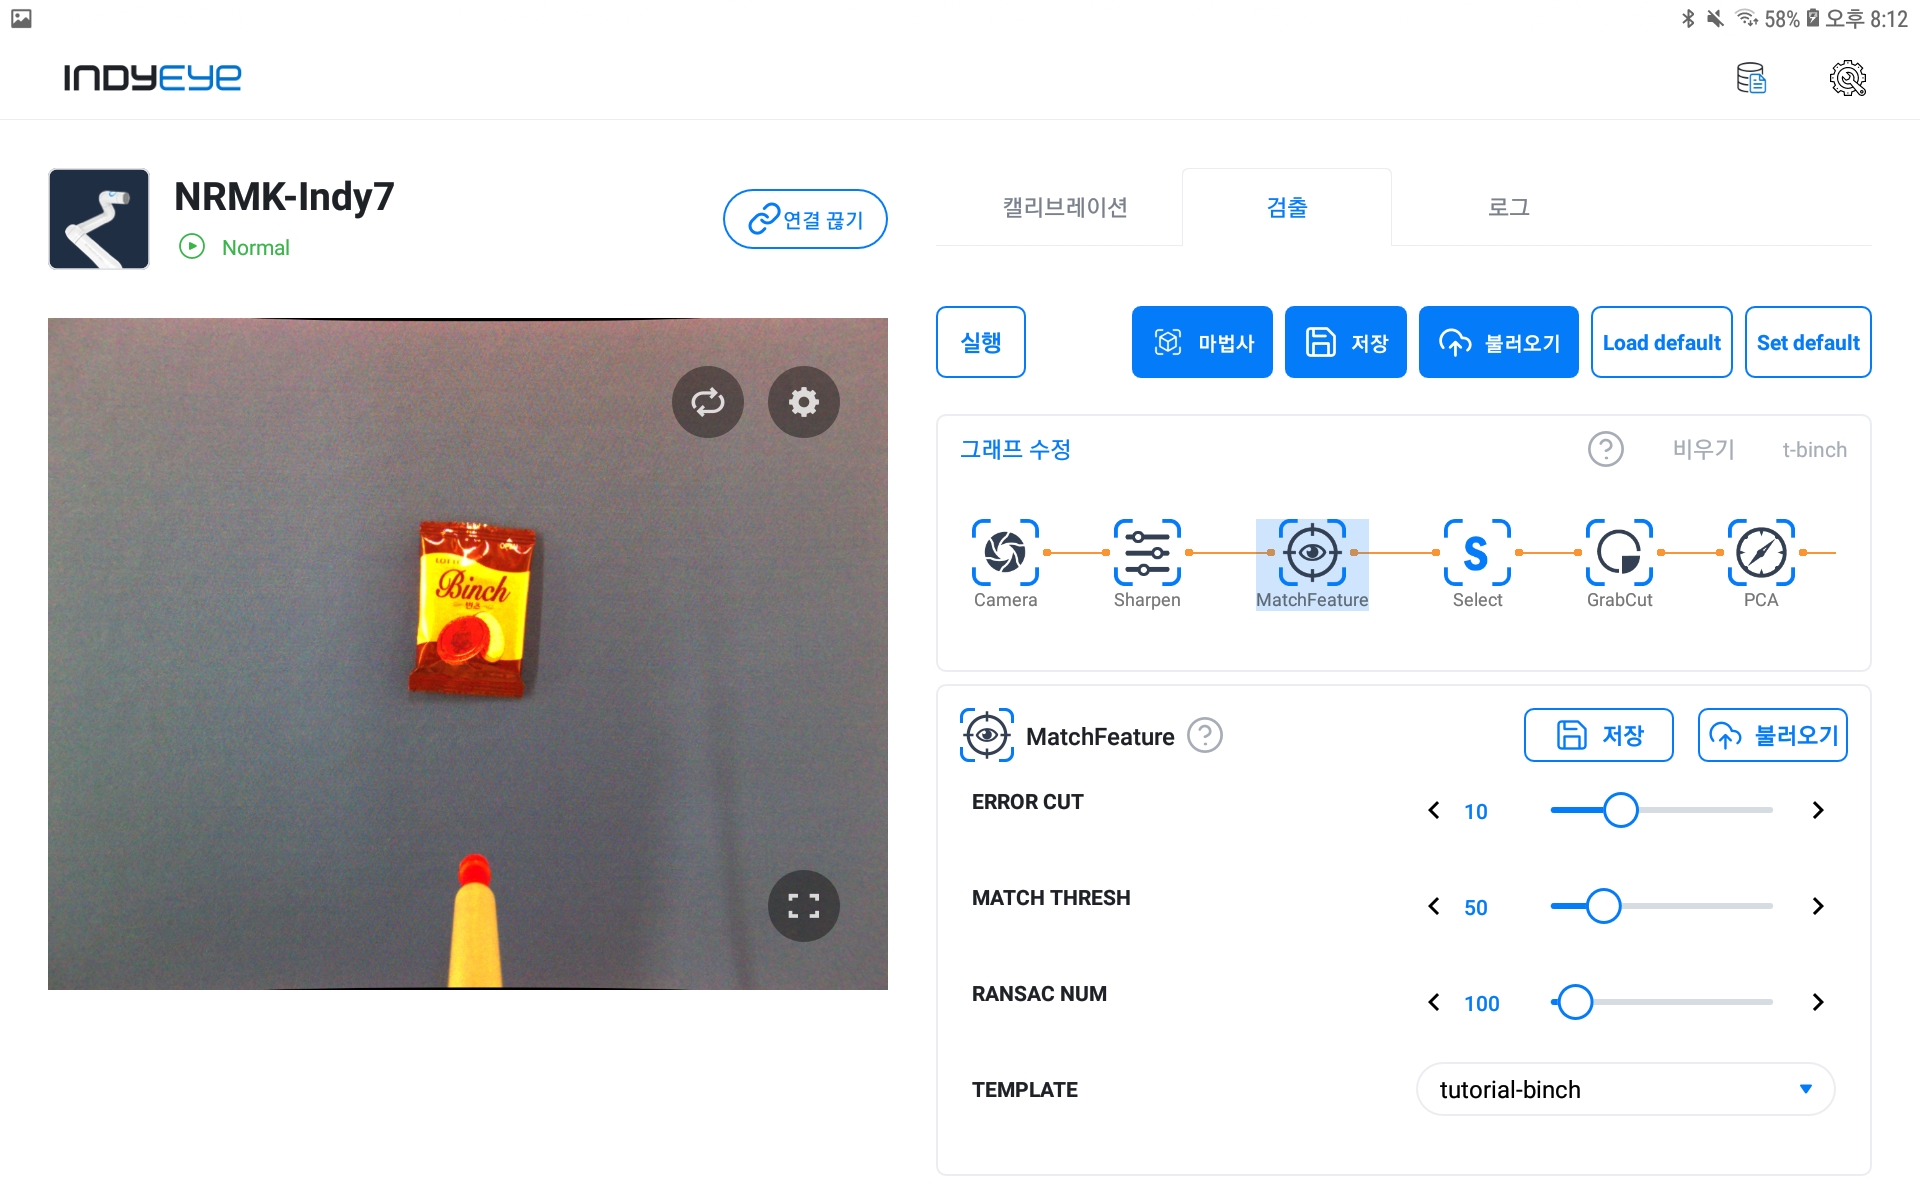
MatchFeature module settings
Now we are going to divide the region using the GrabCut module. Adjust the SIZE CLOSE and SIZE DILATE sliders as appropriate to determine the recognized object area. At this time, if the screen is too bright or dark, press the refresh button on the camera video screen to automatically adjust the exposure settings and then proceed to the parameter settings.
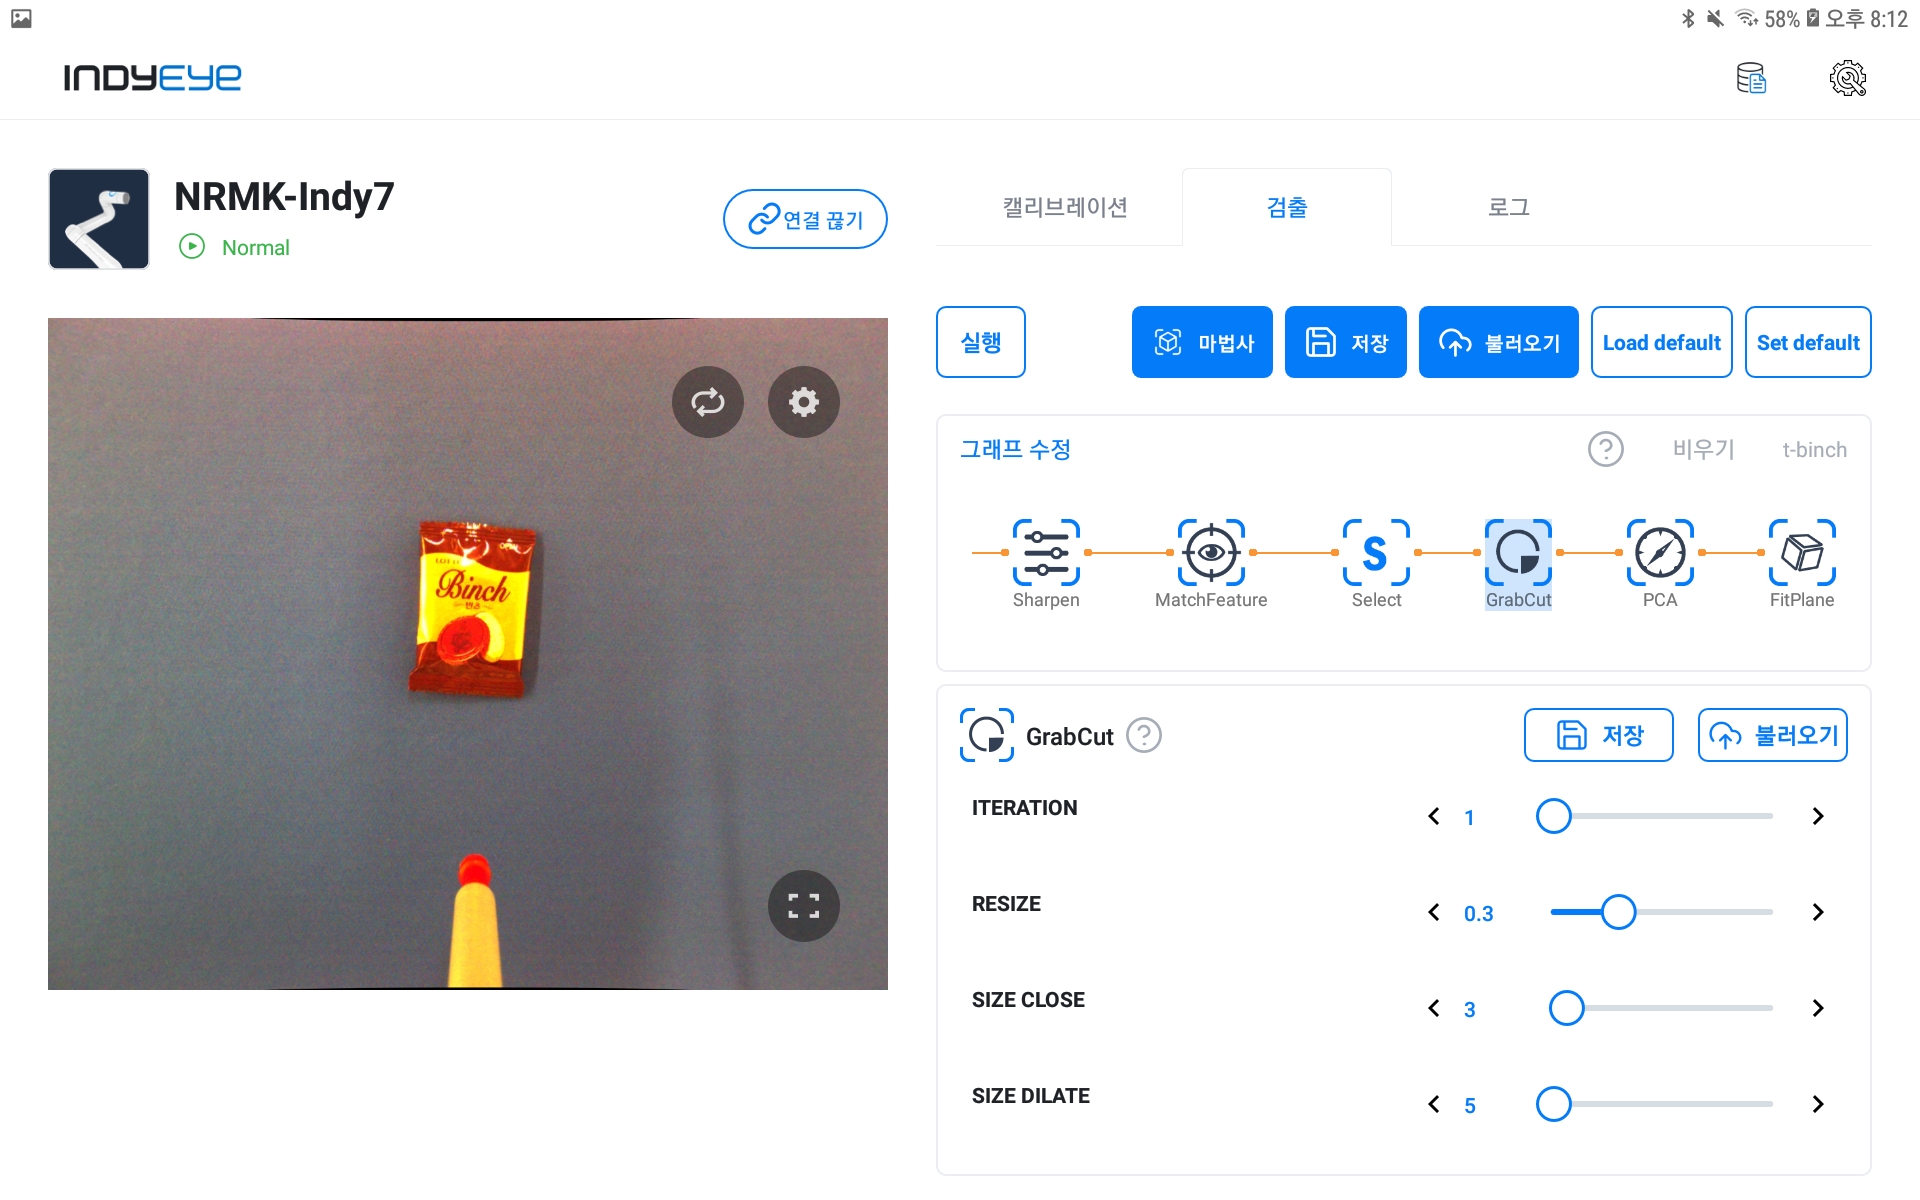
Area division algorithm applied
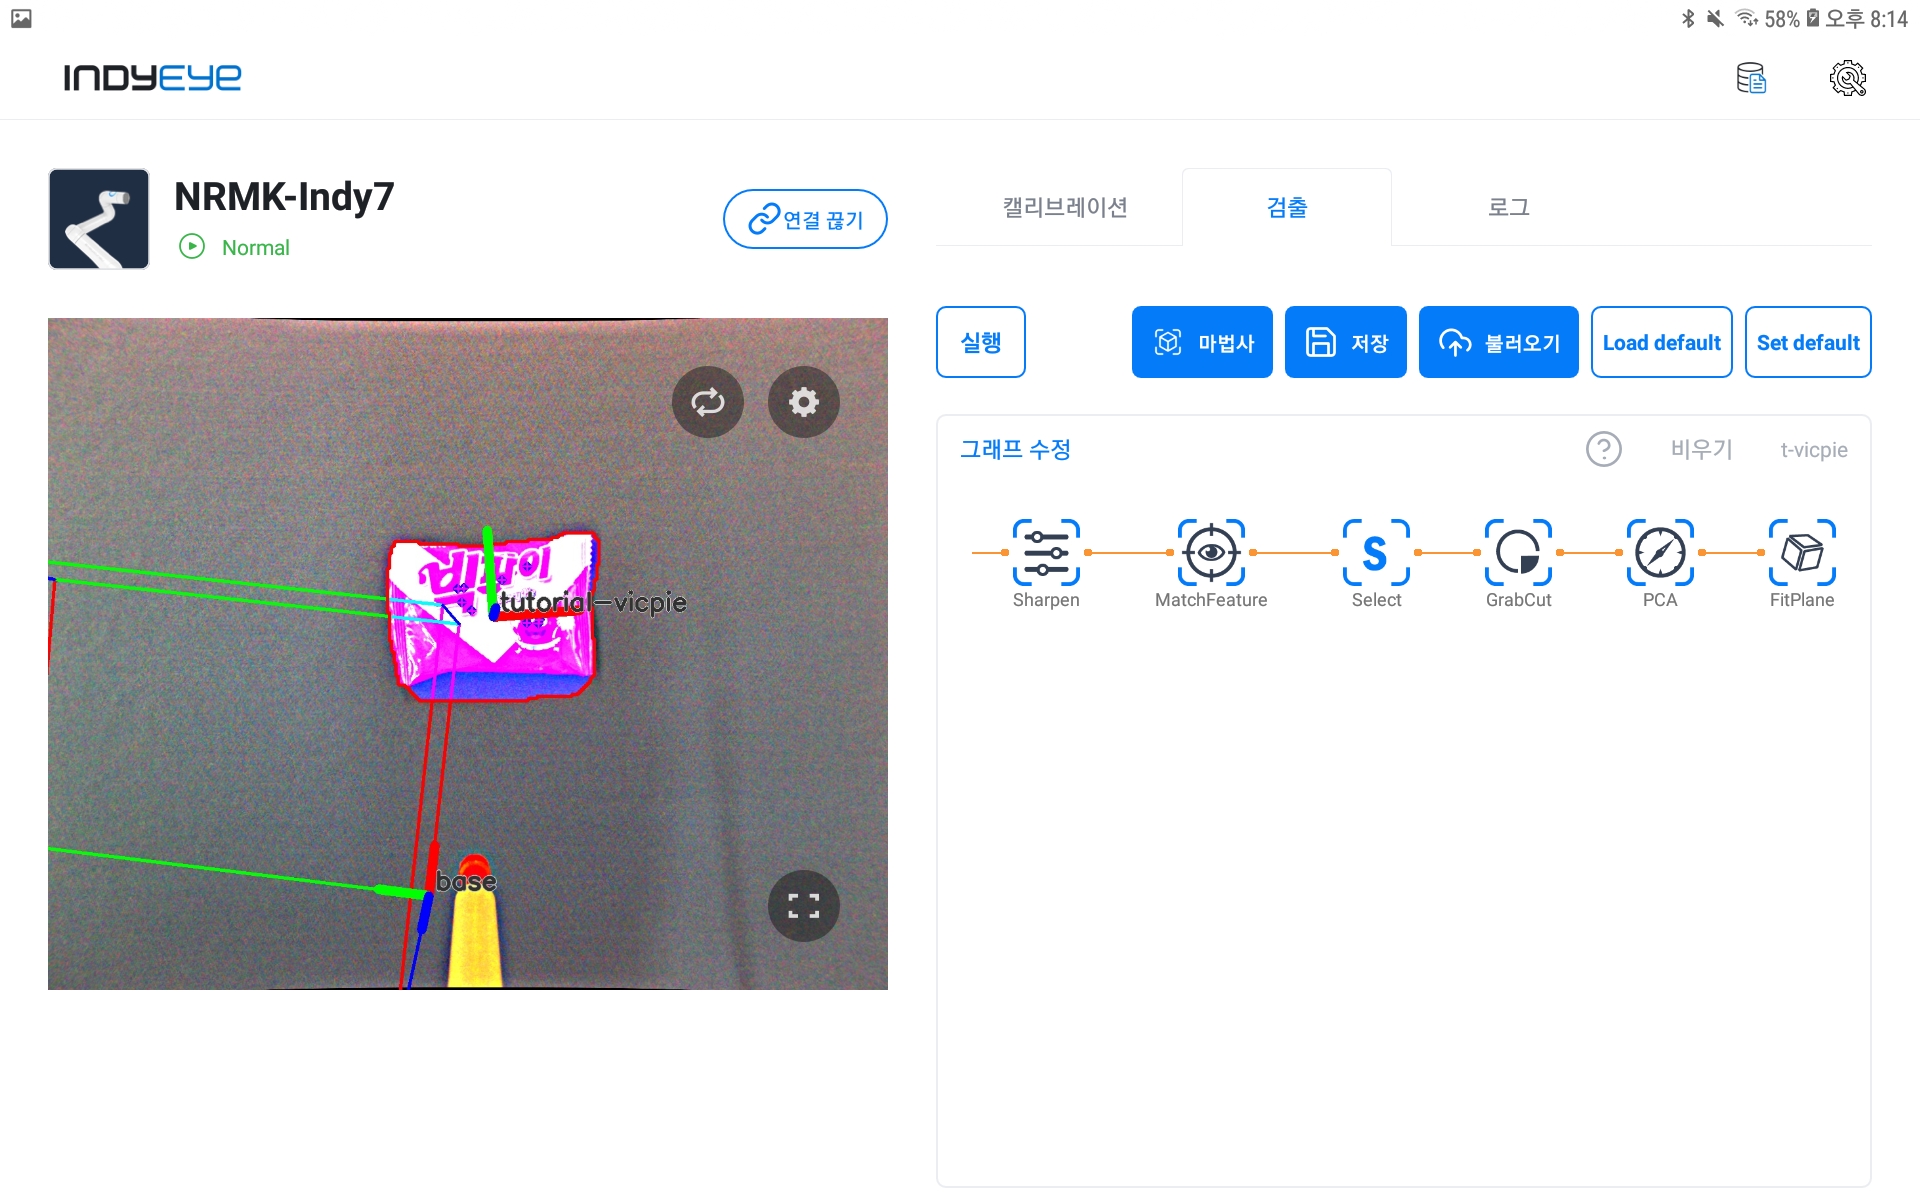
After completing the above steps, you can check the object recognition result by pressing the Execute button. If the recognition result is normal, save the graph.
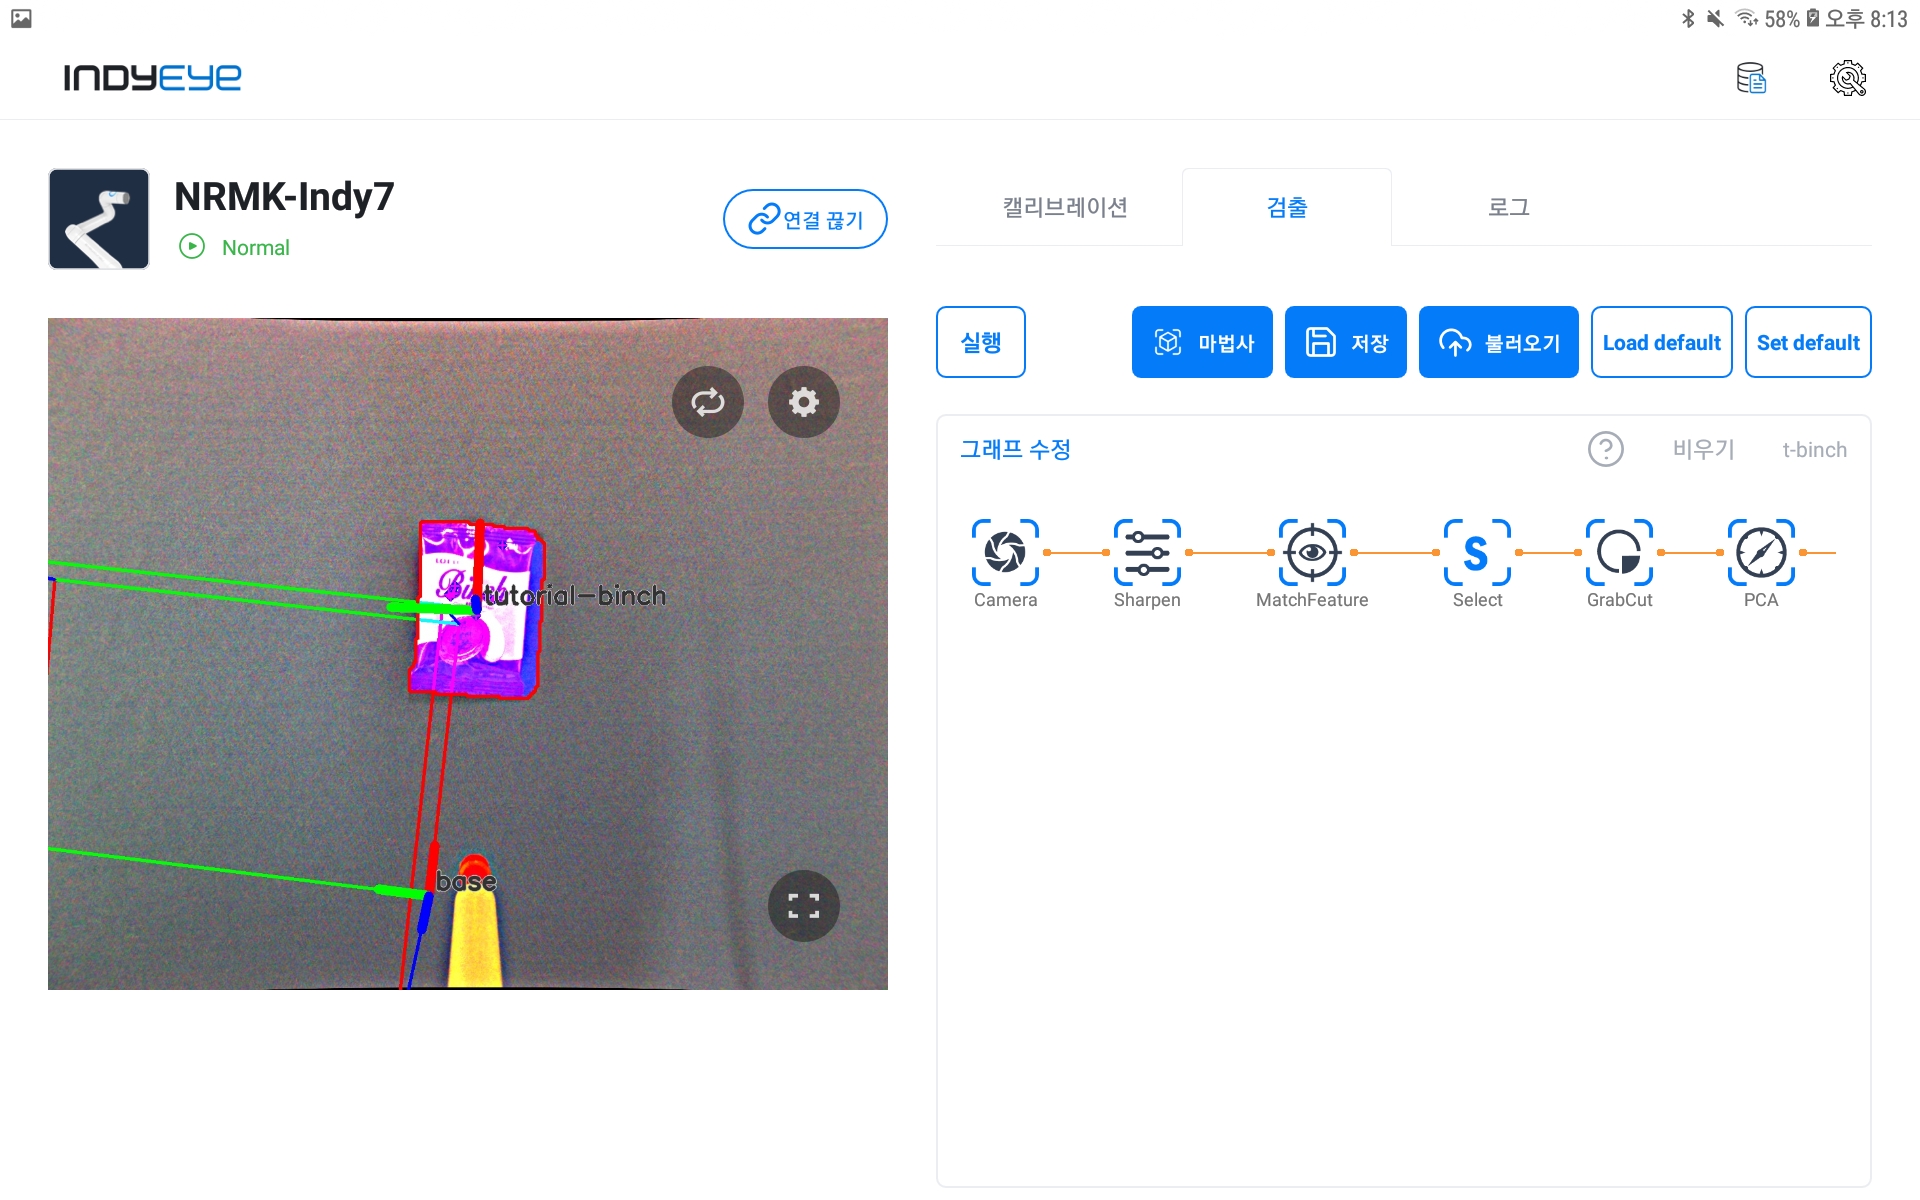
First specimen recognition result
Now do the same for the second specimen. After preparing the specimen as shown in the figure below, modify the generated graph again using the wizard. After entering the MatchFeature's detailed settings, select the name you entered when saving the second specimen image from the TEMPLATE drop-down.
MatchFeature module settings
Then, click the Run button to see the specimen recognition results. As shown below, if the specimen recognition result is normal, save the graph under a different name. However, if the recognition result deviates significantly from the specimen, fine-tune the GrabCut module to correct the recognized object area.
Second specimen recognition result
Multi-object Pick and Place
IndyEye App Settings
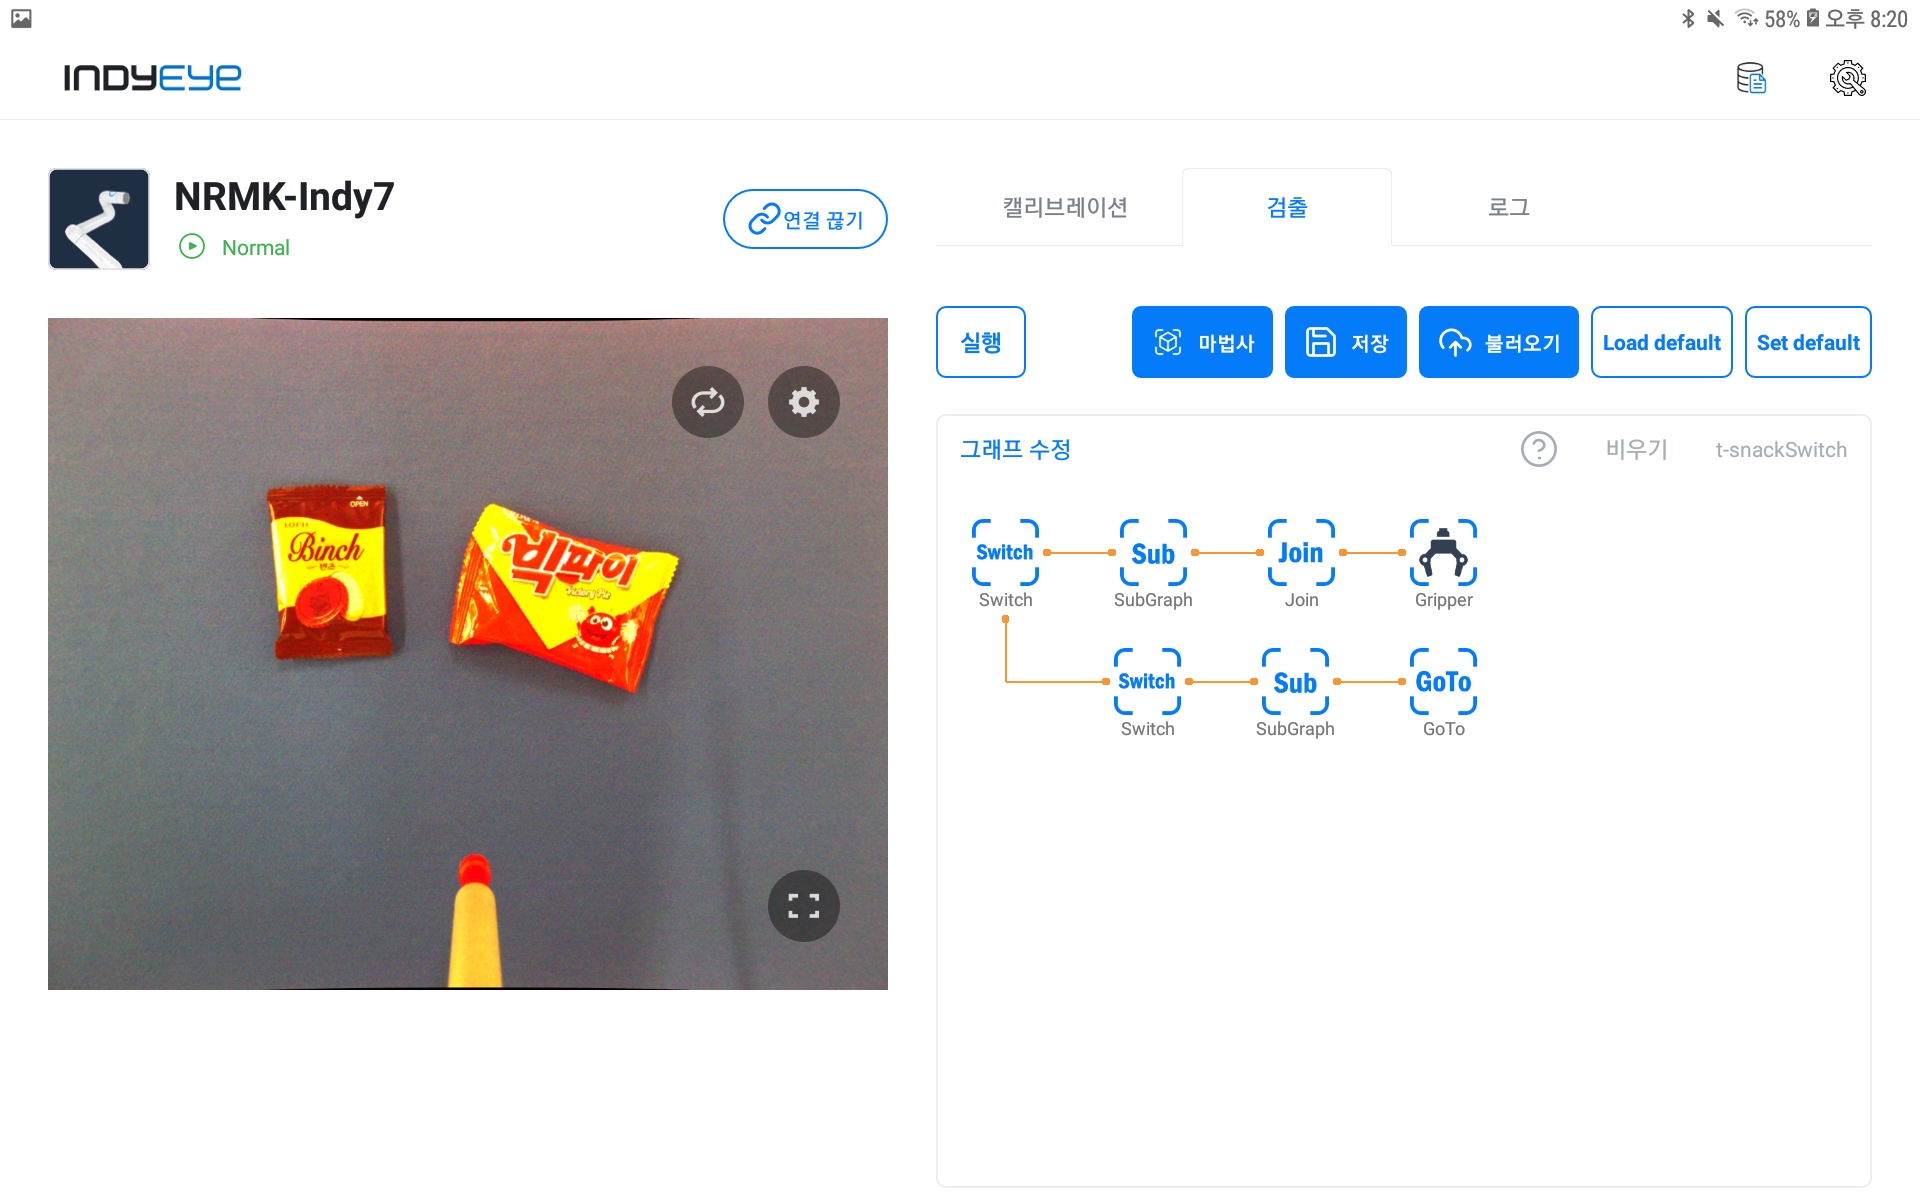
After saving the object recognition graphs for both specimens, we are now ready to go through the pick and place process. First, to initialize the current graph, press the Empty button in the graph window, and click Modify graph to configure the graph as shown below.
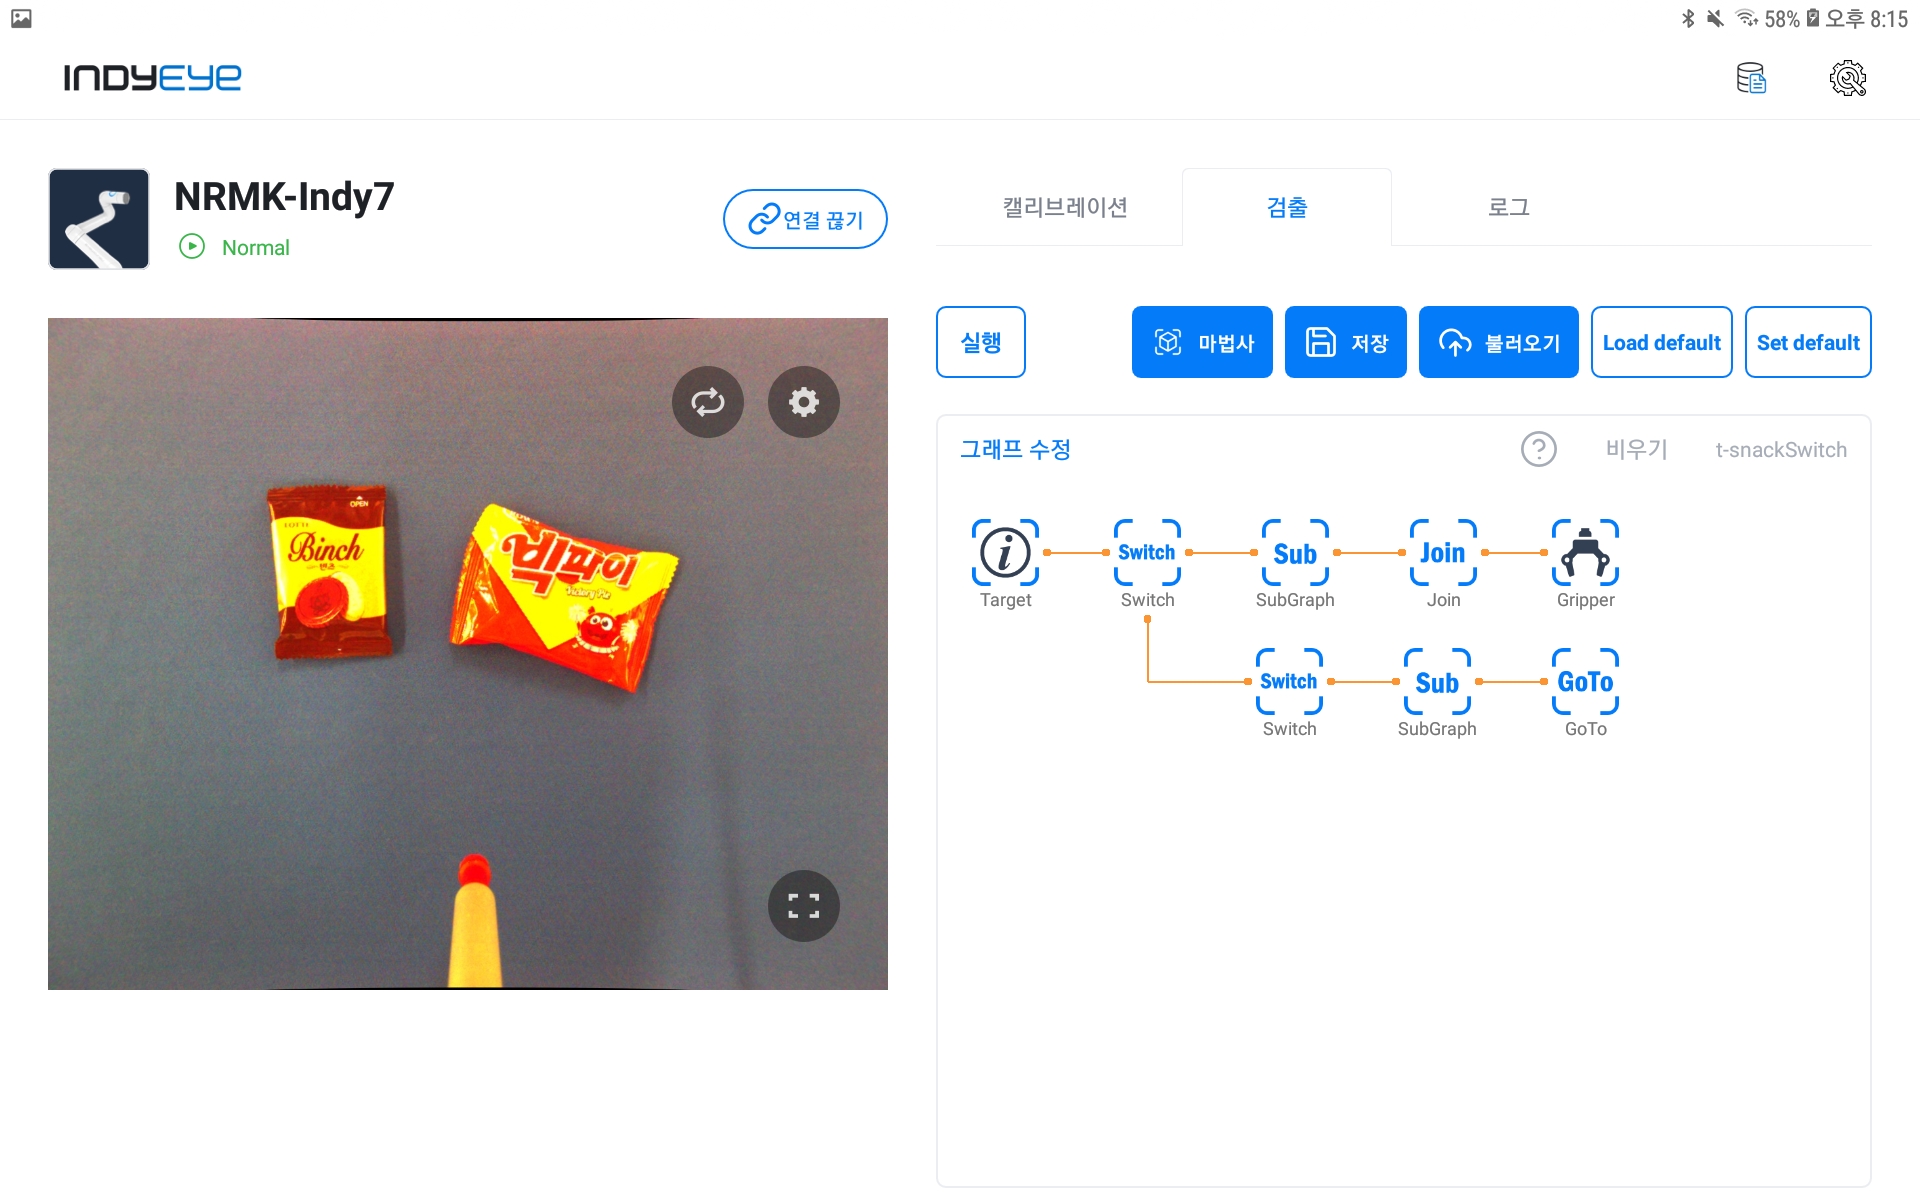
Pick and place graph composition
For reference, if you proceed with the wizard with the gripper instead of the gripper not used in the previously saved graph, you can also pick and place work on a single object. This example describes the pick-and-place process for various specimens, and single-object pick-and-place operations can also be performed with reference to the Conty settings described later.
The first target placed on the graph is a test module that specifies the object to be recognized. After testing, it must be deleted when interlocking with Conty, and it must be changed to recognize the object specified by Conty. First, select the graph saved in the NAME item of the two SubGraphs of the configured graph.
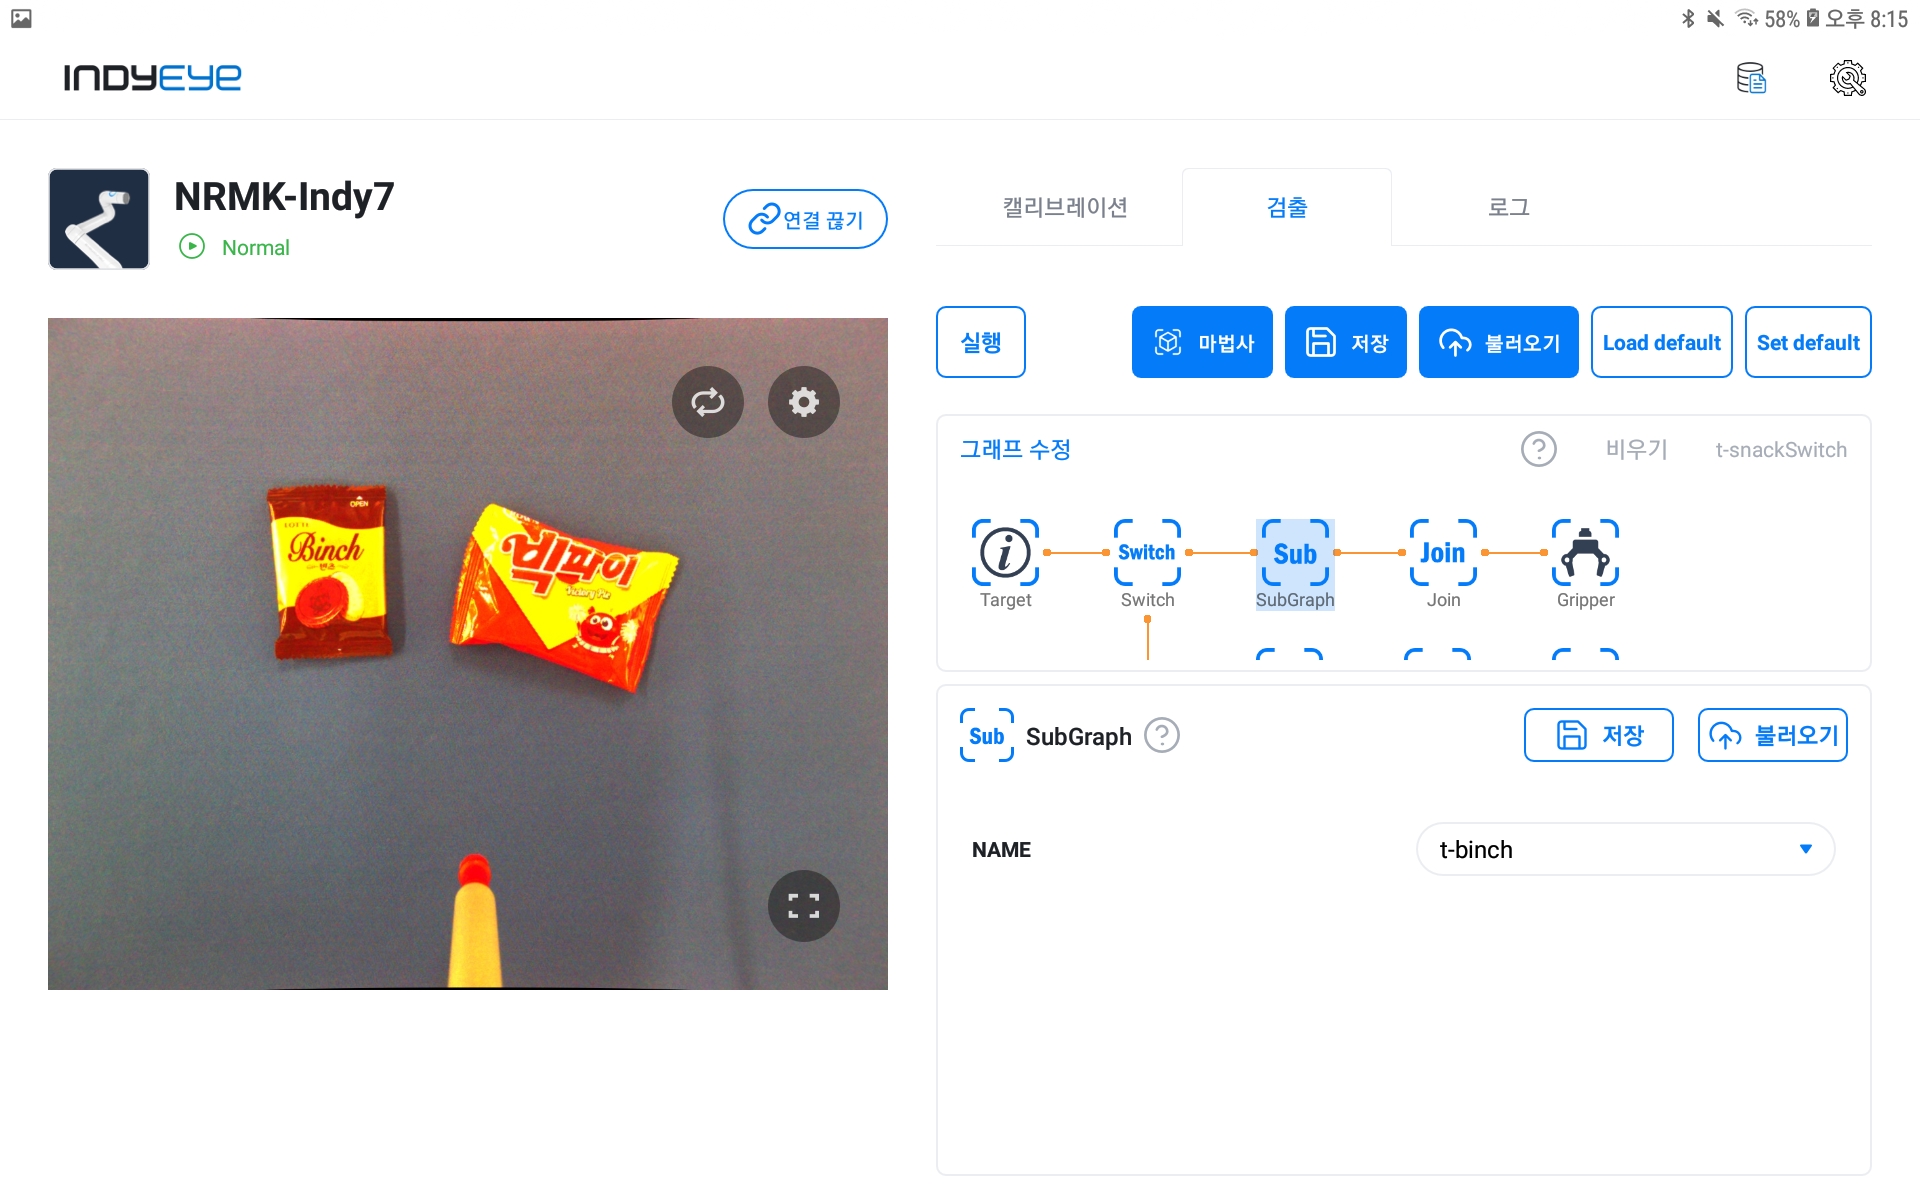
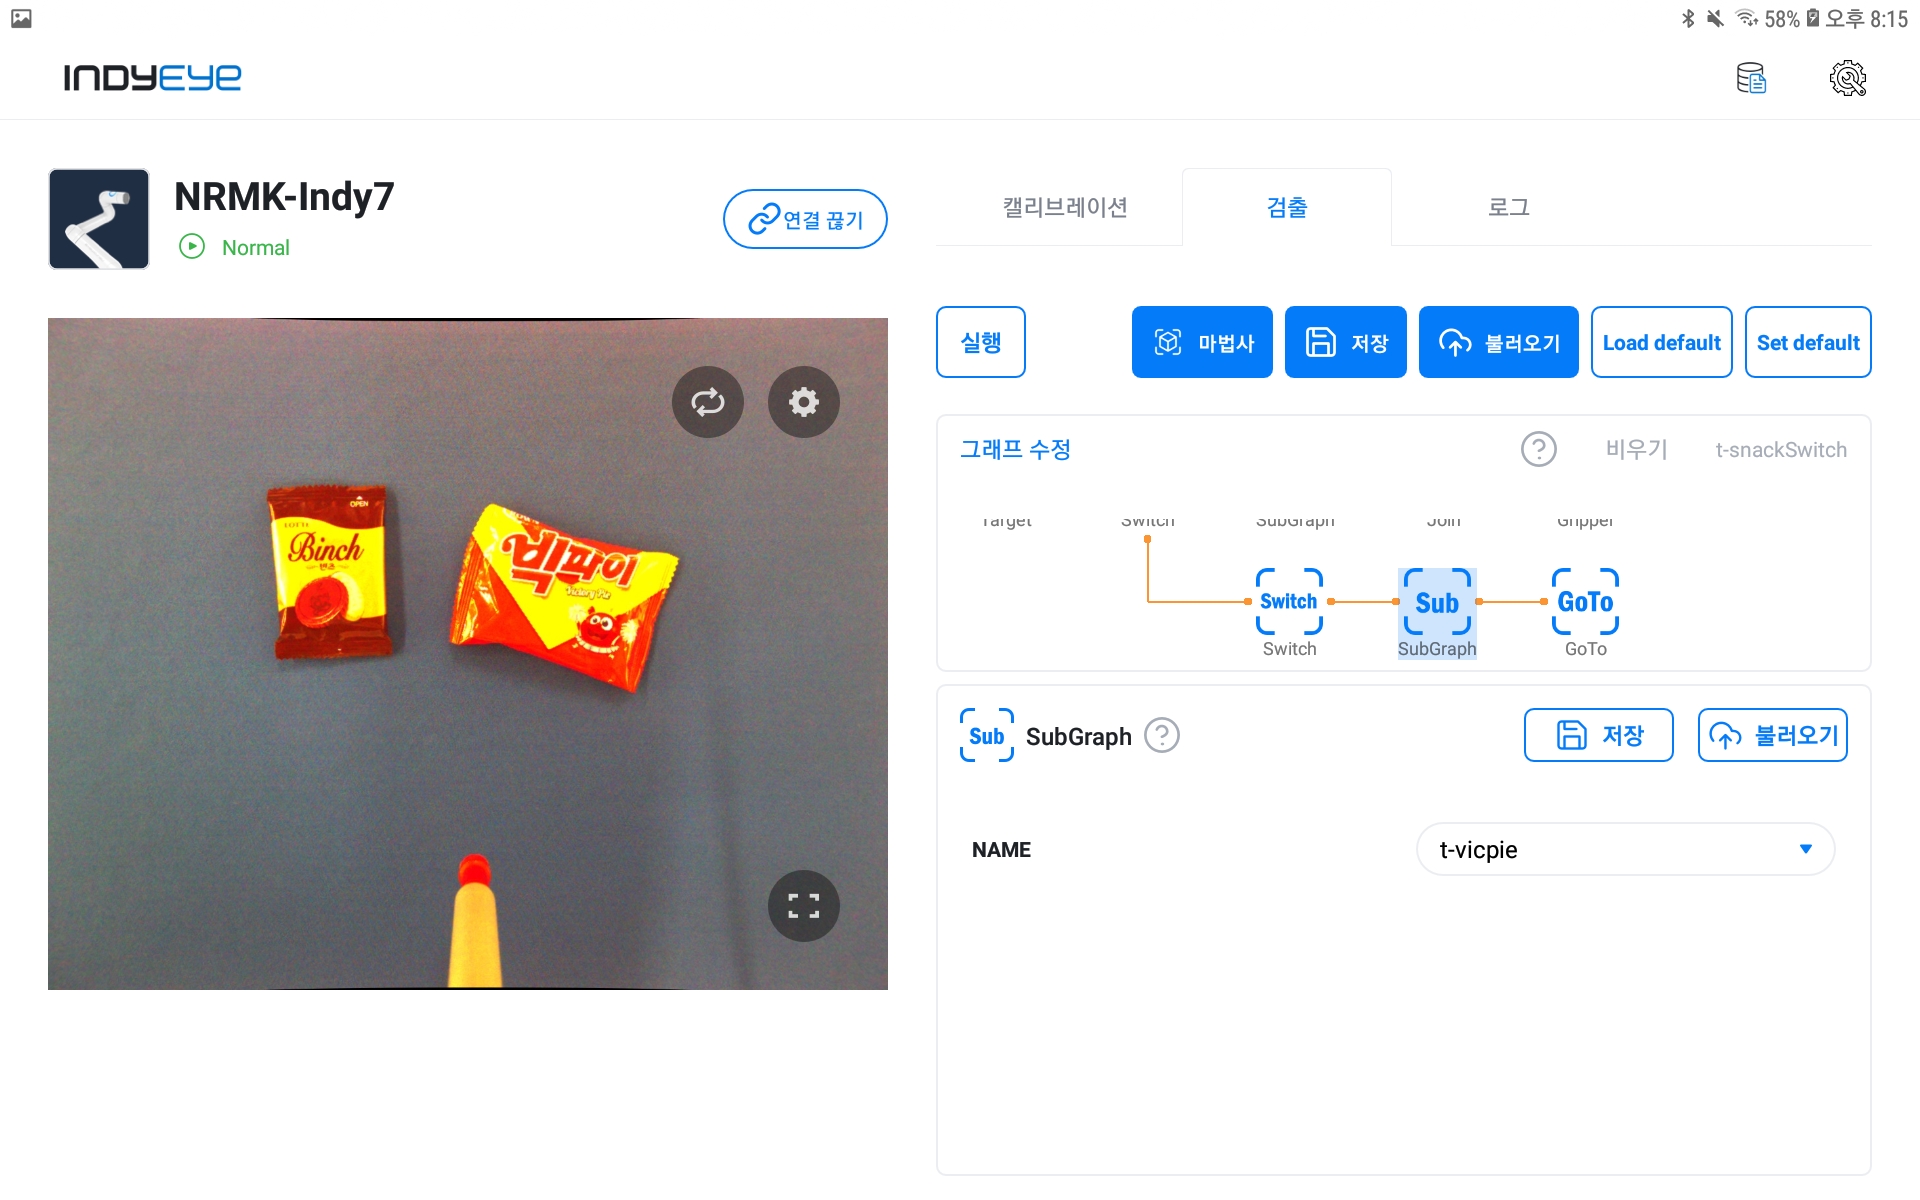
SubGraph module composition
Next, the two Switch modules also select KEY as the target and VALUE as two specimens. That is, when interlocking with Conty, it is composed only of Switch without Target, and when interlocking, it operates as a general switch structure.
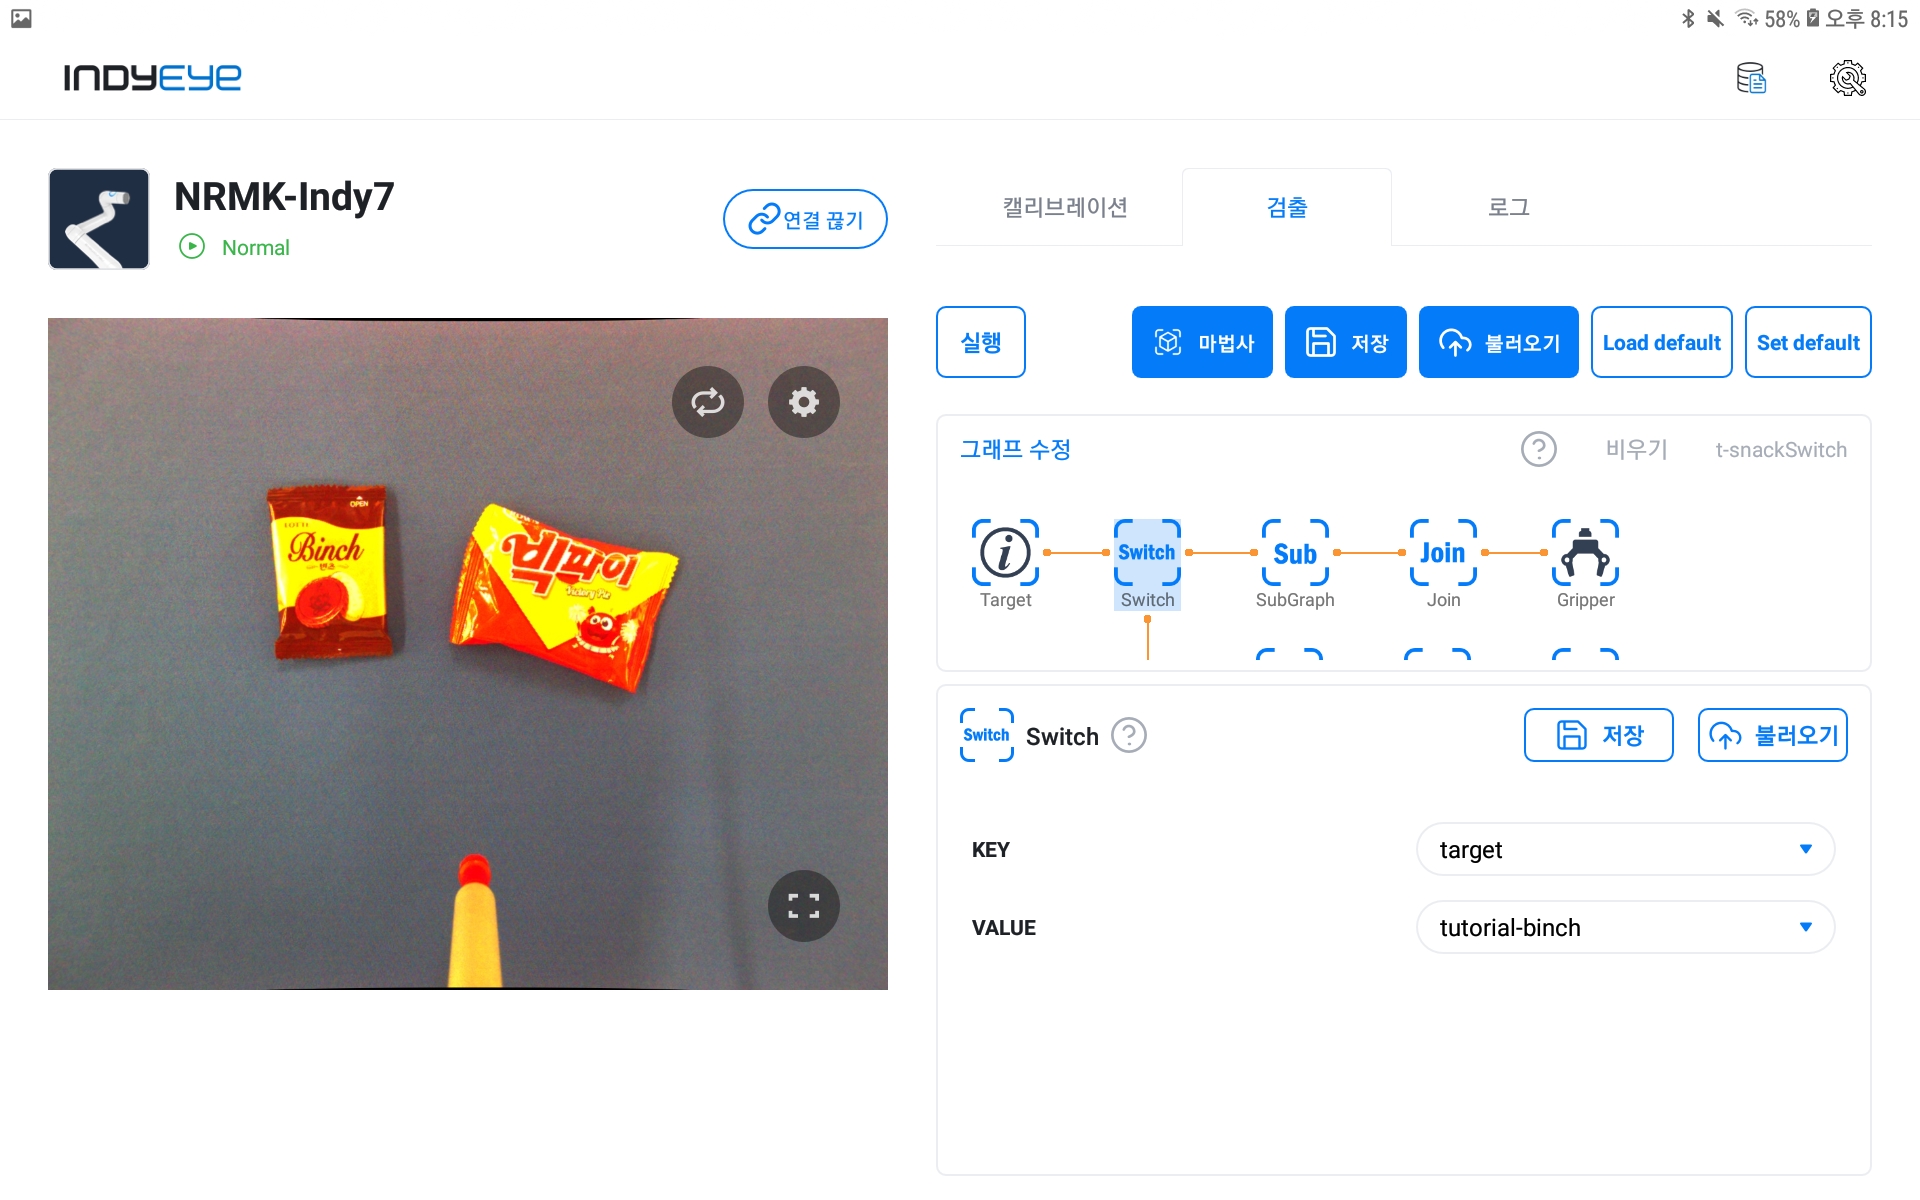
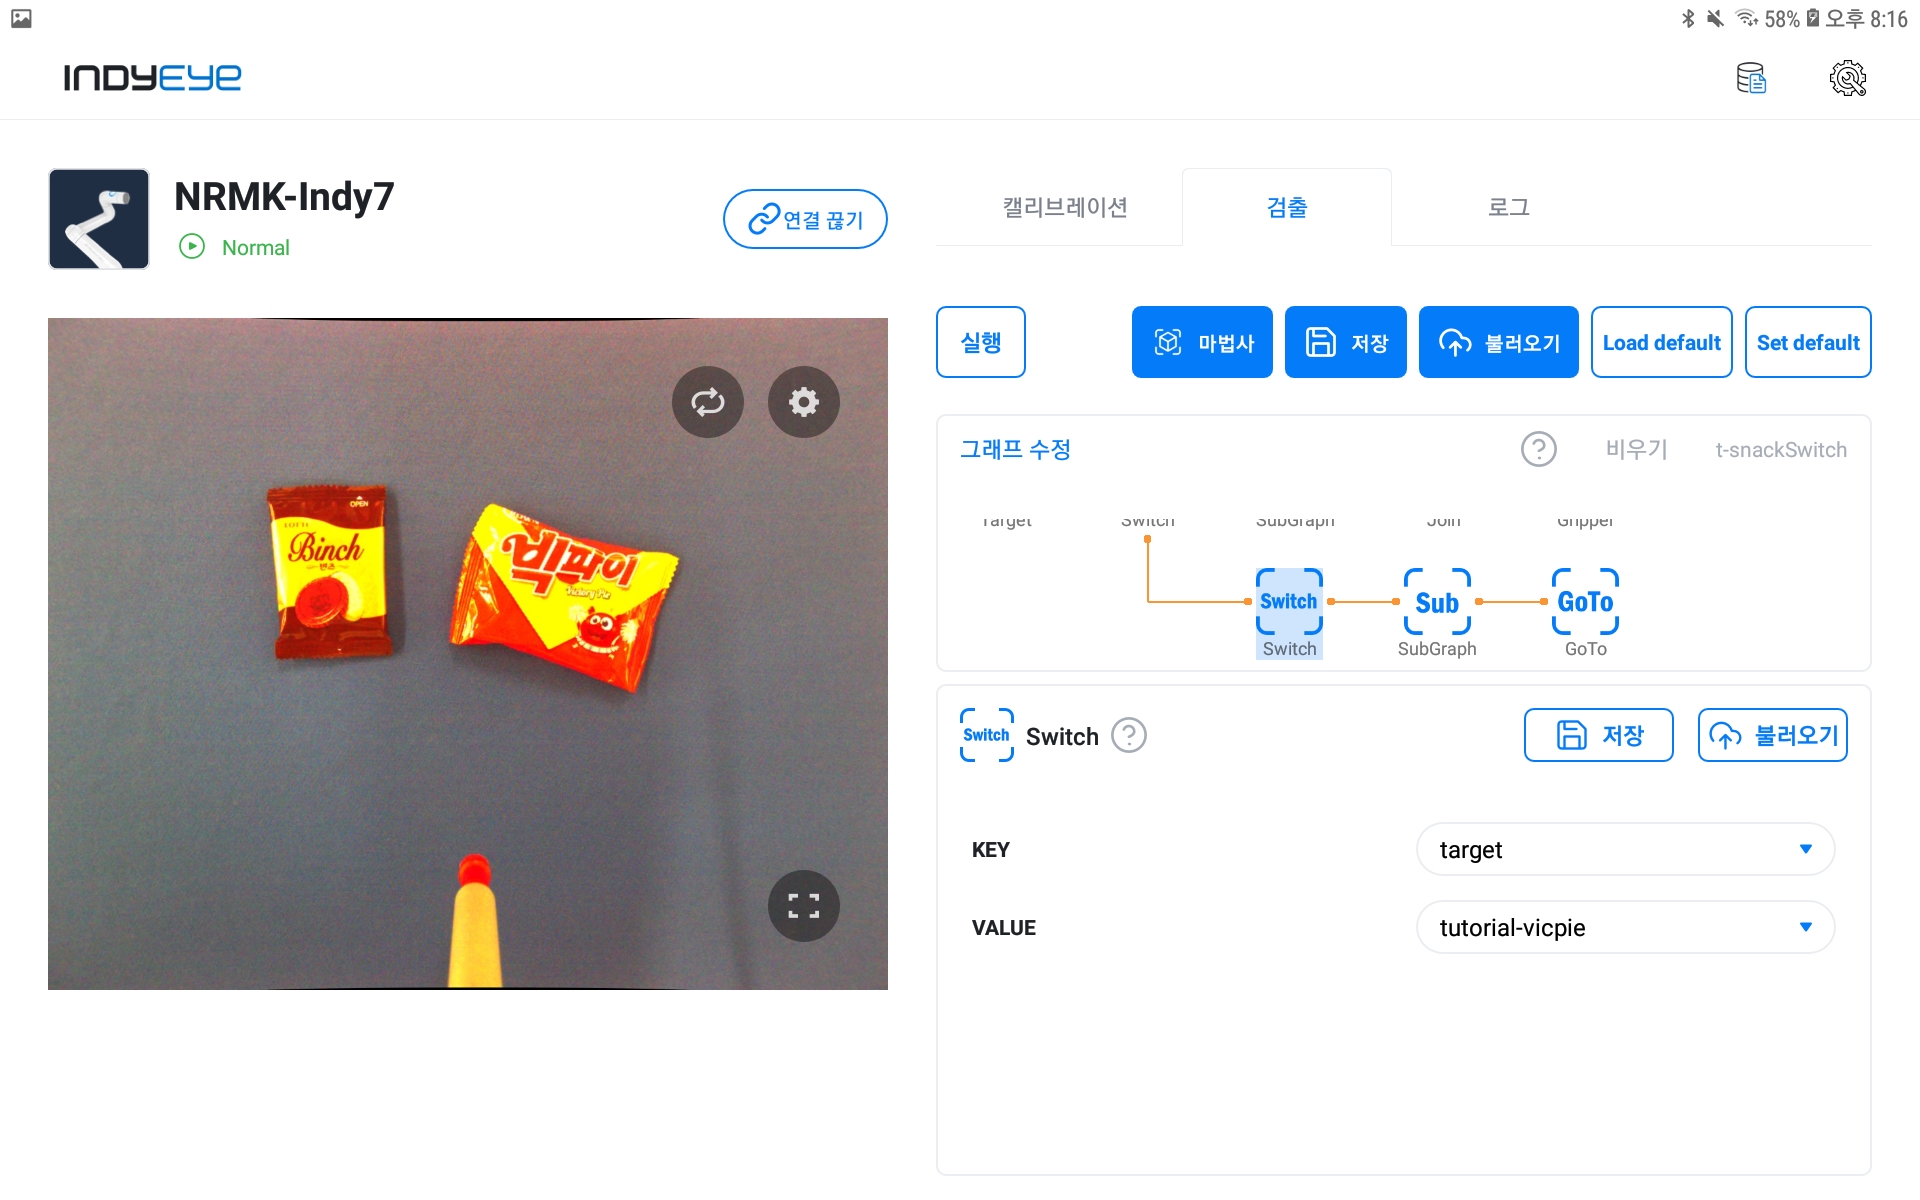
Switch module composition
The GoTo- module in the graph leads to Join, and after recognizing each specimen, all go to the Gripper module to perform the pick operation.
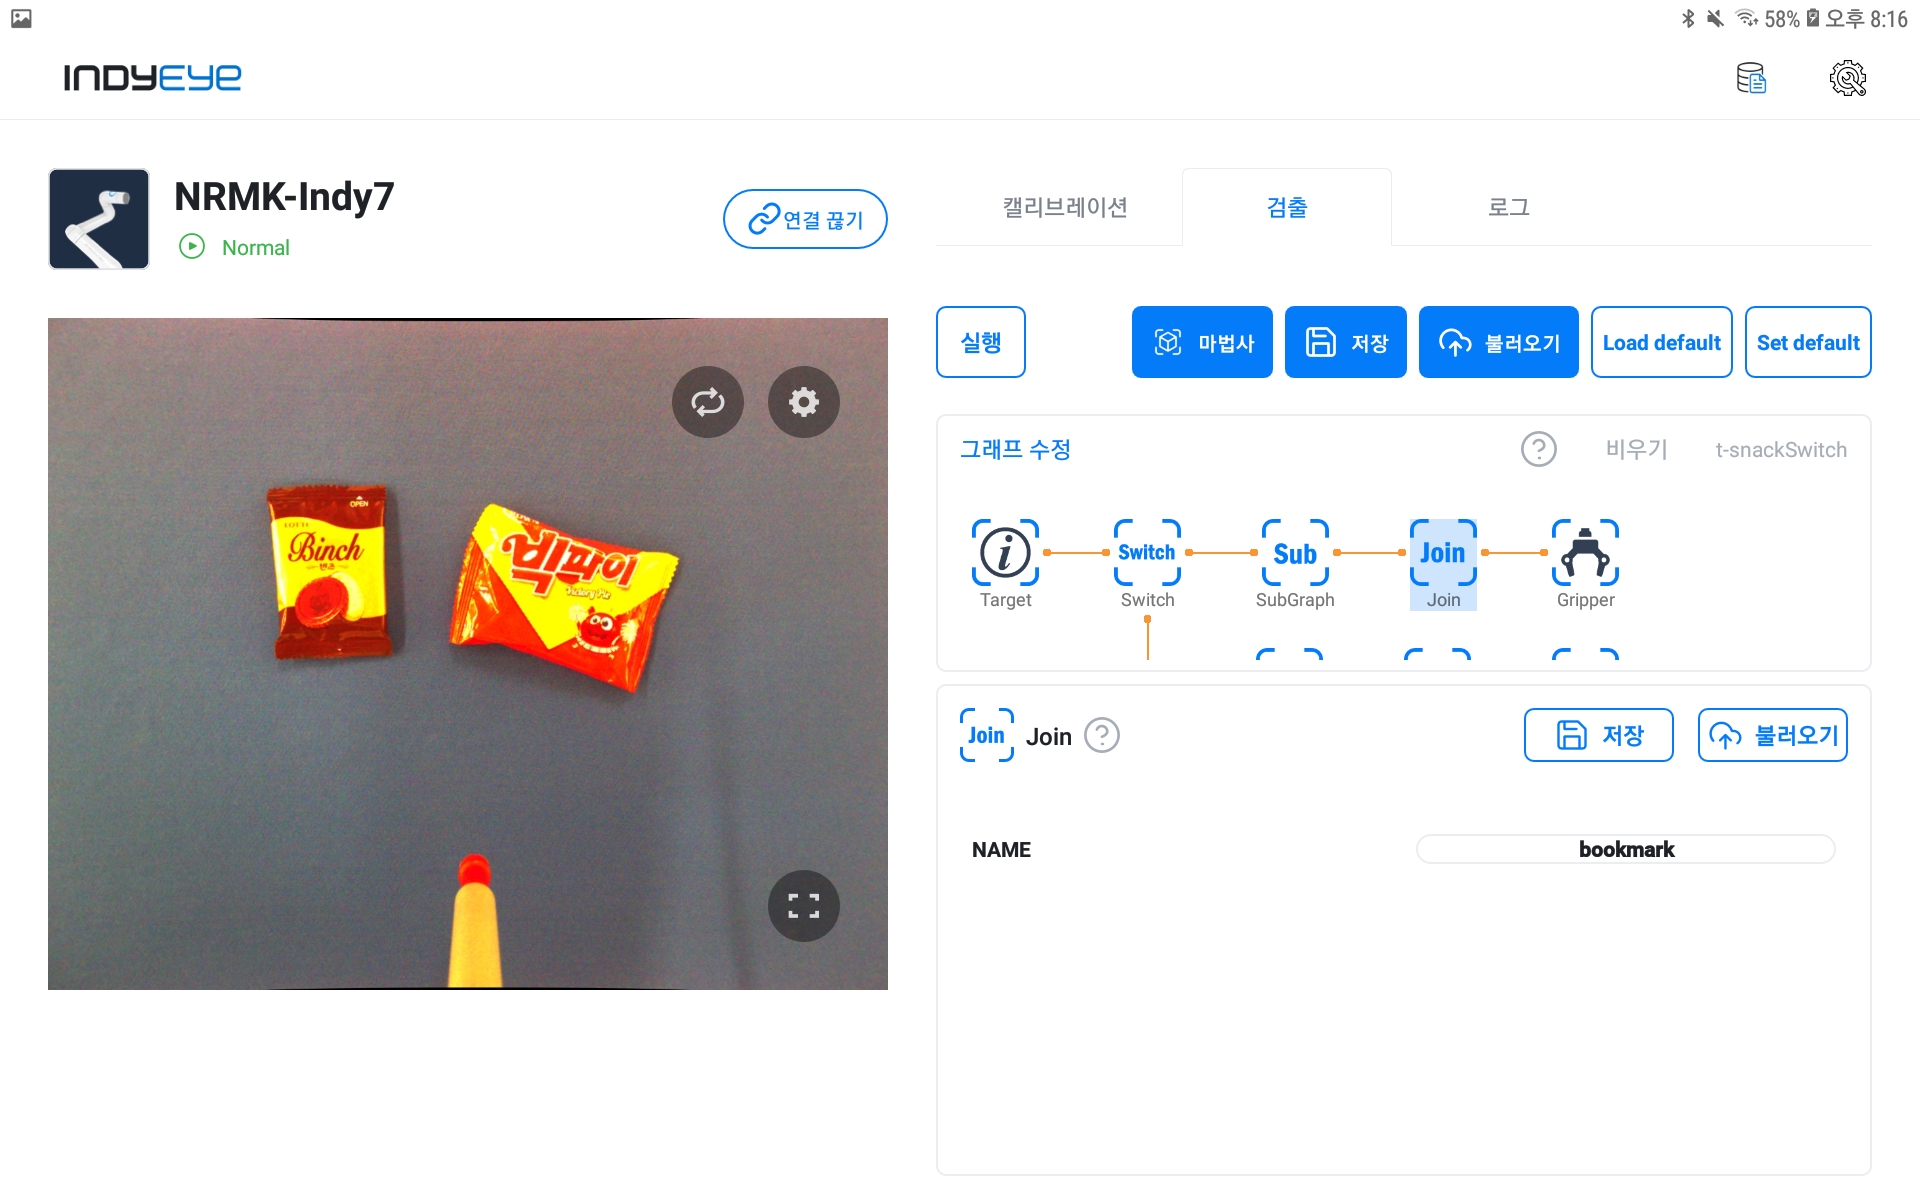
Join module composition
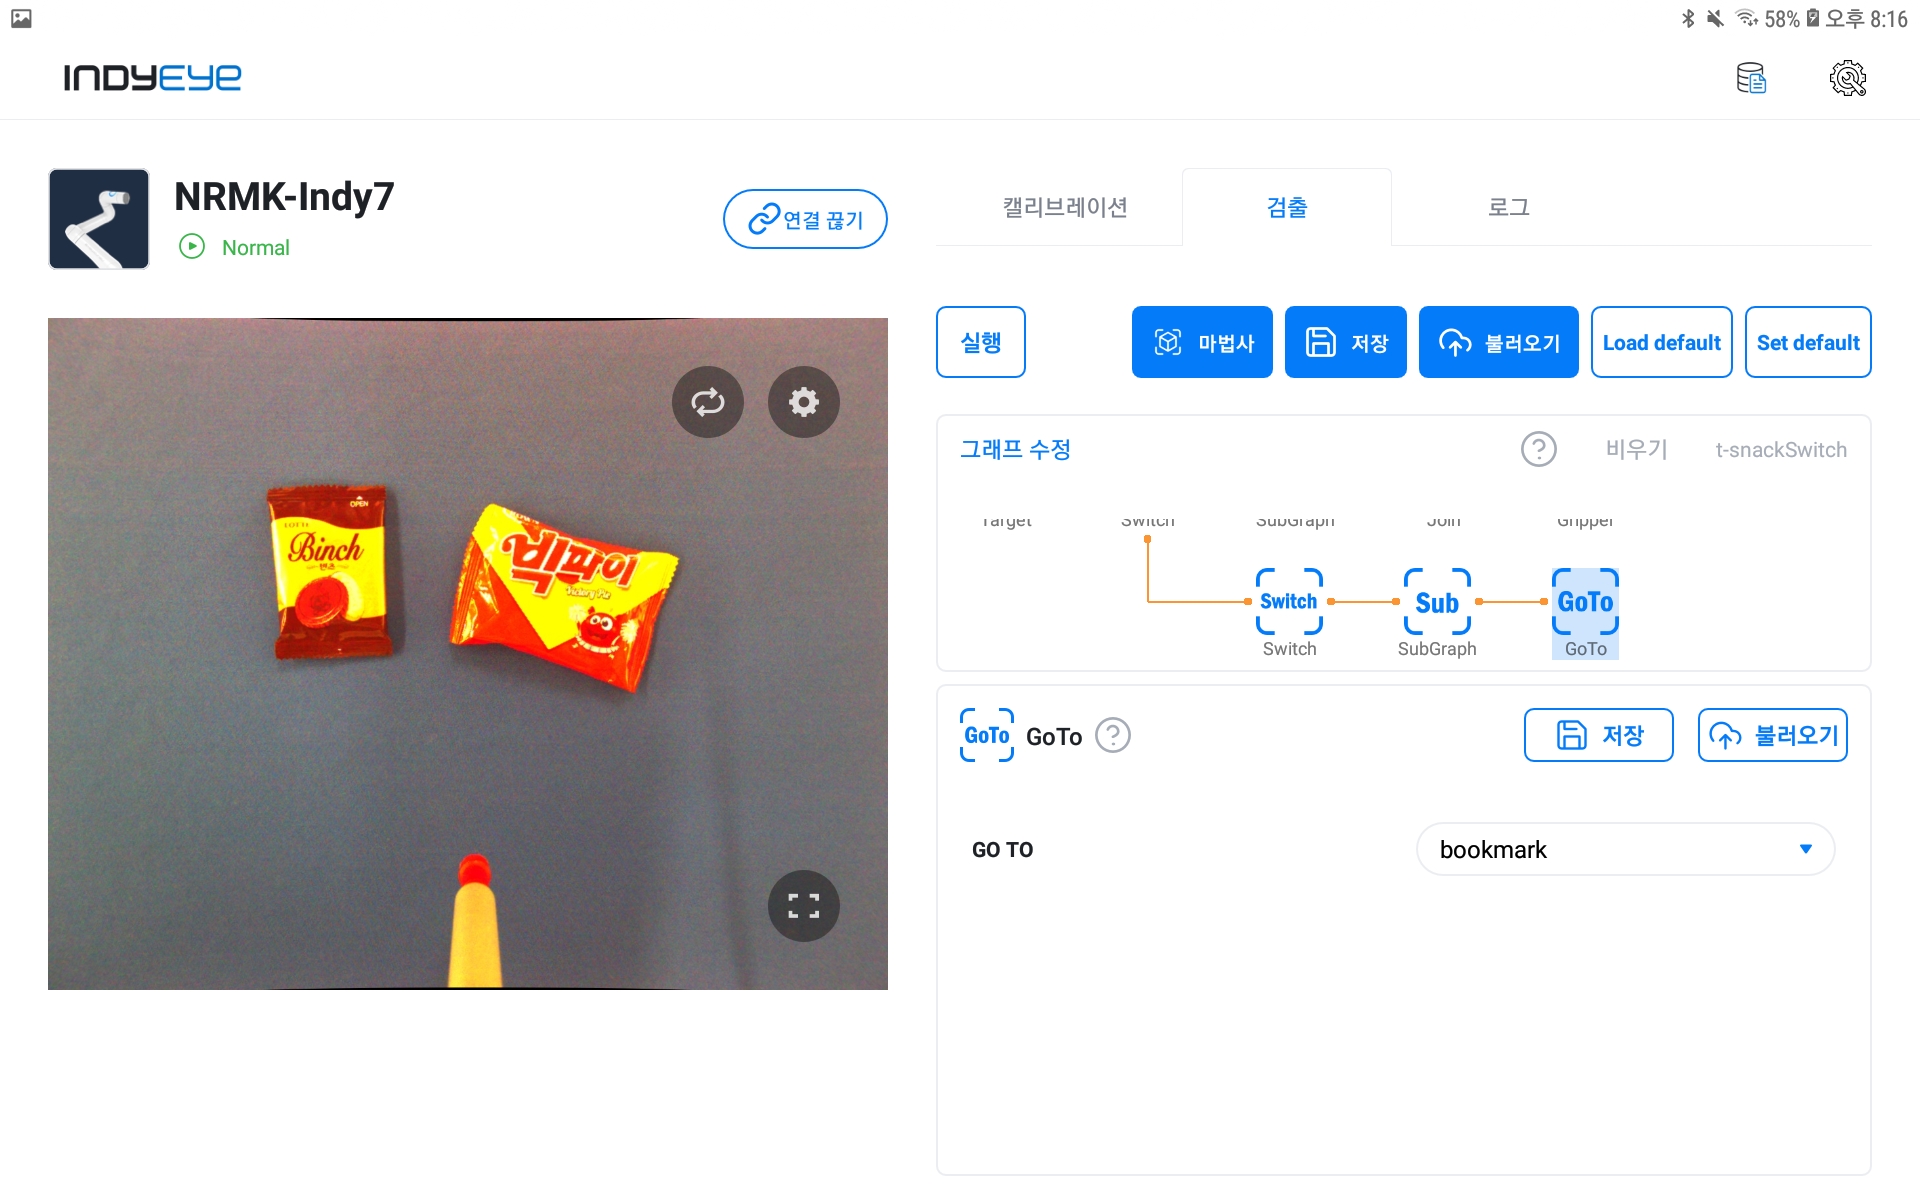
GoTo module composition
After the above settings, set the Gripper module. In this example, the object is gripped using a vacuum gripper. The robot can be equipped with various tools with IndyEye, and once installed, the tool position and gripping position must be set through the Gripper module. For how to do this, refer to the Gripper module setting in the graph module list and set the tool position and gripping position.
After completing the Gripper module setup, a list of specimens appears in the GRIP item as shown in the figure below, and you can check the recognition result by selecting the desired specimen from the first Target module.
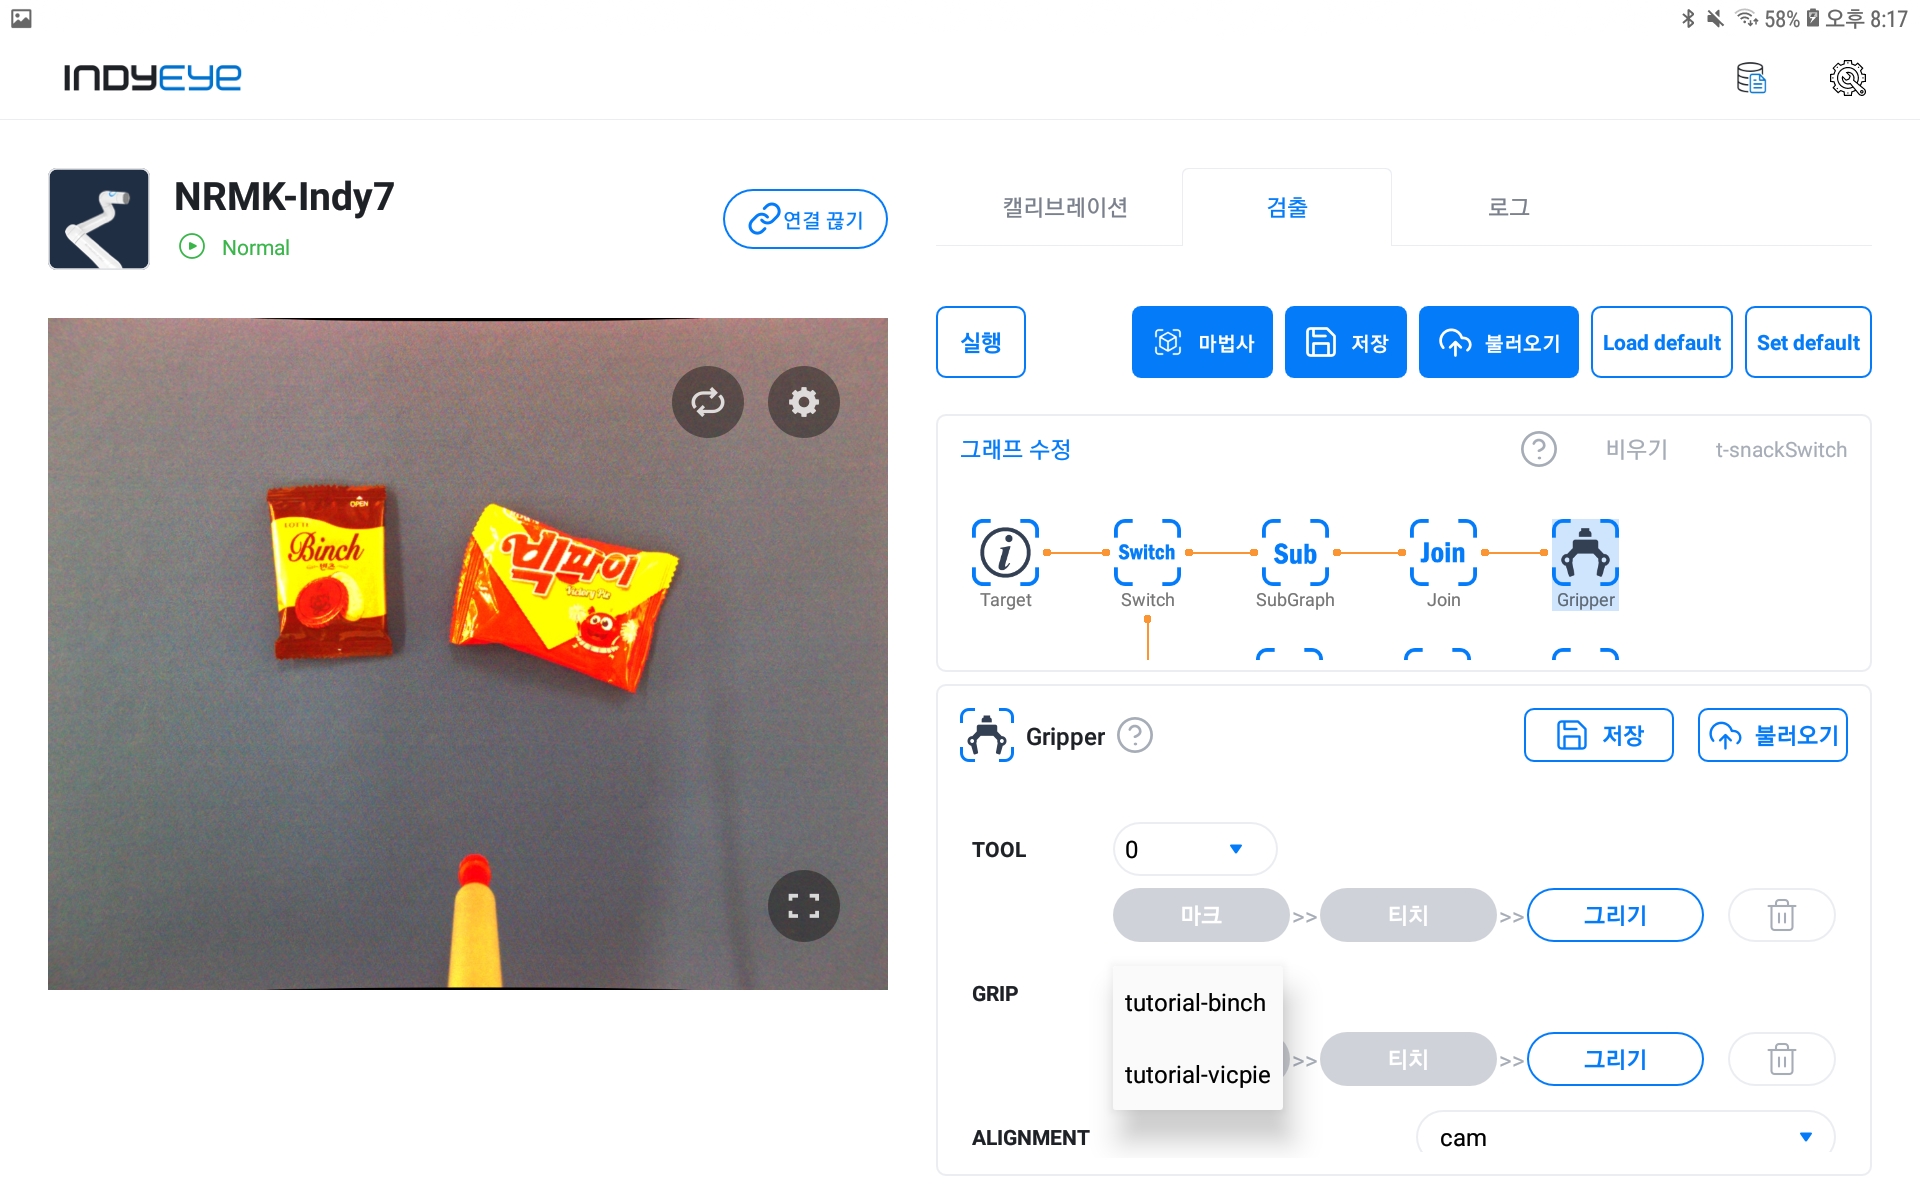
Gripper module composition
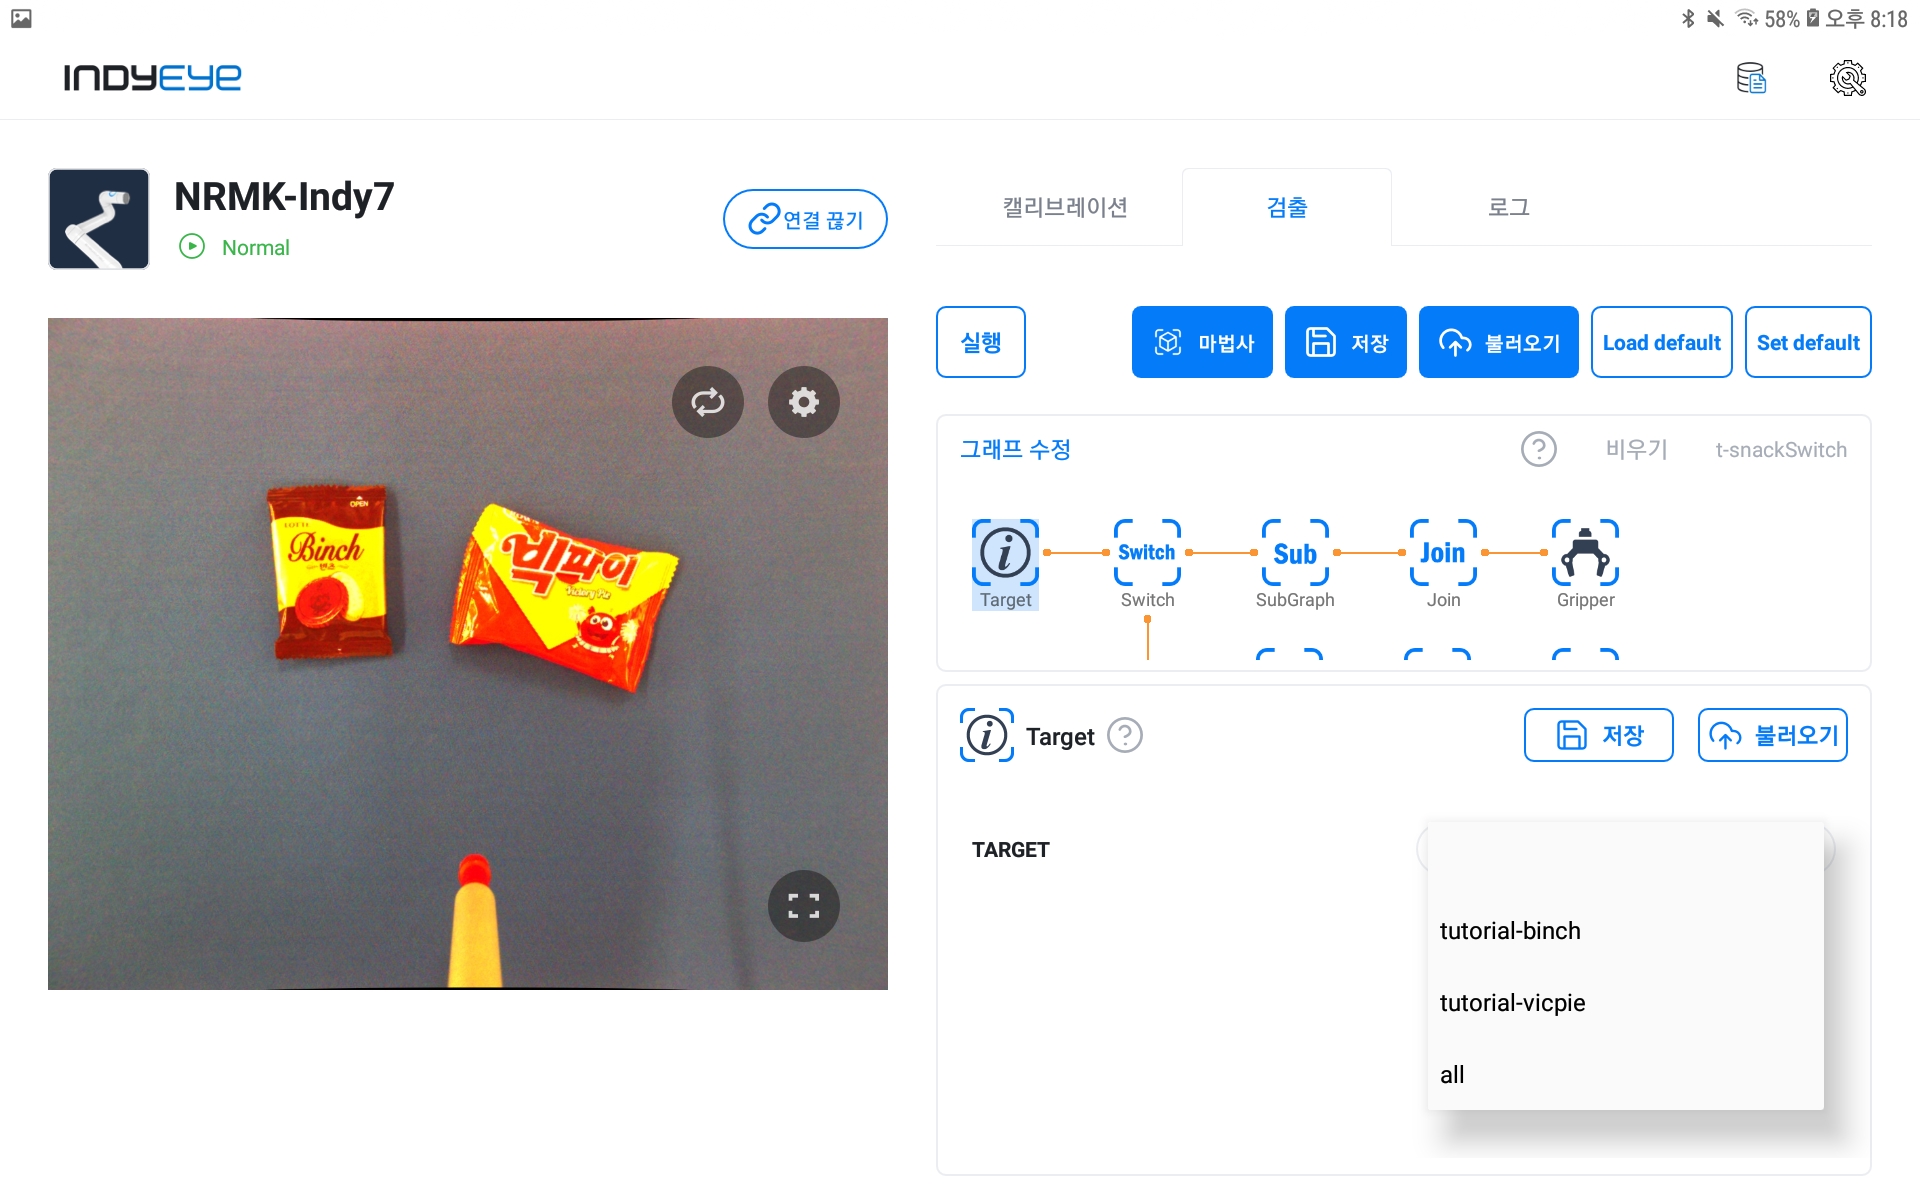
Target module composition
If the recognition result appears normally, you can check the screen below.
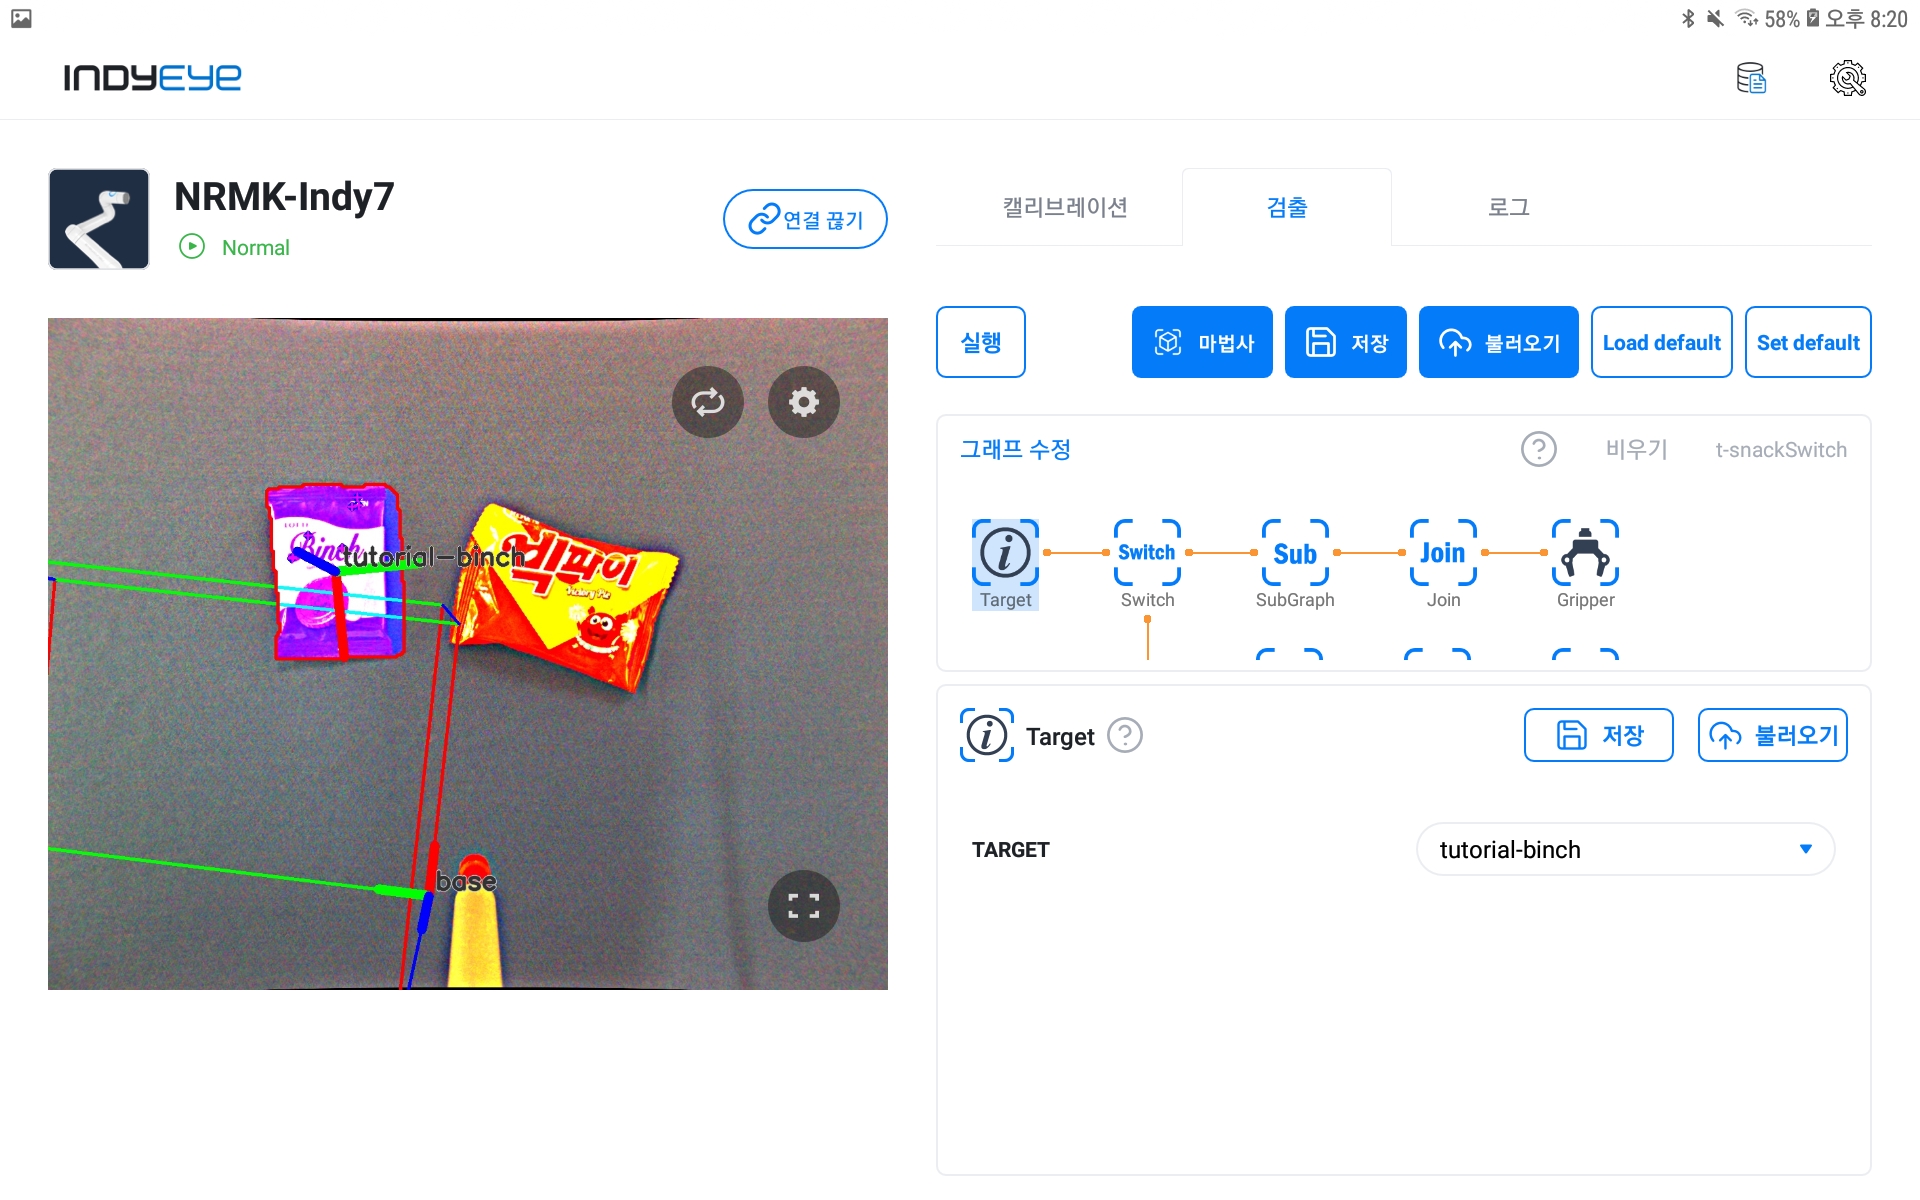
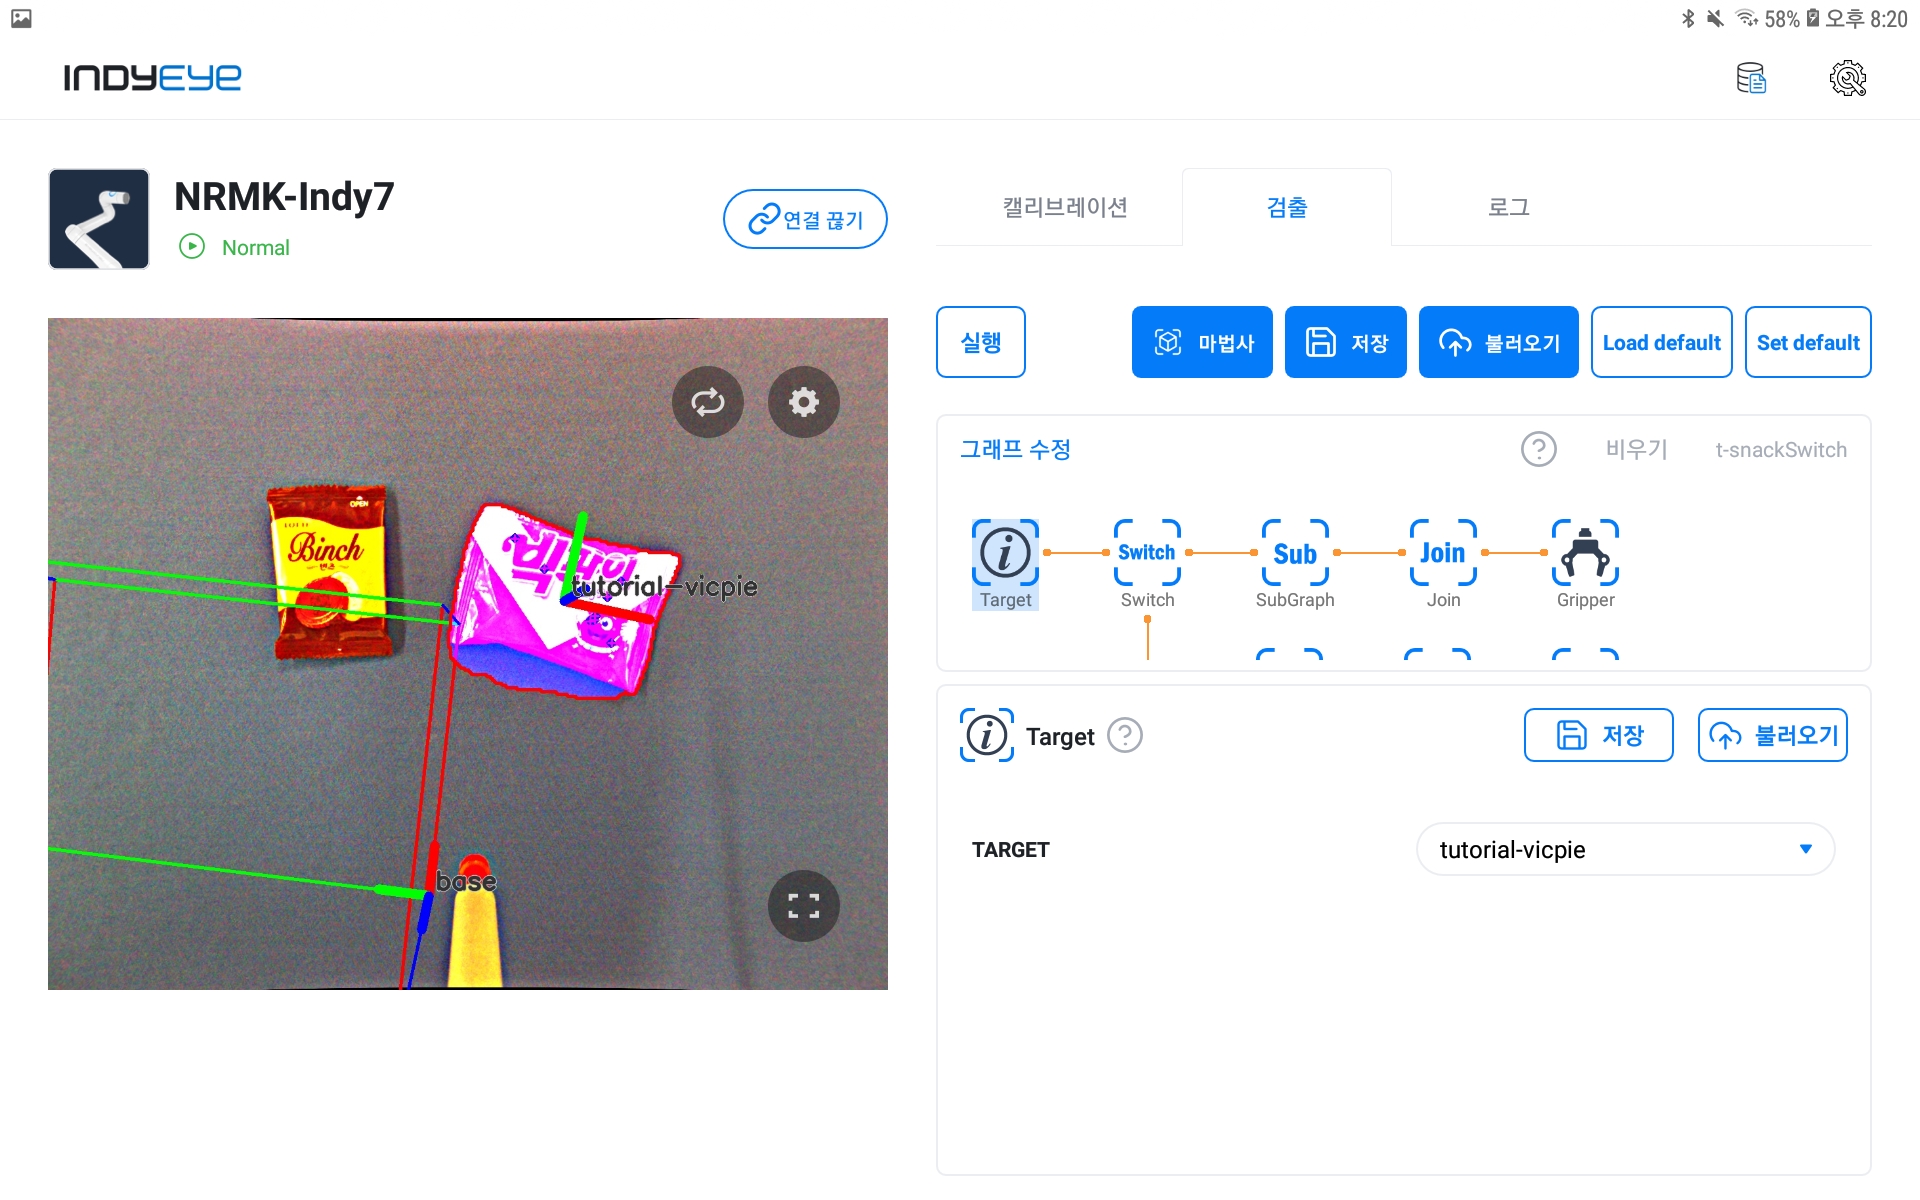
Target module composition
Now, modify the graph as shown below for Conty integration.
Final IndyEye graph
Conty link setting
Prior to detailed description, when all Conty settings are completed, the program tree is completed as shown below. You can configure Conty's program tree by selecting Programs-New from the top menu.
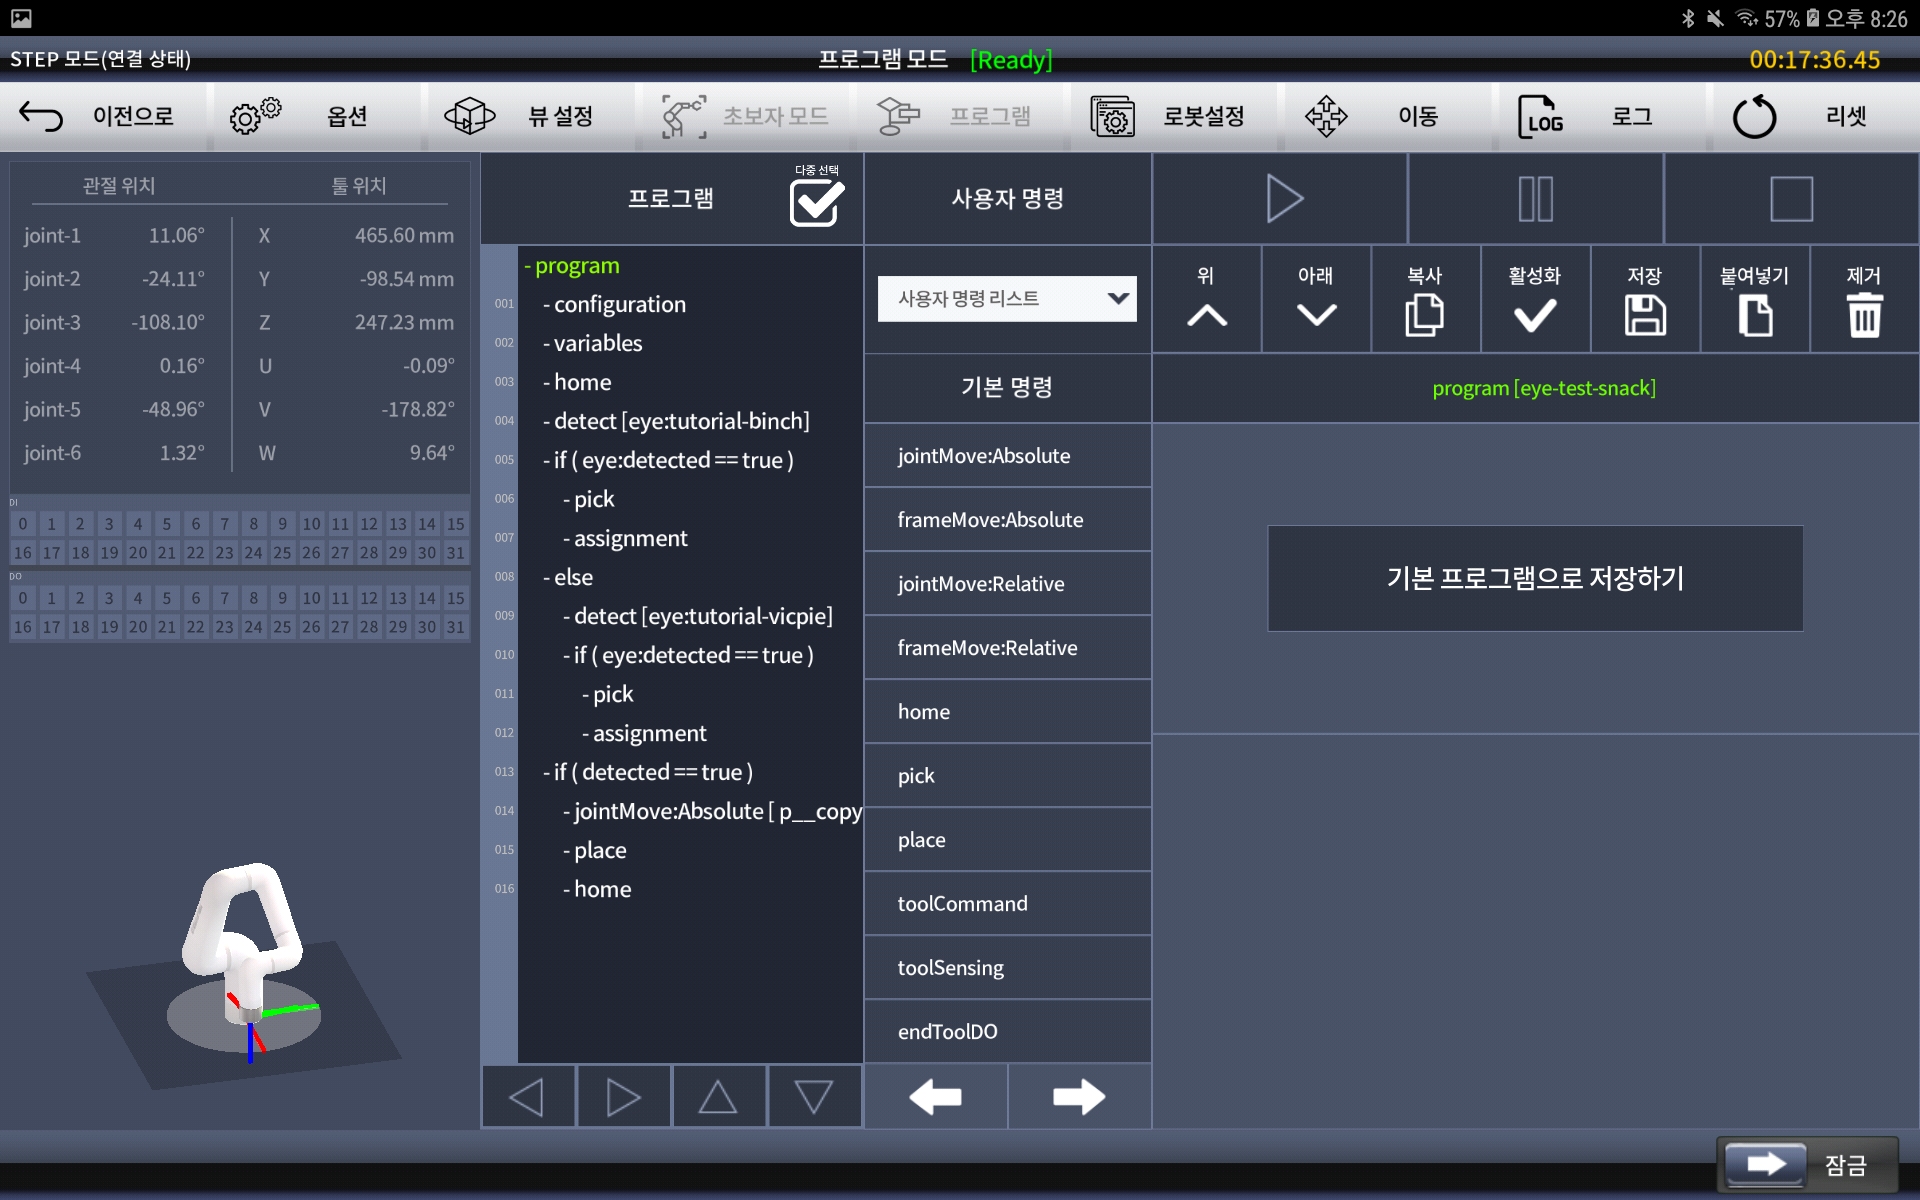
Final Conty Program
When entering the program tree, first, set the vision in the configuration as shown below for interworking with IndyEye. Select Edit Vision Settings, enter the desired name, and enter the IndyEye IP and Port(2002). Then Select IndyEye and add it.
- If you have a separate IndyEye PC, enter the IP address of the separate PC. This IP is the same one that you enter on the first screen of the IndyEye APP.
- If you are using IndyEye-LITE, enter the IP address of the IndyCB. This IP is the same one that you enter on the first screen of the IndyEye APP.
- If you have an IndyEye CB produced in 2023 or earlier, check if your IndyCB have a camera port. In this case, your IndyEye processor and IndyCP have separate IP addresses internally. Enter 192.168.137.100.
- If there is no camera port on IndyCB, you have IndyEye-LITE. (IndyEye-LITE: IndyCB-integrated version without separate address).
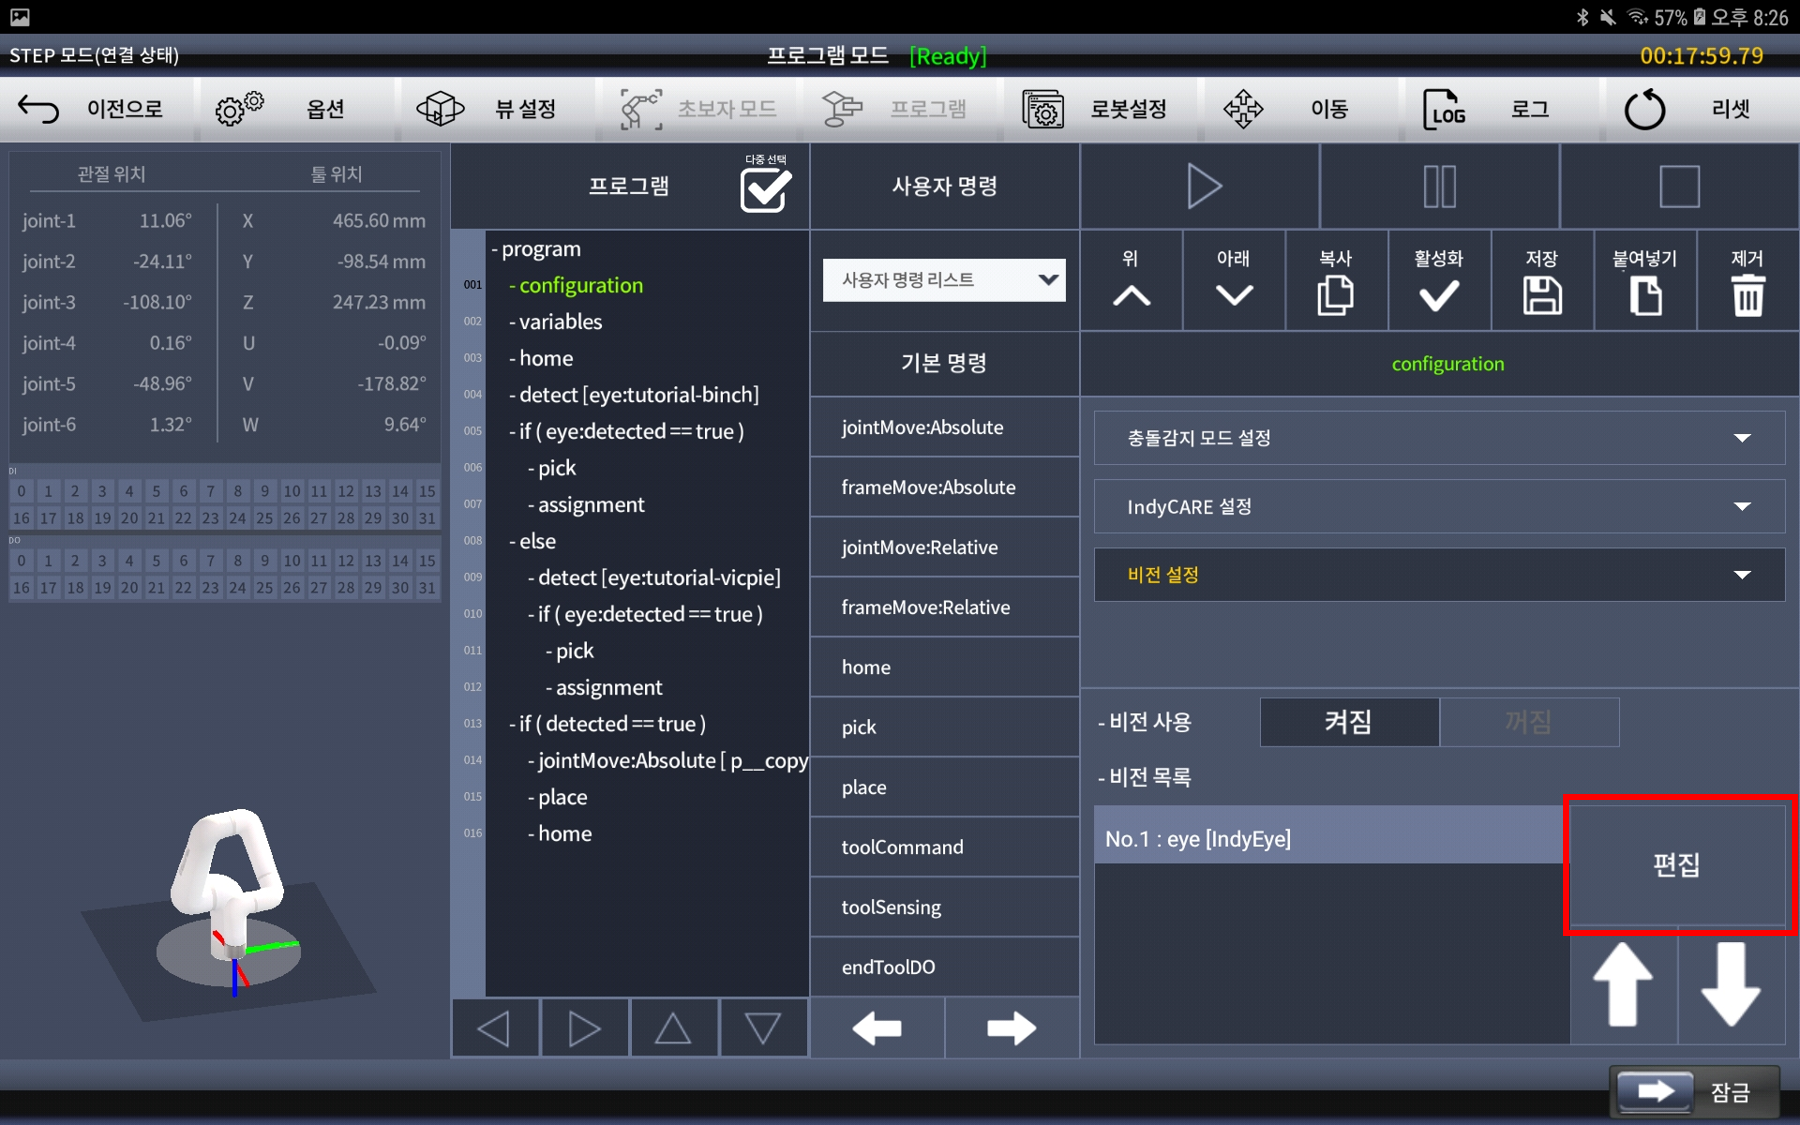
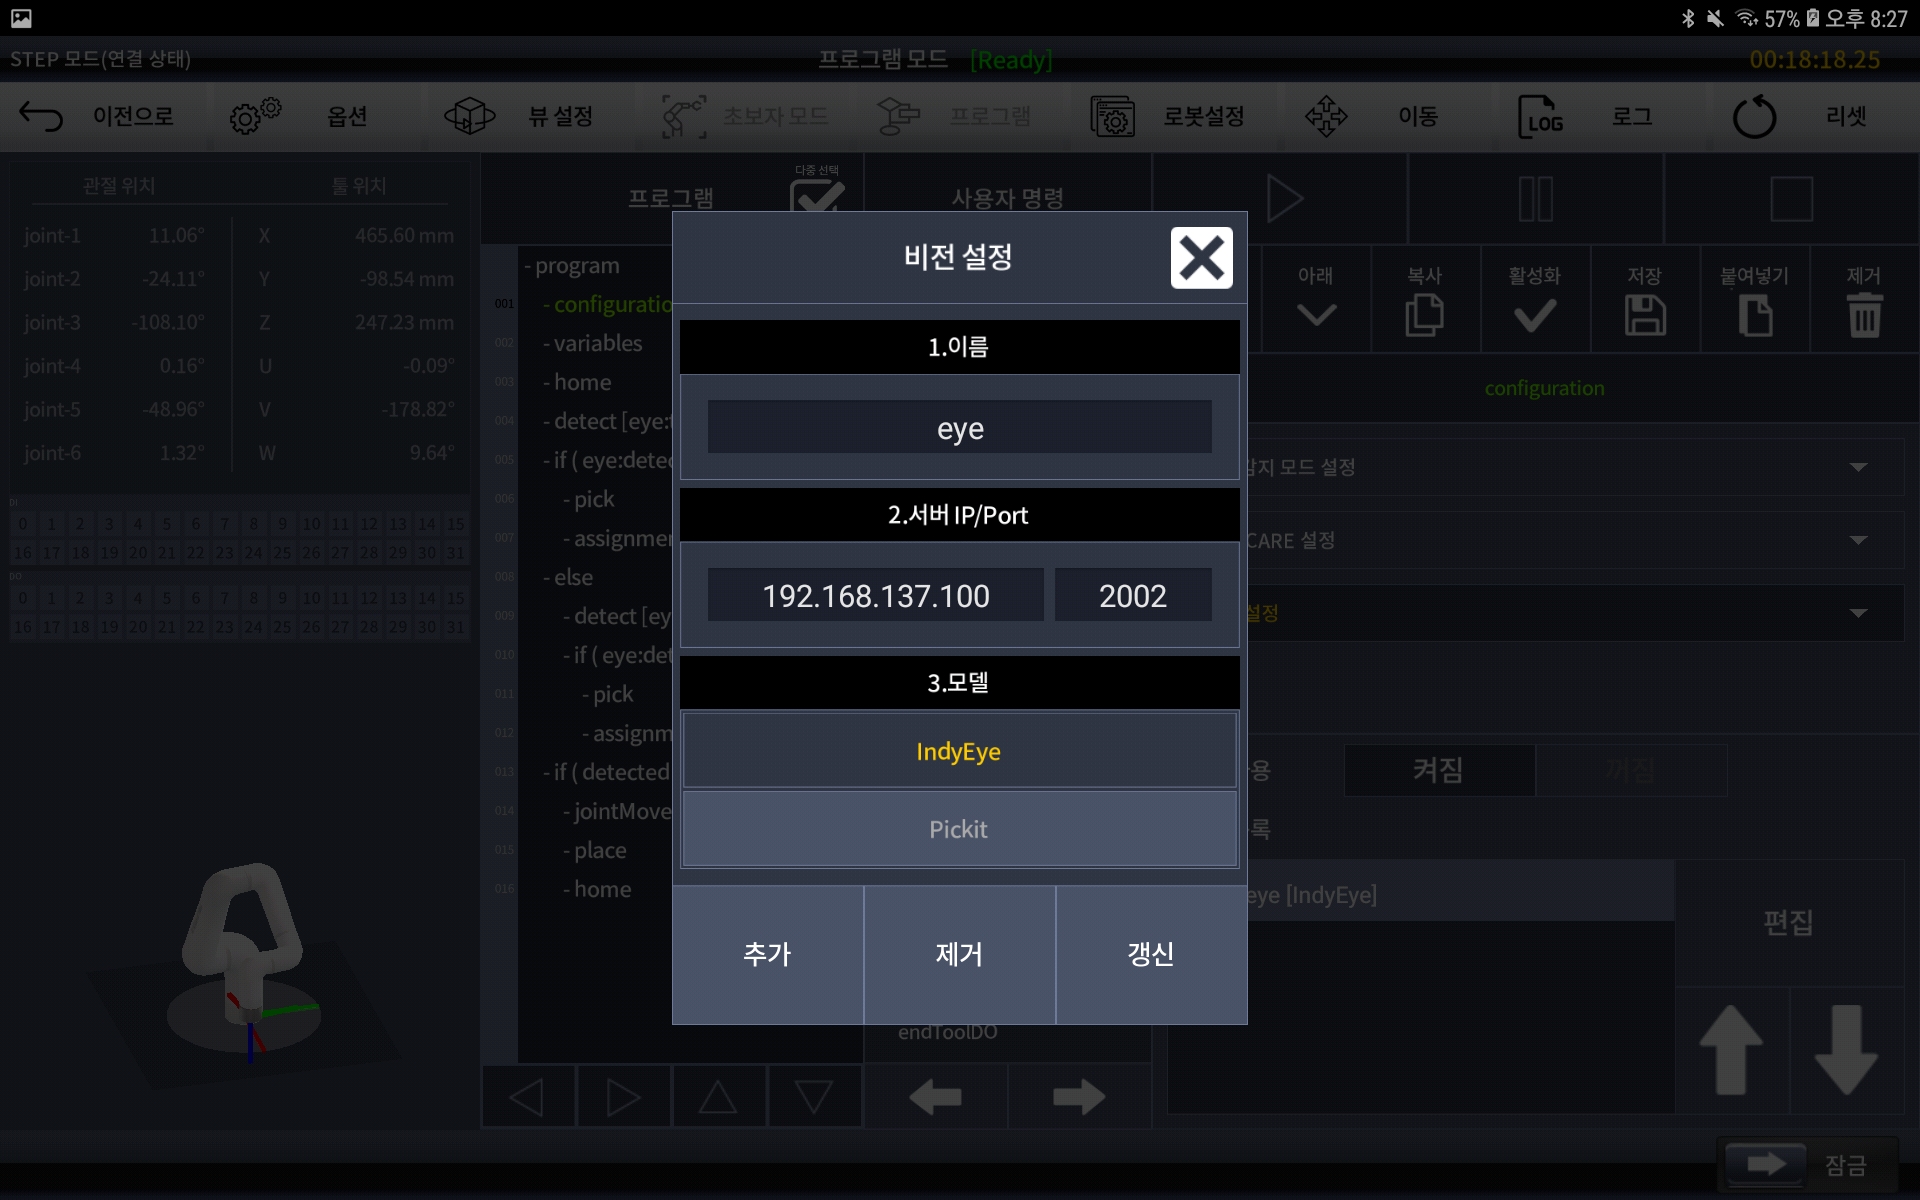
Vision Settings
Next, in variables, set the detected variable as shown below. This is to specify the flag to start the place operation after performing the pick motion normally. Set the initial value to false.
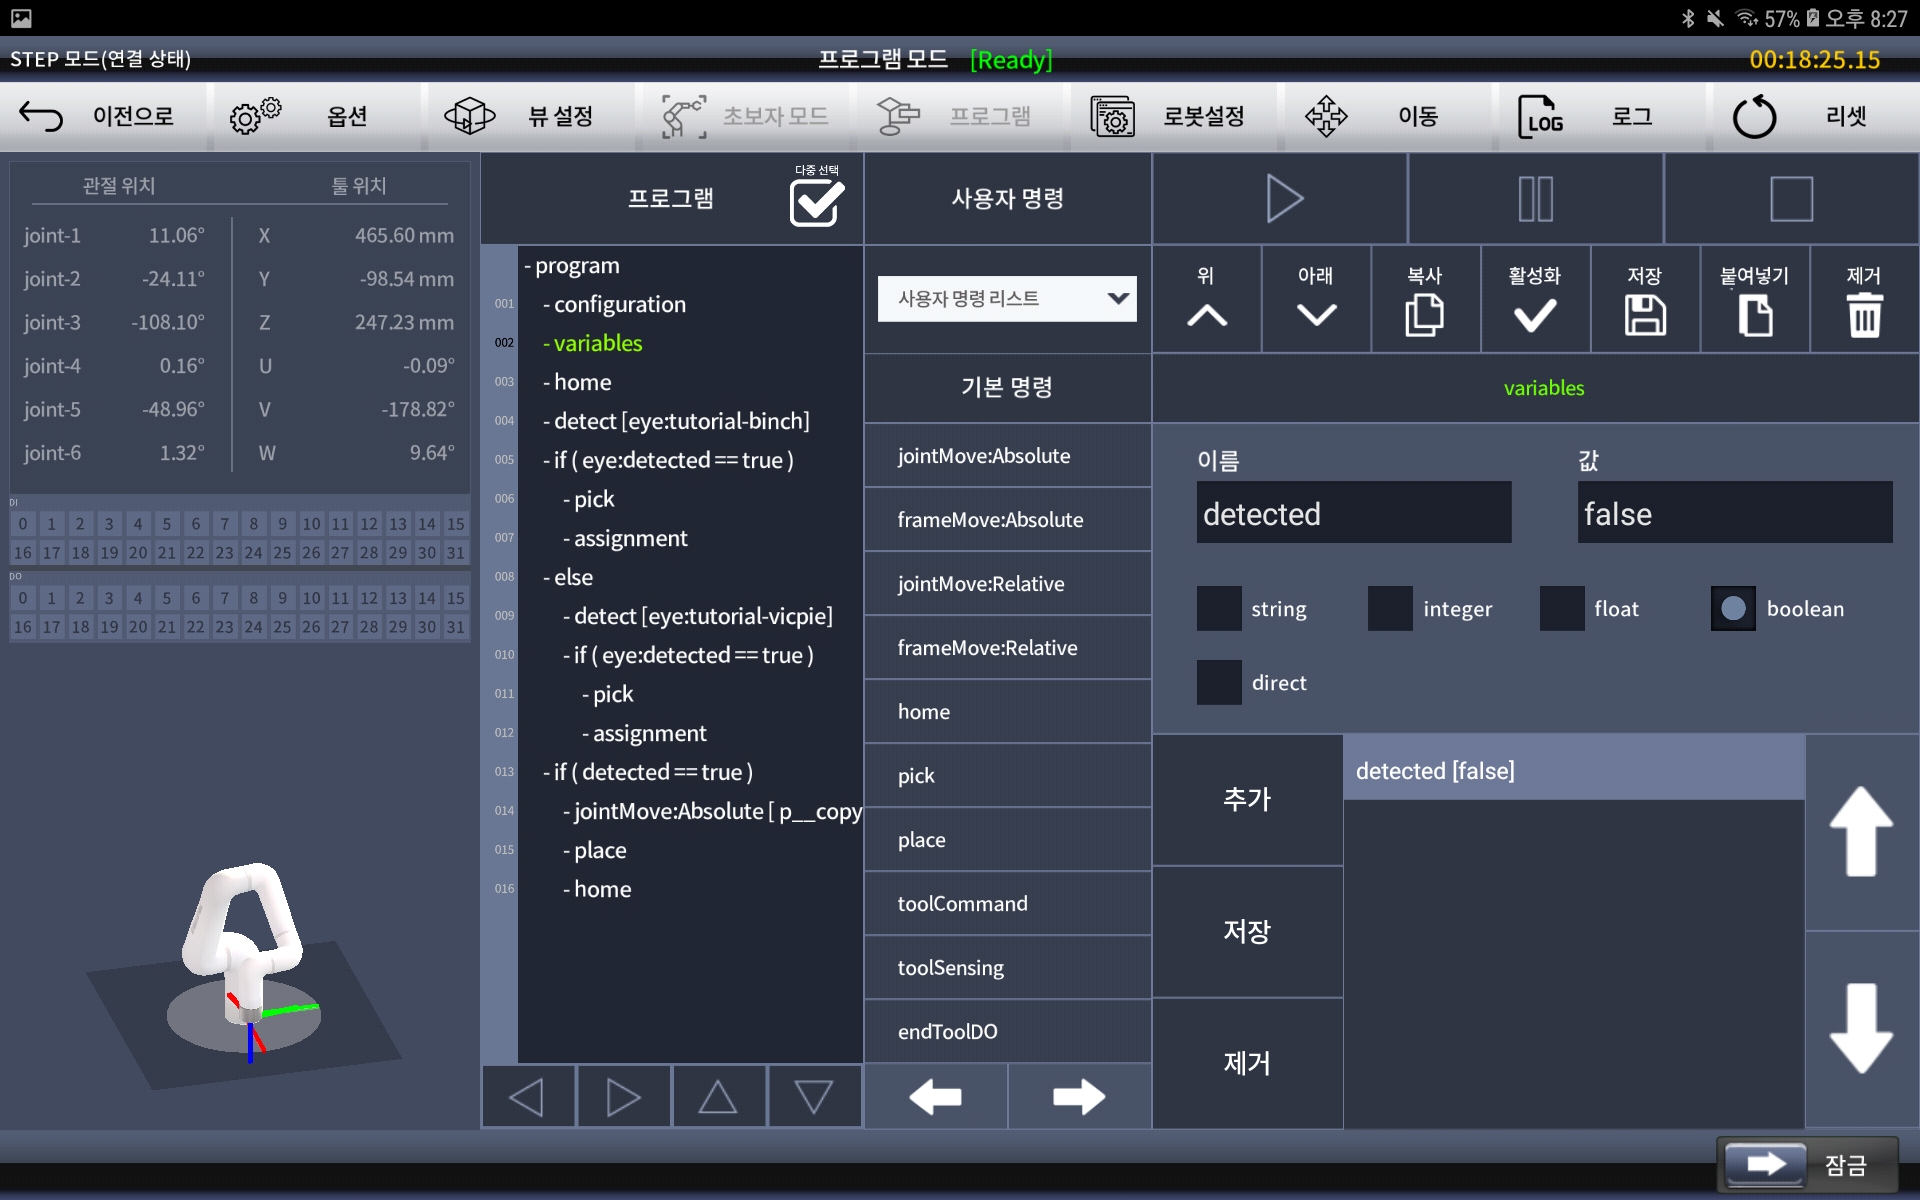
Variable settings
After completing the initial settings above, the next step is to add motion commands and linkage with IndyEye for pick and place. In this example, home is added as the first motion to try to recognize from the default home position. You can substitute jointMove or taskMove depending on the position to recognize.
First, in order to try to recognize one of the two specimens, set the detect command as shown below. Also, select the target object.
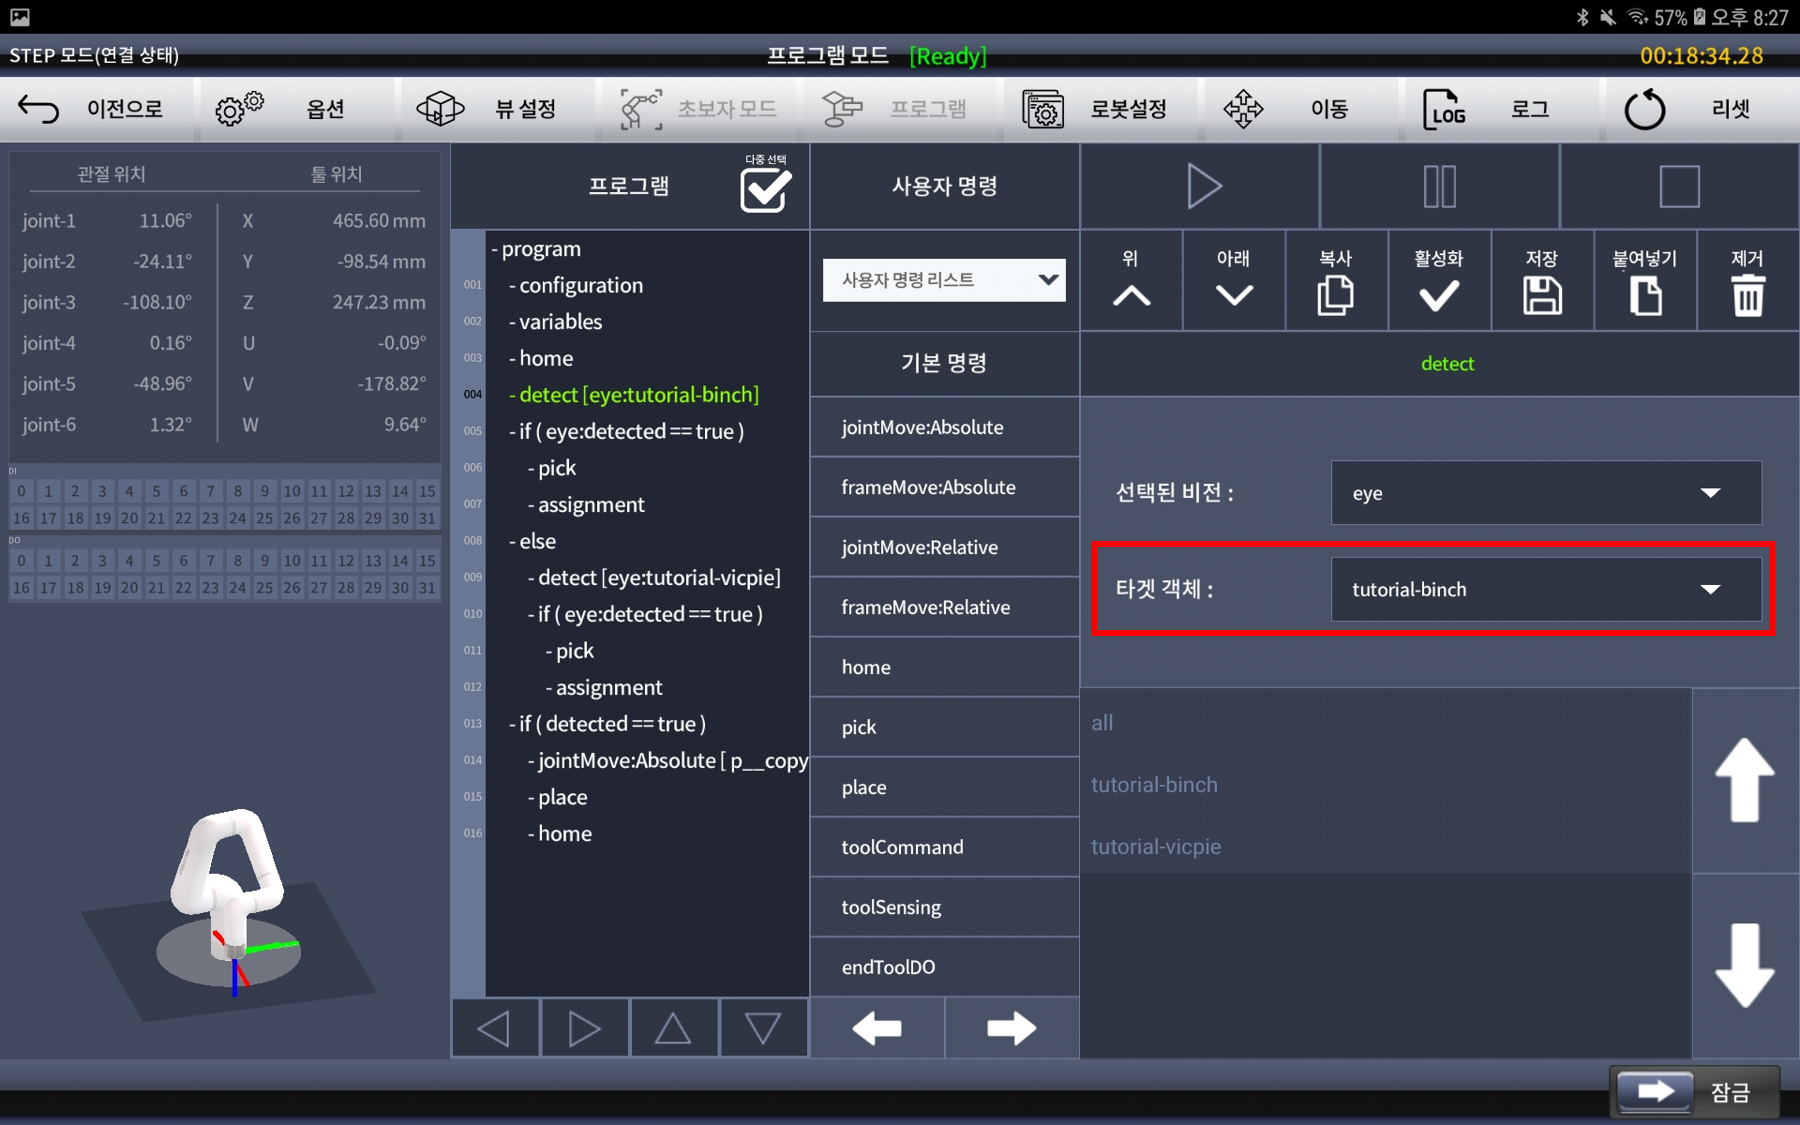
detect command setting
If the above target is recognized normally, we need to perform the pick operation, so add the if statement as shown below.
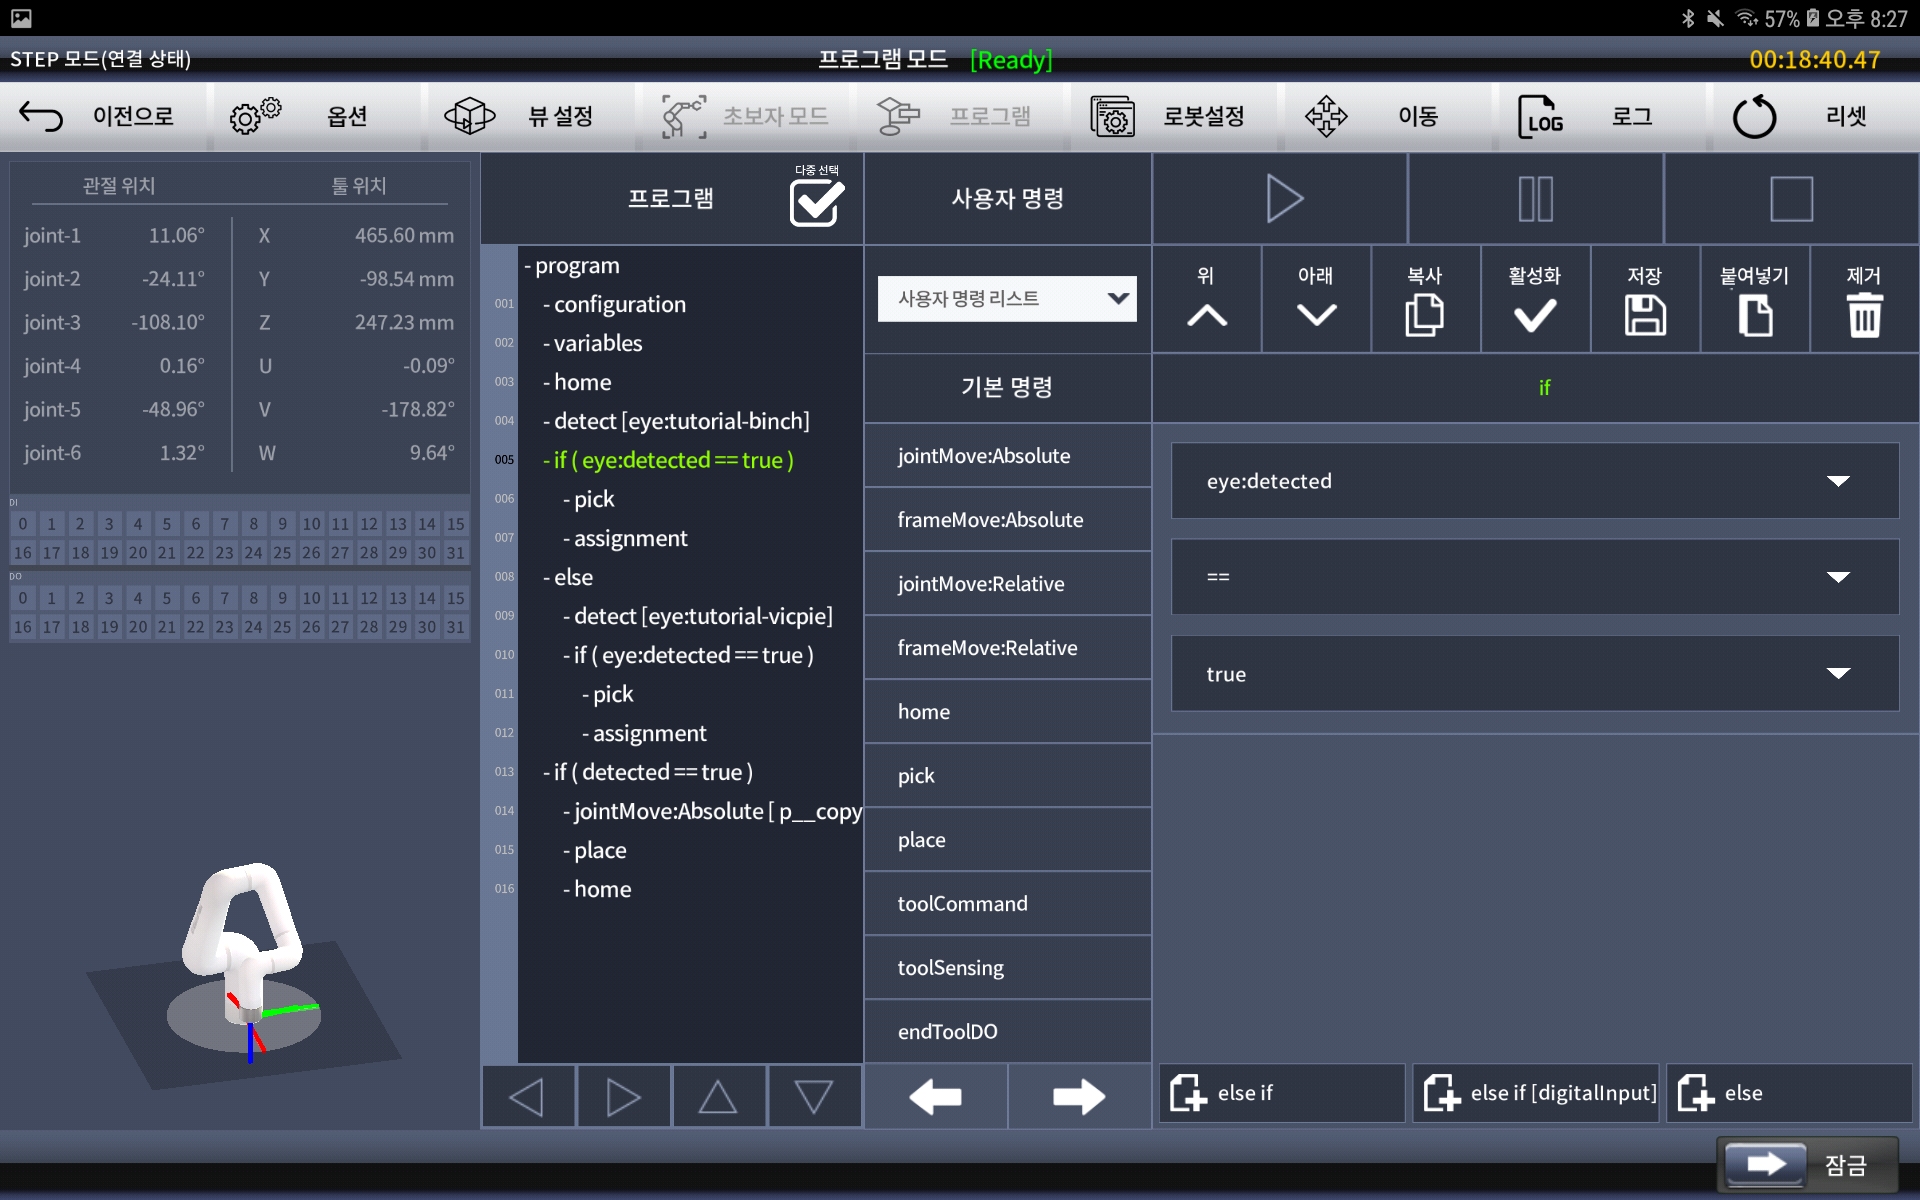
if command setting
Before proceeding, the tool setting attached to the robot must be done in Conty first. After entering the tool setting of the robot setting, add the tool to the user tool list. Next, if you select the application type as pick and place, Hold and Release appears in the tool command list. Set the output according to the operation method of the currently installed tool (such as using I/O or end tool port). For detailed instructions on connecting and setting up the tool, please refer to the Indy manual provided with the purchase.
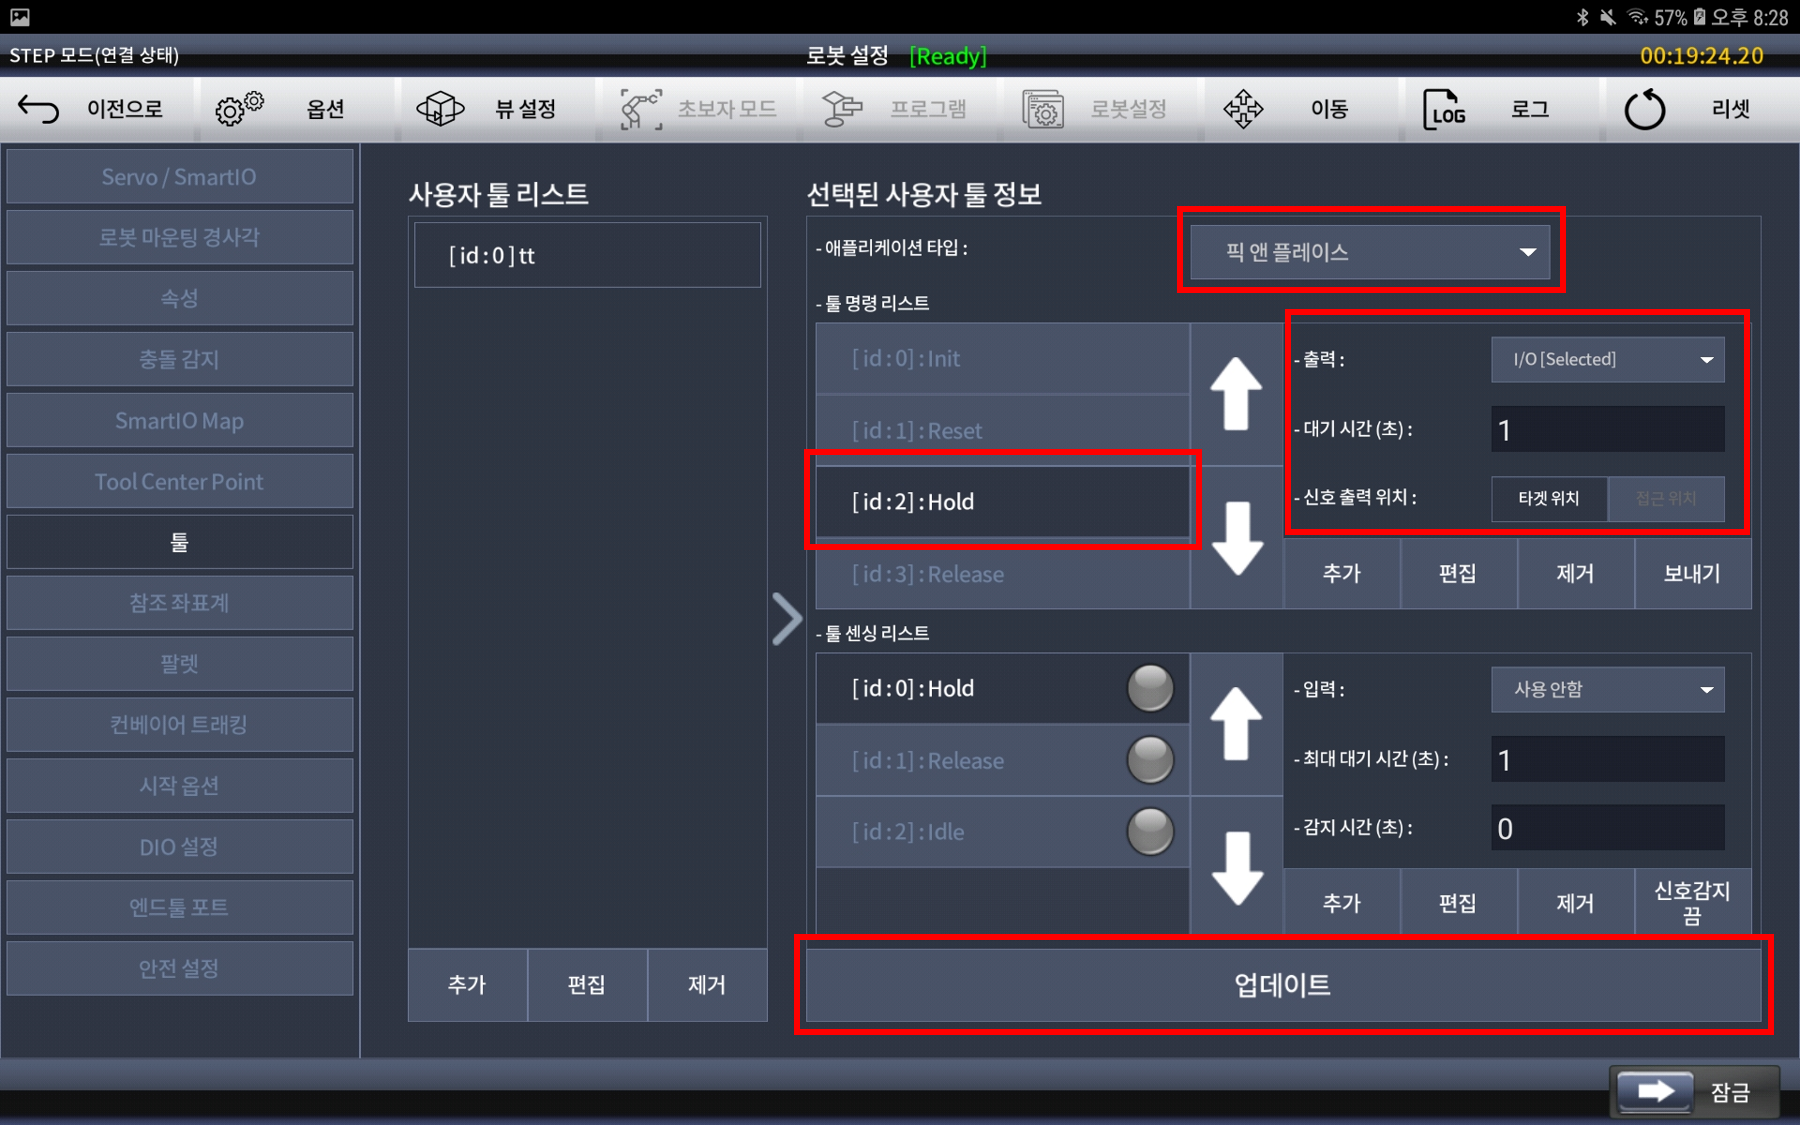
Tool setting
After setting the tool, add the pick and assignment commands to the sub-tree of the if command previously added, and enter the Pick Edit of pick.
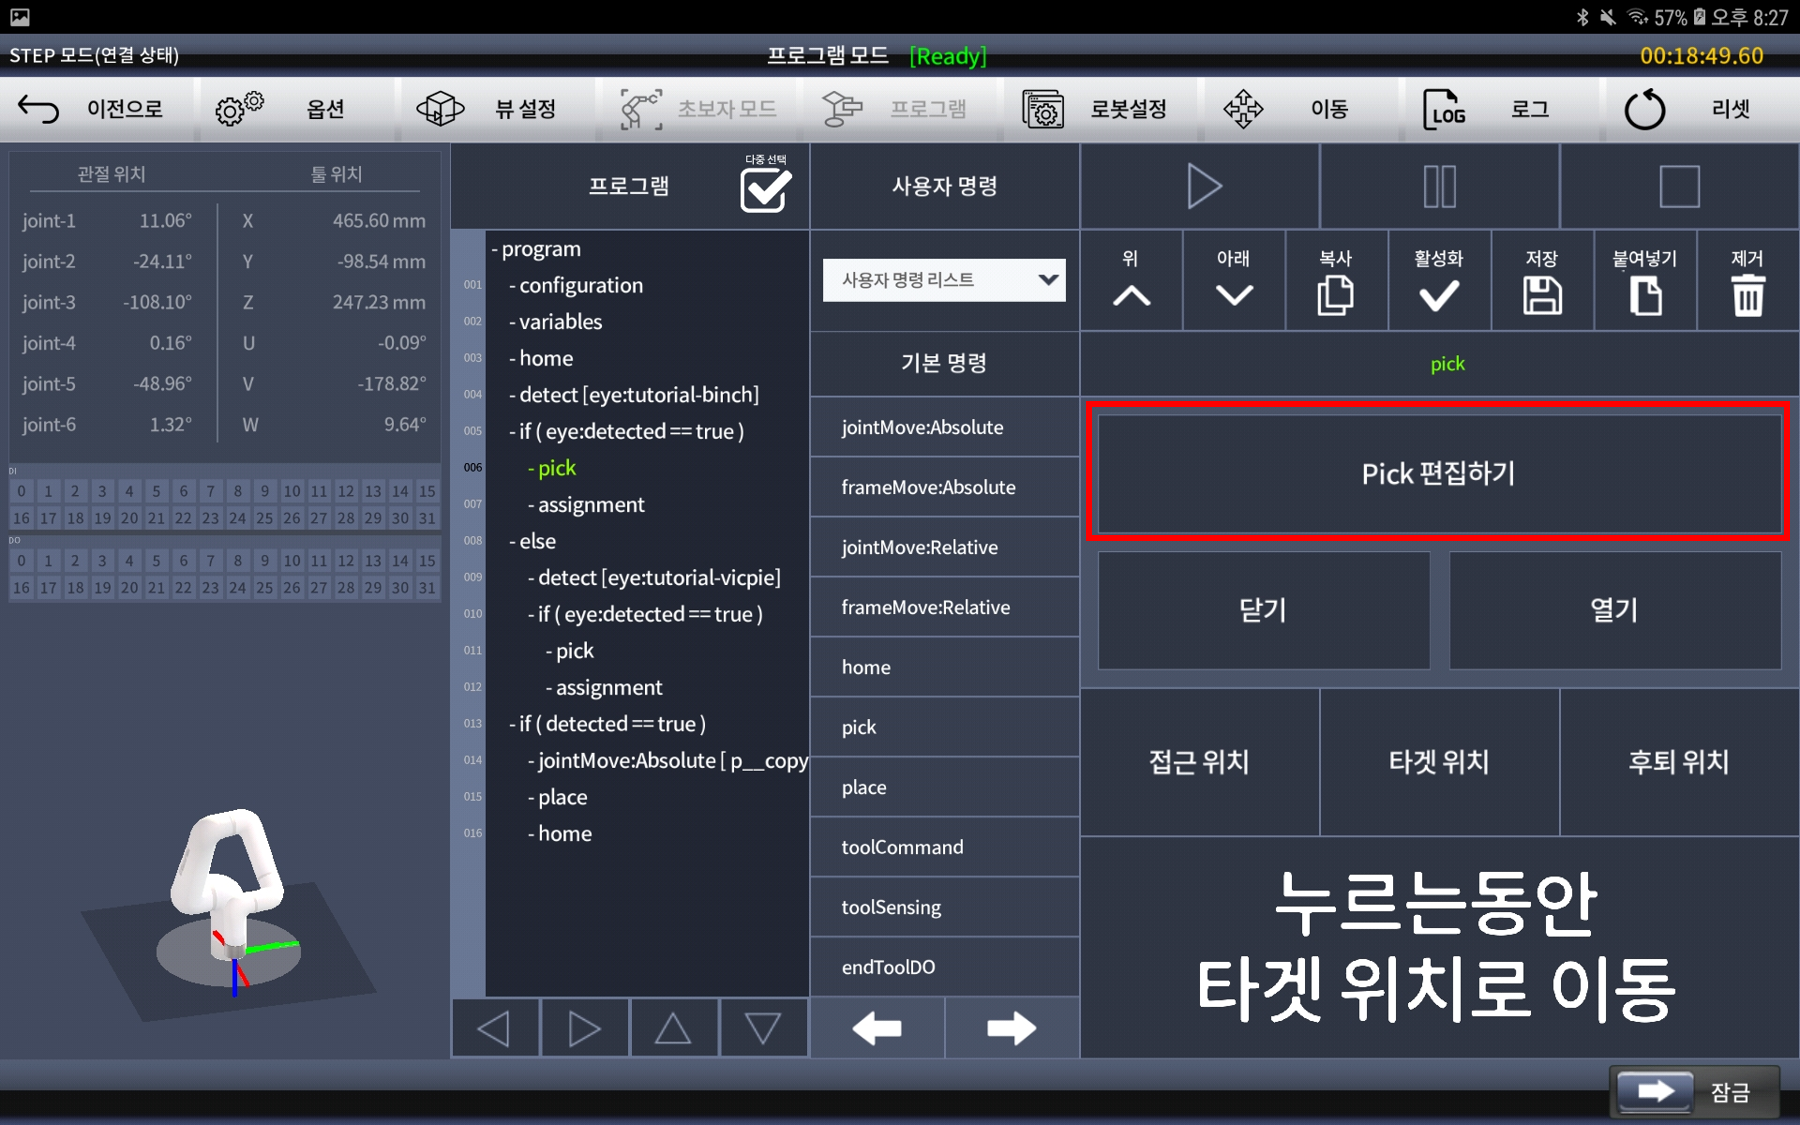
Pick Edit menu
After entering, first select the added tool from the selected tool information on the bottom left.
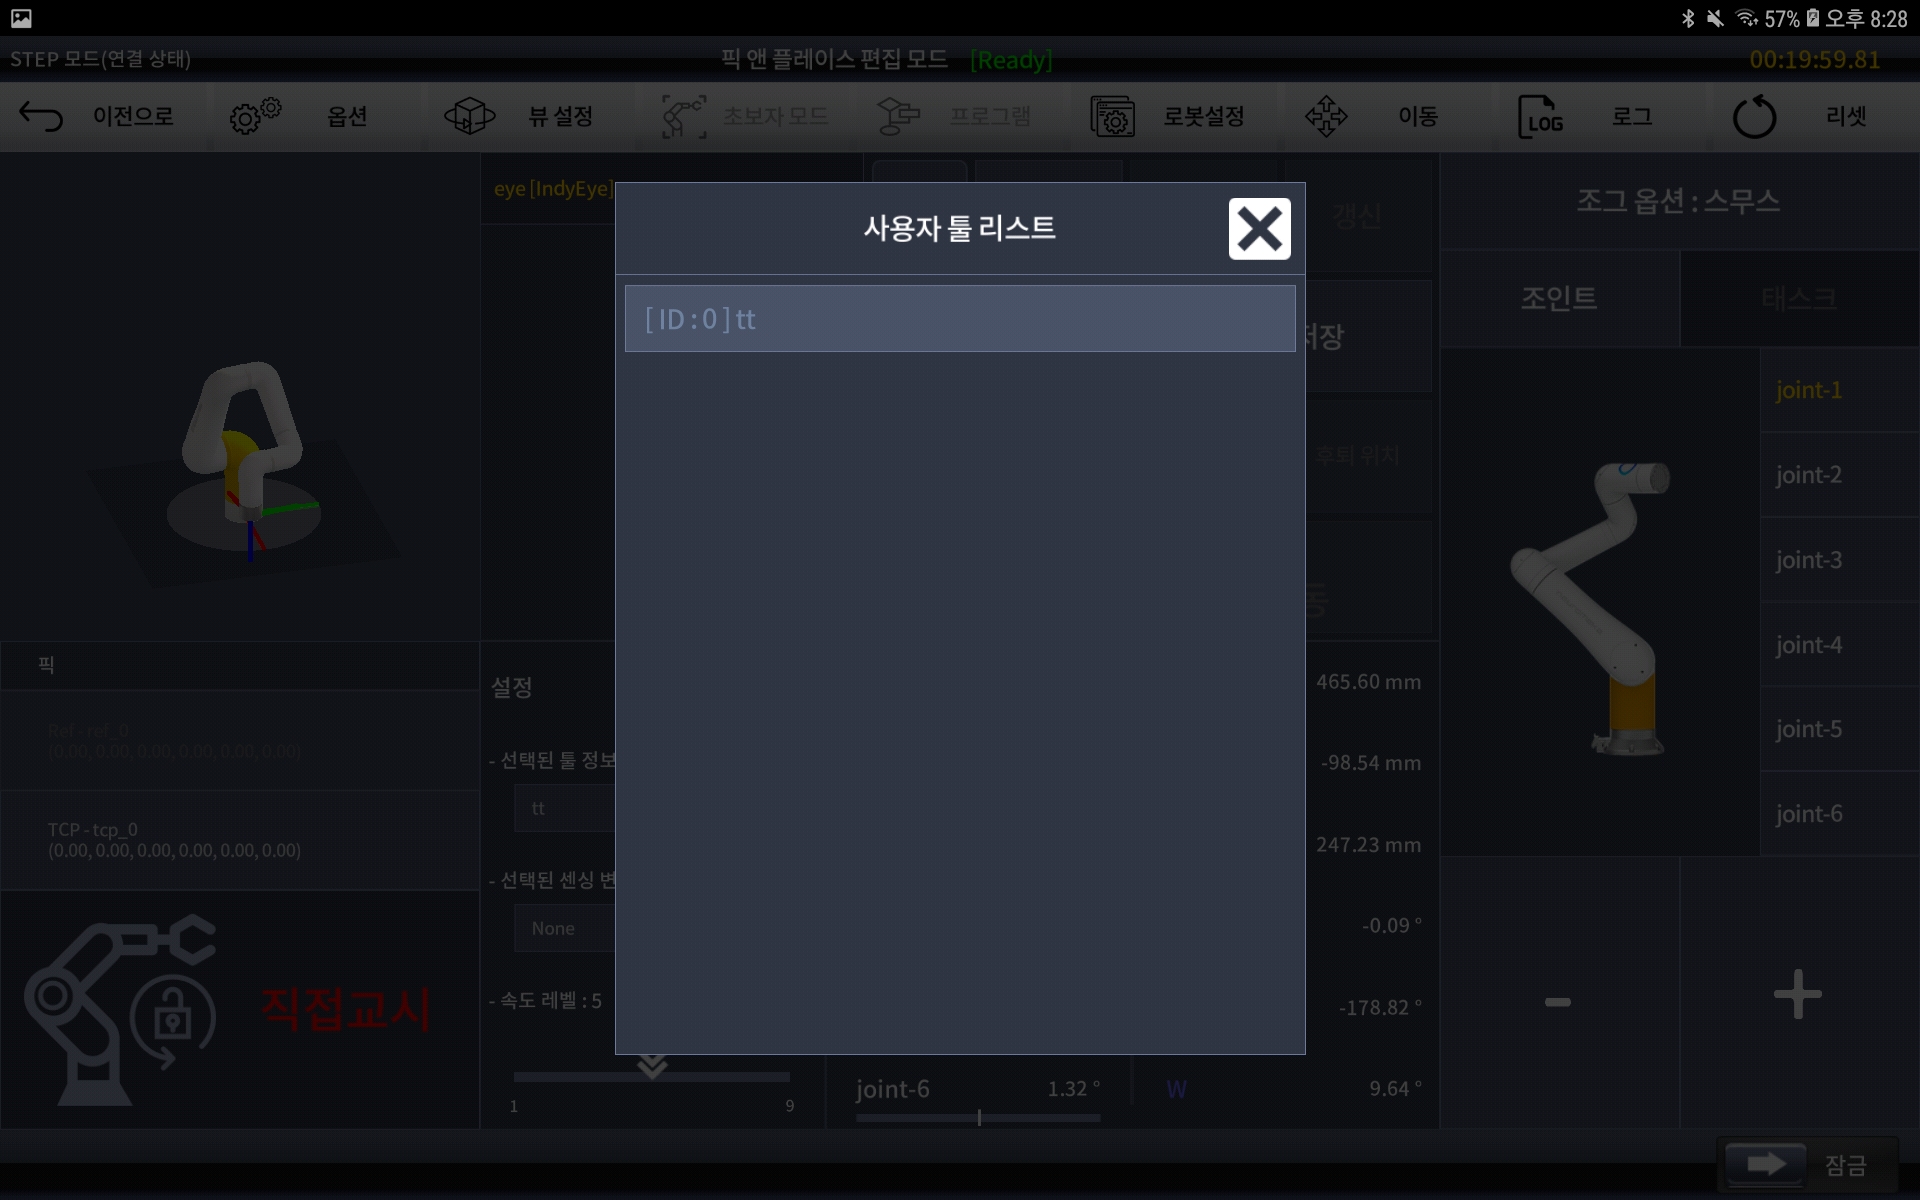
Pick tool selection
Then select Edit, select Use Vision from the user pick settings, enter the travel direction and distance, and click New. The direction and distance are to set the approach/retraction motion before and after picking, and you must enter a value. For other settings, set the value as desired by the user.
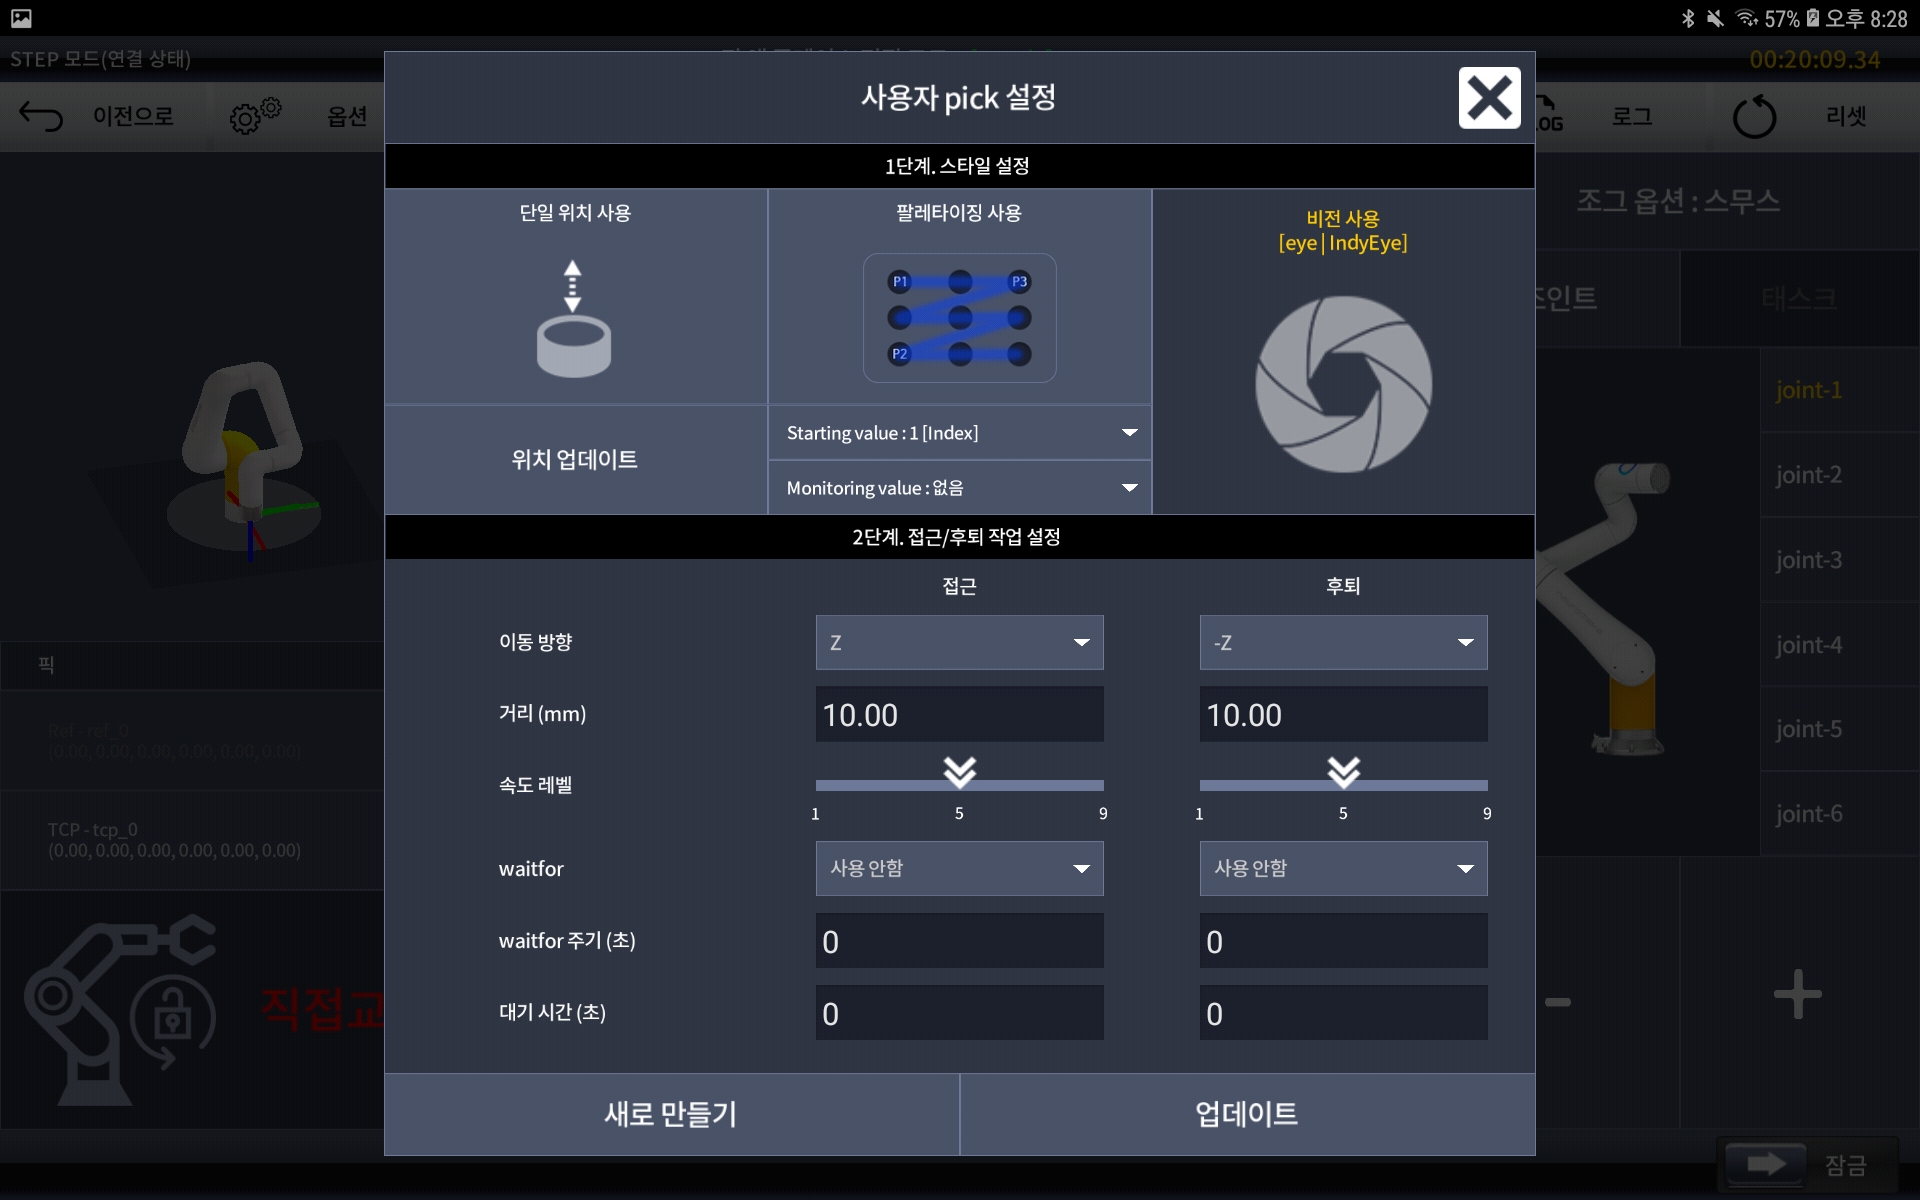
Pick setting
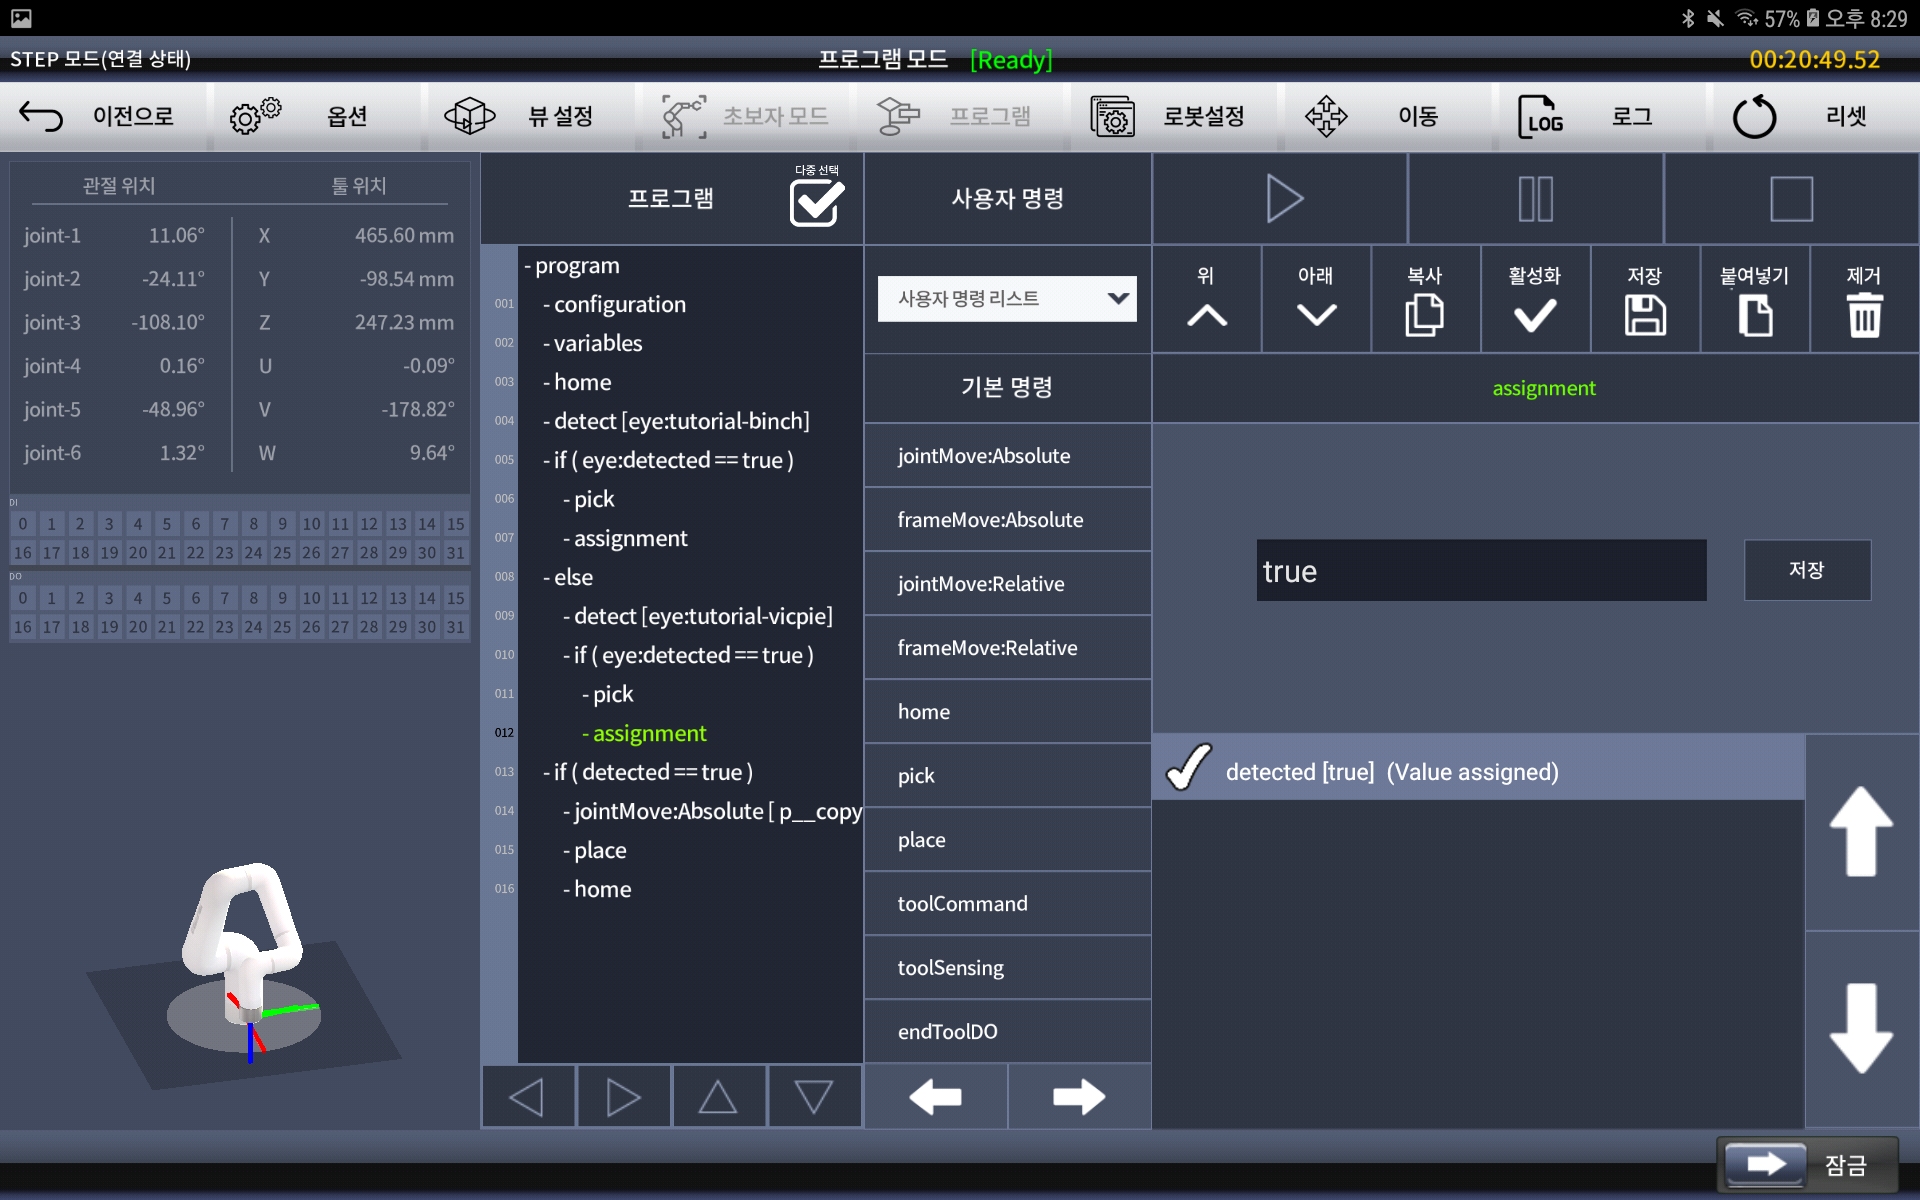
When all settings are completed, save and exit to the program tree screen. Change the detected variable to true in the assignment added with pick and save it. It acts as a flag to complete the pick operation.
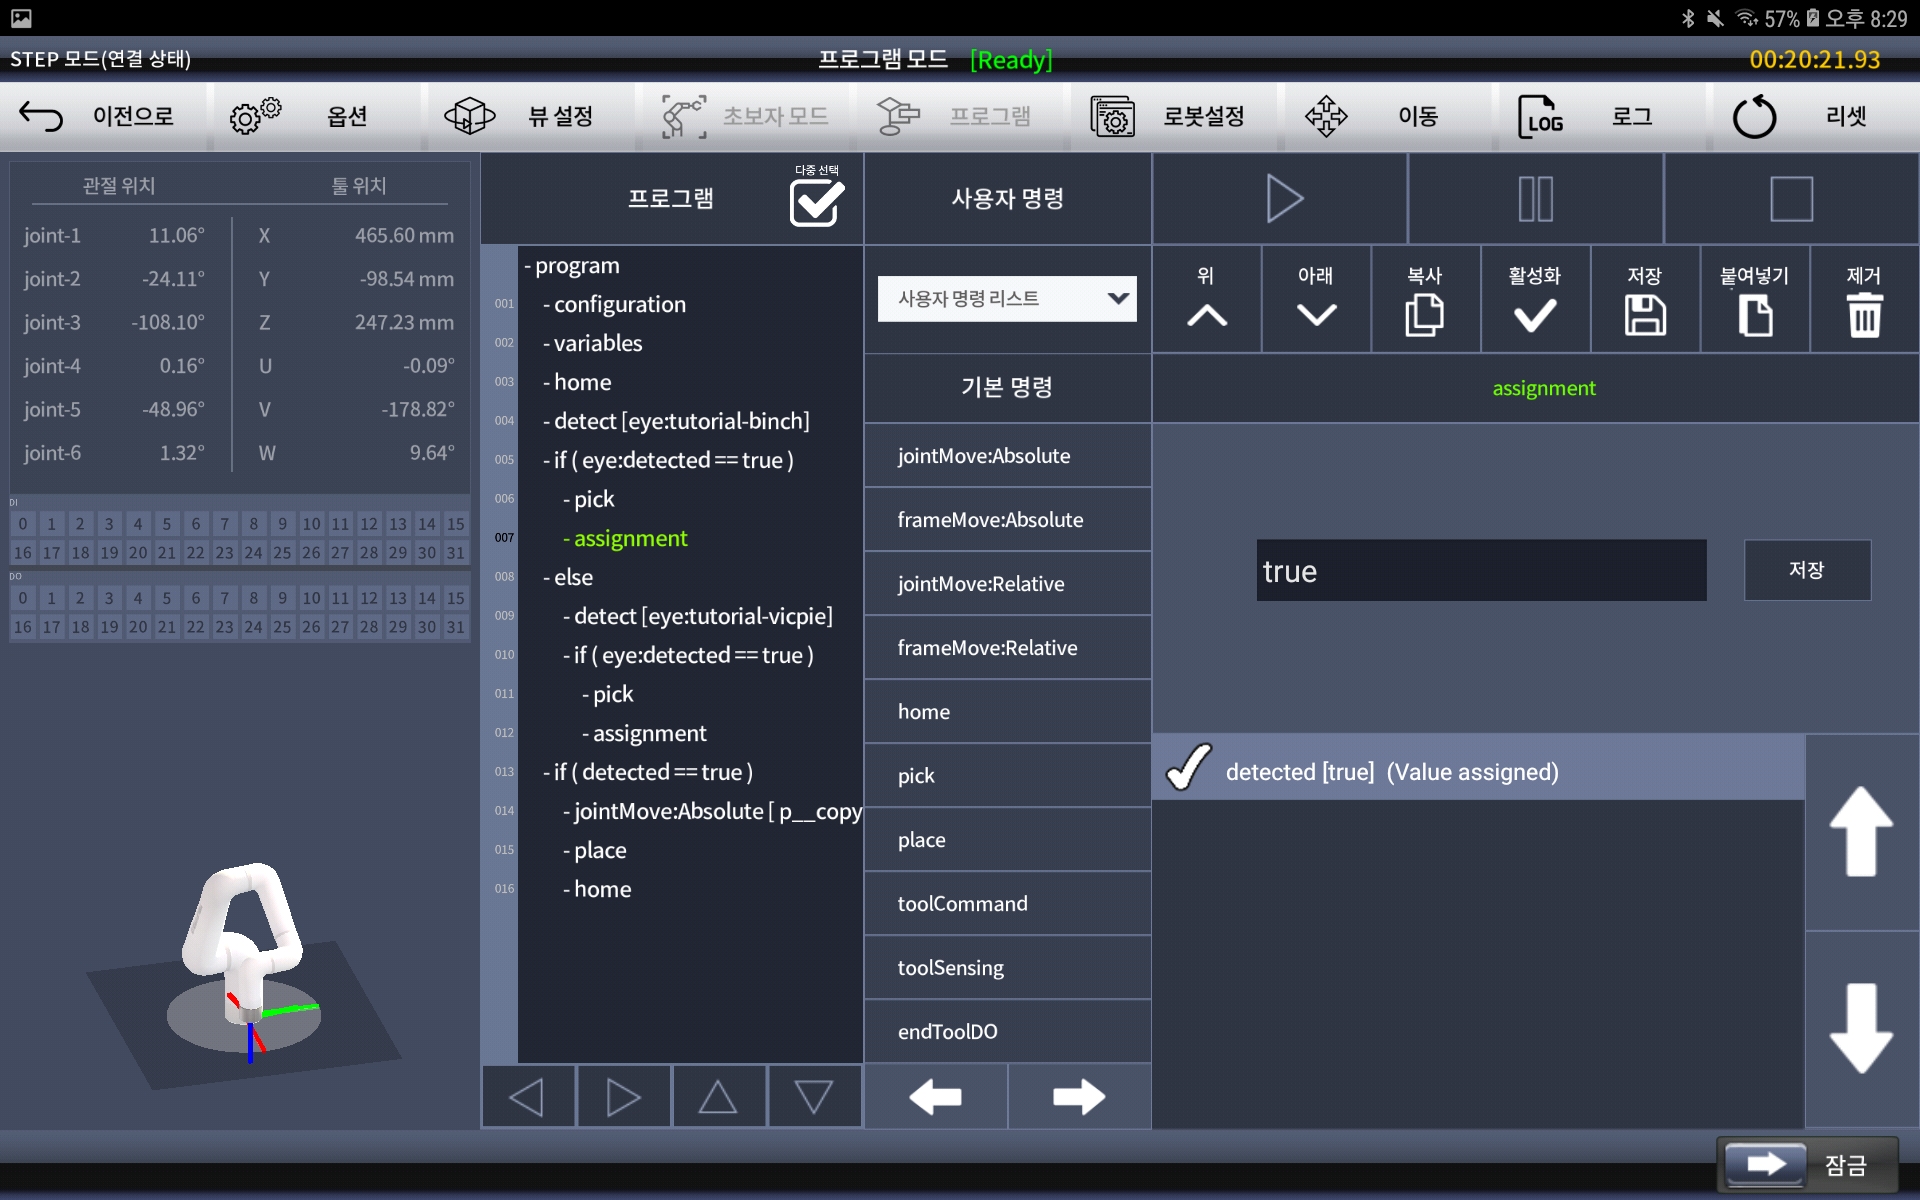
assignment setting
If the first specimen is not recognized properly, or if you place the job after recognition, add the else command and the detect command as a subtree to recognize the second specimen. In the detect command, set the second specimen as the target object, and under the if command, pick and assignment are added in the same way as the first specimen. At this time, the setting for Pick Edit is the same as the previous method.
Second specimen pick operation setup
Up to the process above, the Conty settings for the pick operation has been completed. Now let's set up the place to work. As in the if and else commands added earlier, add the if command as shown below. To that subtree, add jointMove:Absolute, place, and home sequentially.
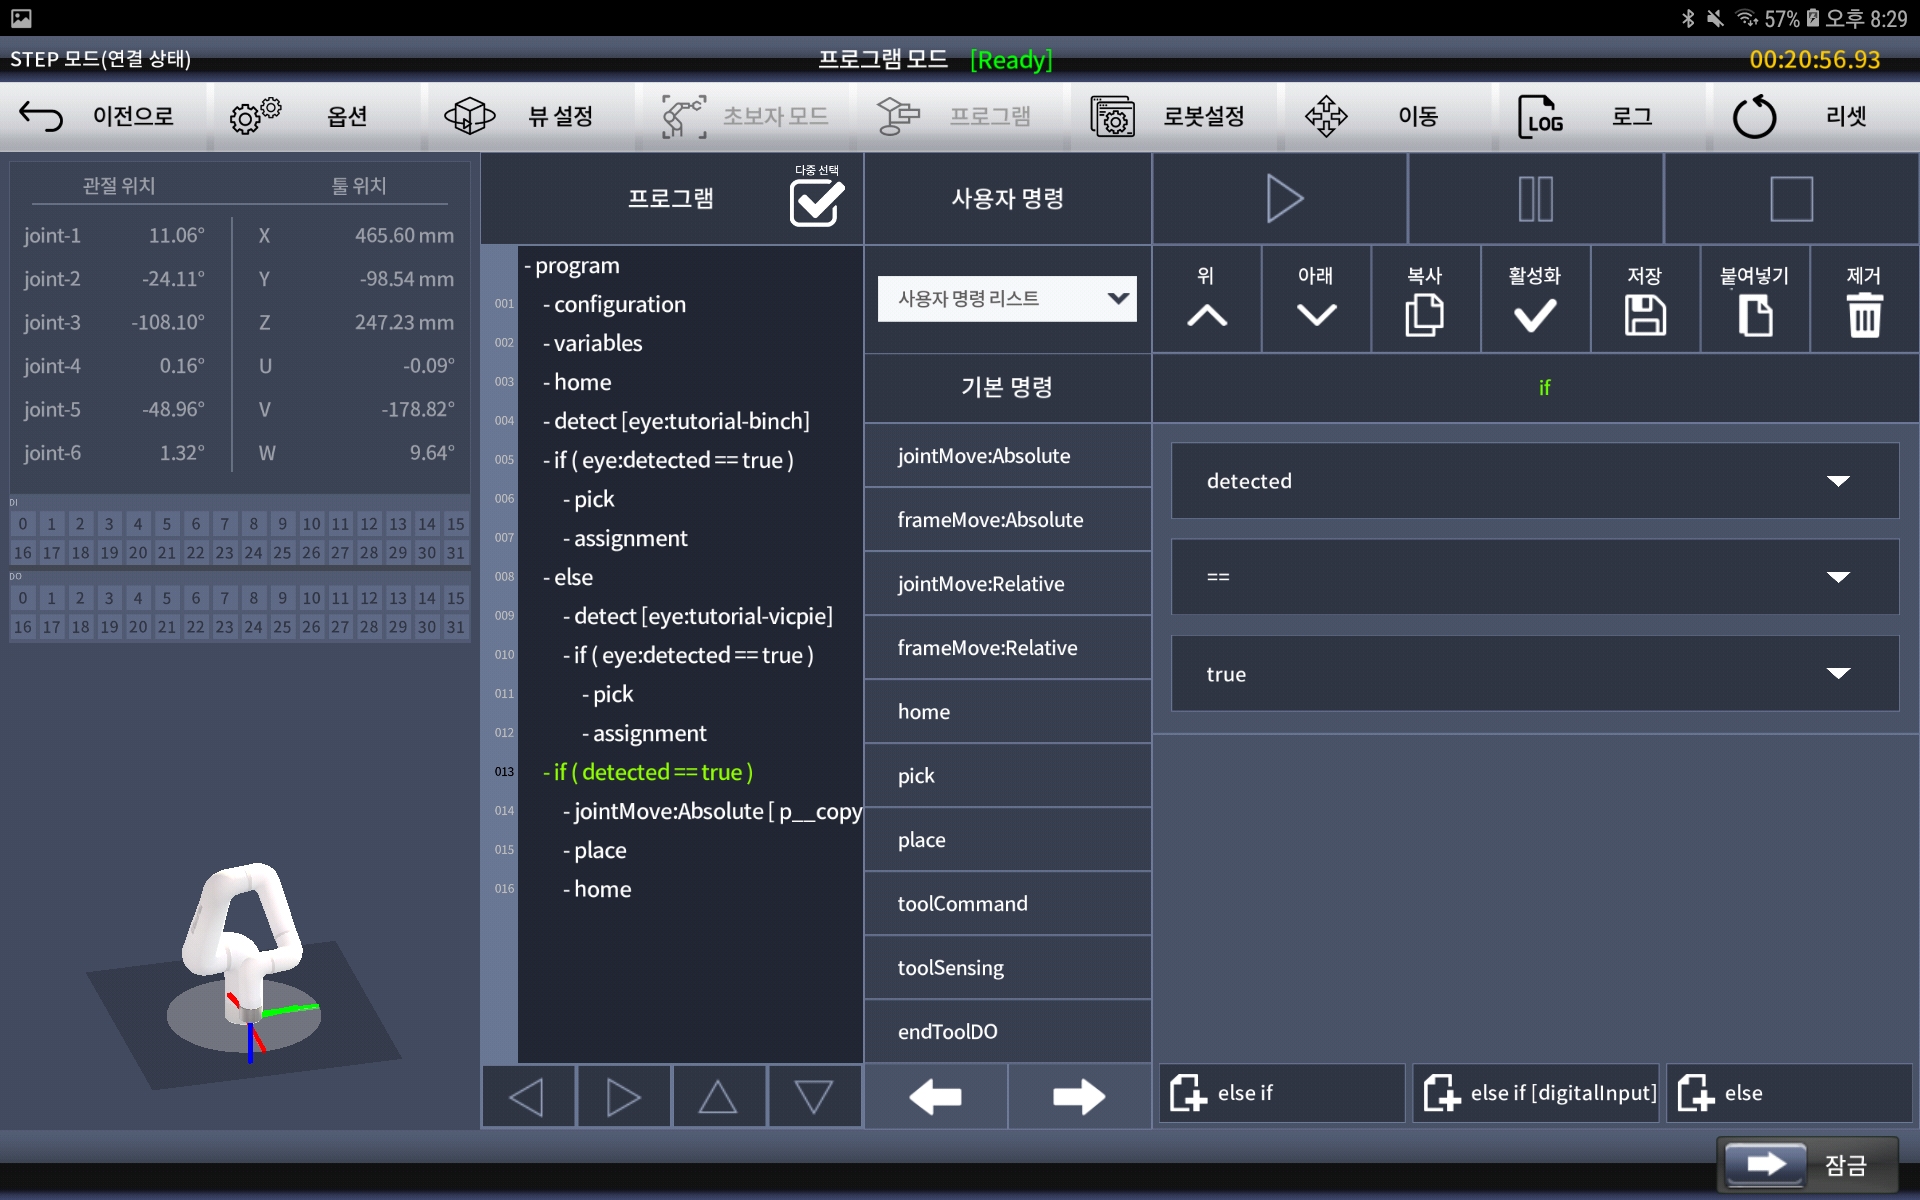
Place Program Tree Organization
First, enter the Absolute Joint Movement Edit of jointMove. To make it possible to reach the final position through several waypoints before the final place position, add a waypoint using direct teaching or jog. After adding, click Save to return to the program tree.
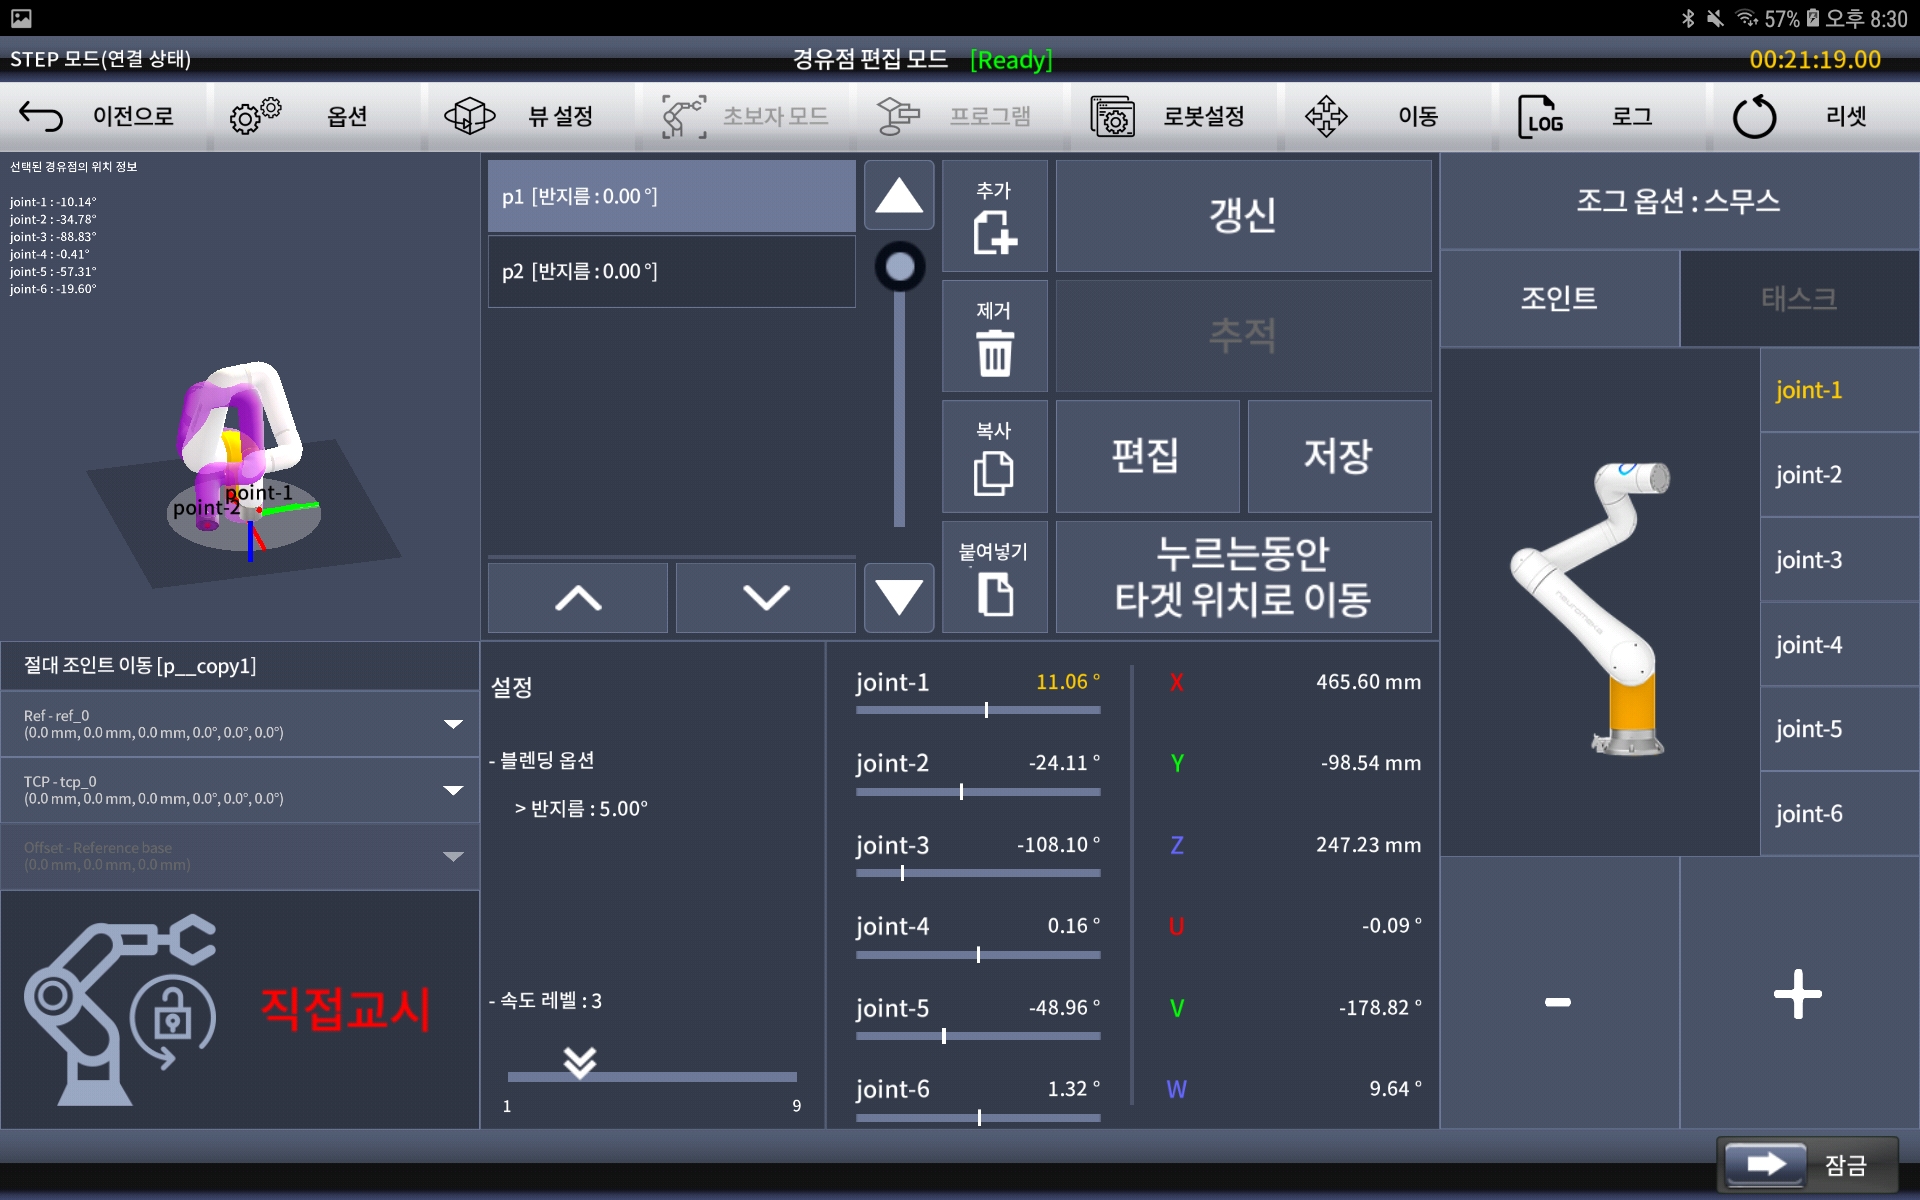
Add a waypoint
After adding a waypoint, go to Editing Place of place. Select tool information in the same way as the pick command and move the robot to the final place position. After determining the final location, click Update Location on the edit screen. As with the pick setting, set detailed settings such as the direction and distance of movement to the desired values, and then select New.
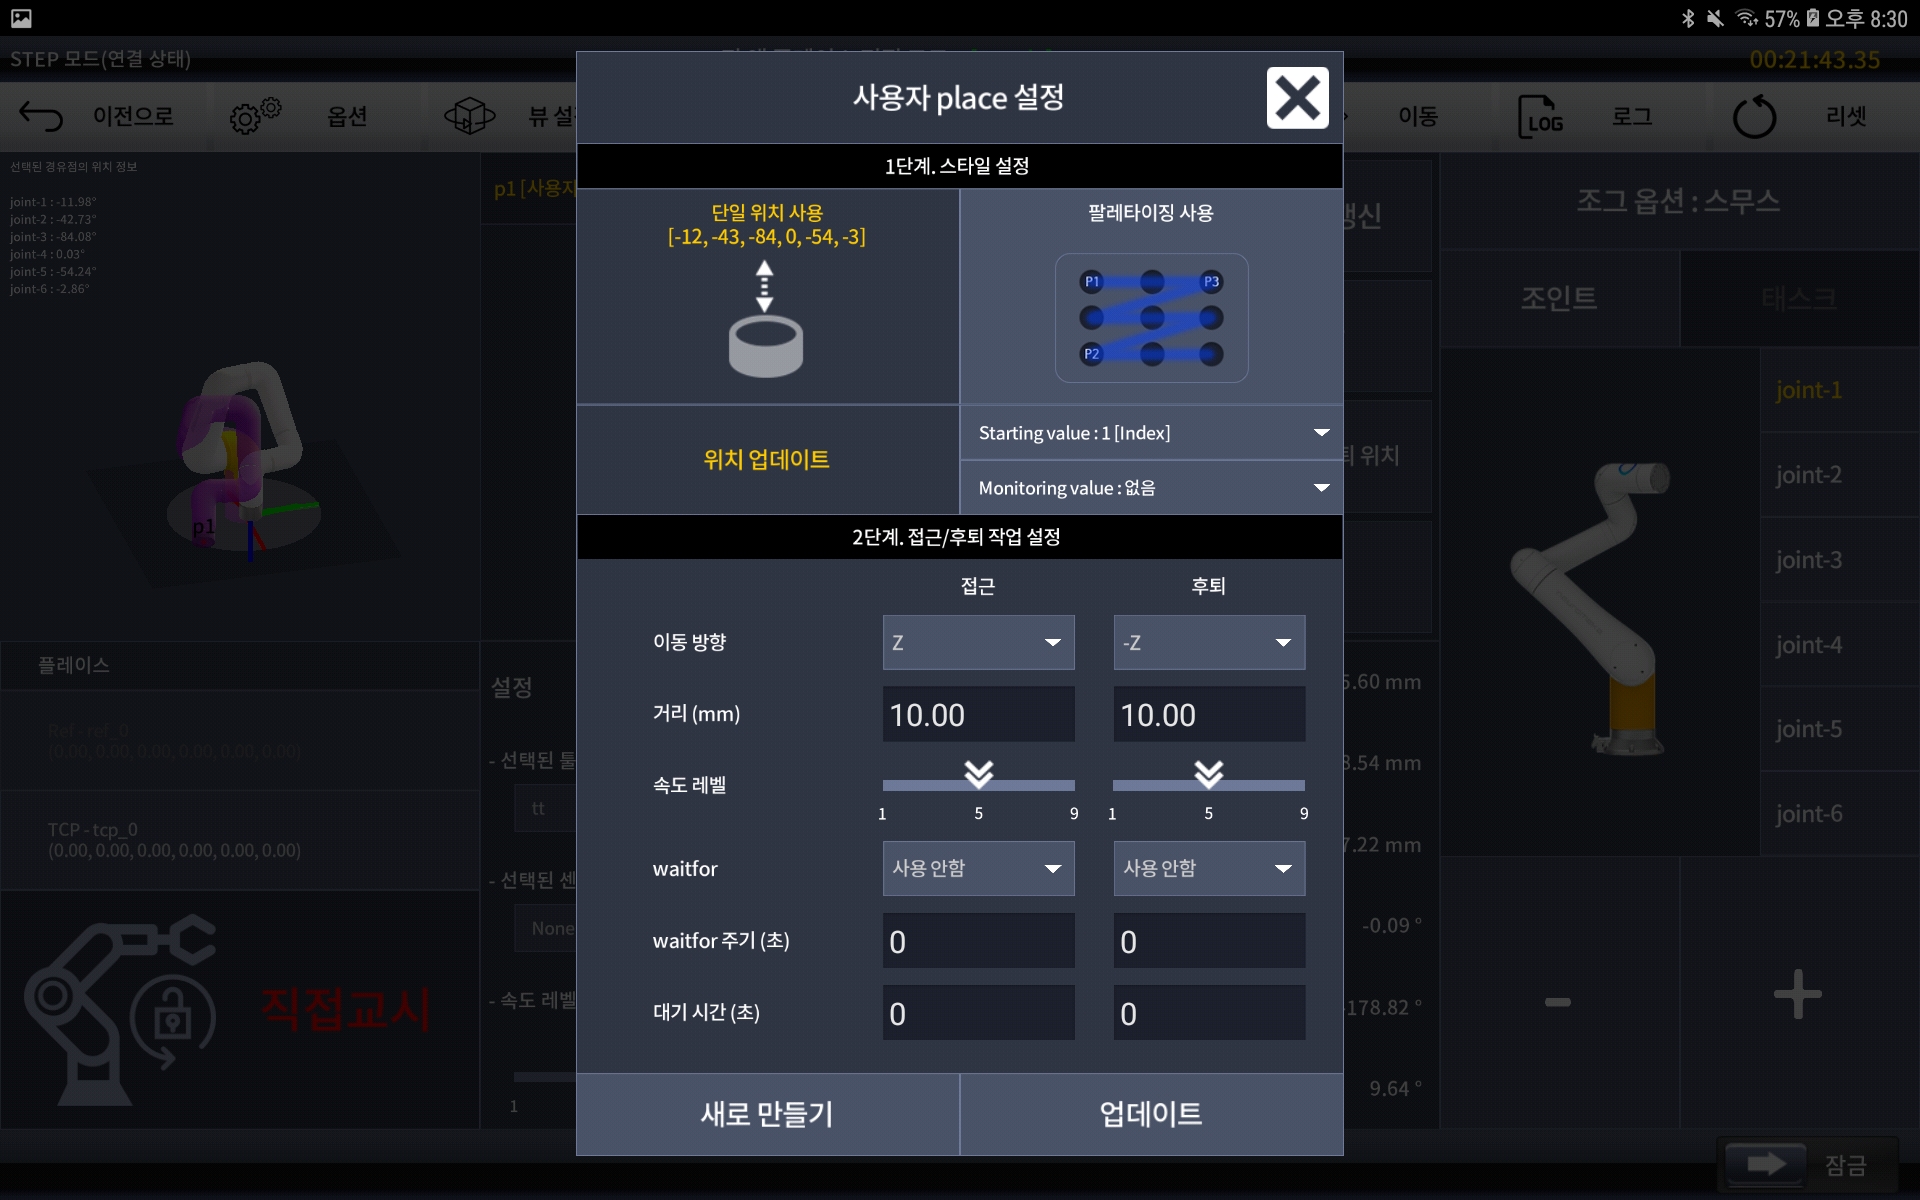
Place setting
Now that everything is set up, launch the program and it will recognize objects through IndyEye and pick and place them.
TCP/IP Communication
Advanced users can request detection to IndyEye and get the results on their own programs, without Conty. Using TCP/IP communication example below, you can learn how to request detection to and get the results from the IndyEye.
