TwinCAT Setup
Introduction
- This document guides you how to setting up a TwinCAT project to control Neuromeka CORE module. In order to follow these instructions. You need a PC or Laptop which runs Windows 7 or later version and has an Ethernet port.
- Connection between PC/Laptop with CORE Module is described below:
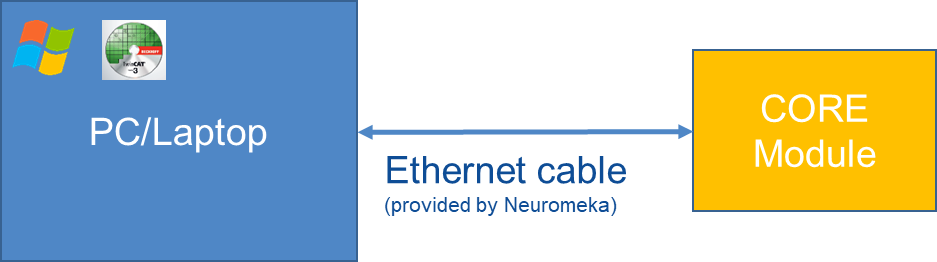 Figure 1. CORE Module - EtherCAT Connection
Preparation for TwinCAT3
Requirements
-
Microsoft Visual Studio 2010 (with Service Pack 1), 2012, 2013, 2015 or 2017 Professional, Premium or Ultimate–When installing Visual Studio 2015, the Visual C++ development option must be manually selected, as this option is not selected with the automatic installation.
 Figure 2. Enable Visual C++ Development Option
-
Microsoft Windows Driver Kit 7 (WDK): Installing Windows Driver Kit
-
TwinCAT 3 installation (XAE engineering)
Notice:
TwinCAT (TC) 3.0 only supports 32-bit operating systems as target platform (runtime PC).
- TC 3.0 can be used as engineering platform on x64 PCs for project development.
- The program can be transferred to a 32-bit (x86) remote PC over the network for execution.
TC 3.1 supports x64-bit operating systems as target platform (runtime PC). However, the drivers need to be signed, as documented here, which requires a certificate for operation.
- Reference: x64: driver signing & SecureBoot: Driver signing
The target runtime must be based on “Windows NT Kernel”
- E.g. Windows XP, Windows 7, Windows XP Embedded, Windows Embedded Standard 2009, Windows Embedded Standard 7, etc.
x64: driver signing
- Open Windows Command Prompt with administrator rights
- Start ⇨ Command Prompt then right-click on “Run as administrator”
- In Command Prompt, go to directory %WINDDK7%\bin\x86\
- Execute command: makecert -r -pe -ss PrivateCertStore -n CN=MyTestSigningCertMyTestSigningCert.cer
- This is followed by creation of a self-signed certificate, which is stored in the file "MyTestSigningCert.cer" and in the Windows Certificate Store
- The result can be verified with mmc (Use File ⇨ Add/Remove Snap-in ⇨ Certificates)
 Figure 3. Verify x64 Driver Certificate
- Set the system environment variable "TWINCATTESTCERTIFICATE" to "MyTestSigningCert"
- Activate signing mode, so that Windows can accept the self-signed certificates.
- In Command Prompt, execute: bcdedit /set testsigning yes and restart Windows (SecureBoot must be disabled in Bios before executing command)
- If test signing mode is enabled, this is displayed at the bottom right of the desktop. The PC now accepts all signed drivers for execution.
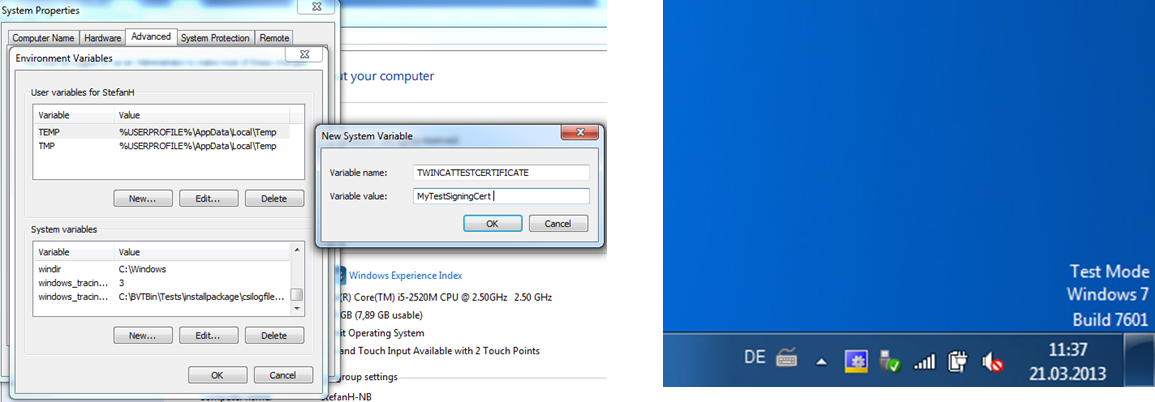 Figure 4. Activate Certificate in Windows Test Mode.png
Add Ethercat XML Device Description (ESI) file for CORE module
- Copy CORE module description file into TwinCAT directory (used when scanning for IO devices)
- Description file: NRMK Drive.xml
- Location: < TwinCAT installation path >\3.1\Config\Io\EtherCAT
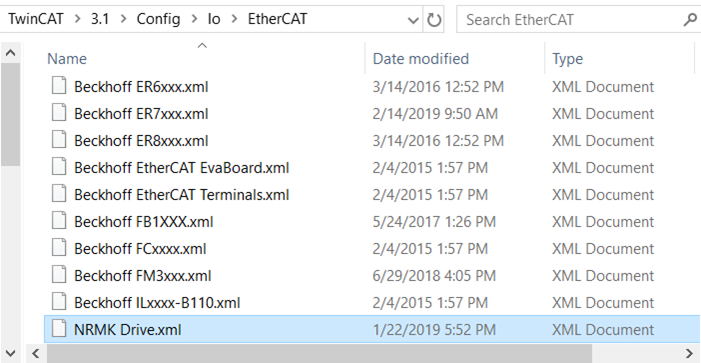 Figure 5. TwinCAT Location to ESI Files
Setting tips
Assign CPU Core for TwinCAT
- To avoid conflict with other applications (such as VMWare), TwinCAT should run on isolated CPU.
- Your CPU must have at least 2 cores for doing this step.
- Setting is below:
- In Solution Explorer, click SYSTEM > Real-time
- Click “Read from Target” to list all available CPU cores
- Then click “Set on Target” and set number of cores you want to use for Windows
- The remaining cores can be selected for real-time task.

Figure 6. TwinCAT3 Project - Assign CPU's Cores for Real-time Task
Setup Tick
- Required when you run Windows 8 or later version
- Open Command Promt in Administrator mode, then run command:
%TWINCAT3DIR%\System\win8settick.bat

Figure 7. TwinCAT3 Project - Setup Real-time Tick
Install TwinCAT driver for Ethernet card
- TwinCAT > Show Realtime Ethernet Compatible Devices…
- Click Yes to allow “Application TcRteInstall”
- At “Ethernet Adapters” windows, click on Ethernet card which is intended to use for Ethercat.
- Click Install to setup driver.
-
Then close the window

Figure 8. TwinCAT3 - NIC Driver for EtherCATNote: Alternatively, in Solution explorer, you can make a double-click on Device 1 (EtherCAT) under I/O -> Devices Then, in Adapter tap, click on Compatible Devices...
Assign Ethernet card for Ethercat Master
- In Solution explorer, double-click on Ethercat master device (such as “Device 1 (EtherCAT)”)
- In Adapter tab, click “Search…” and select Ethernet card to use for Ethercat.

Figure 9. TwinCAT3 - Assign NIC to Ethercat Master
Retargeting solution and project
- Retargeting is required when open solution/project with different SDK
- Right-click on TwinCAT Solution and select Retarget solution
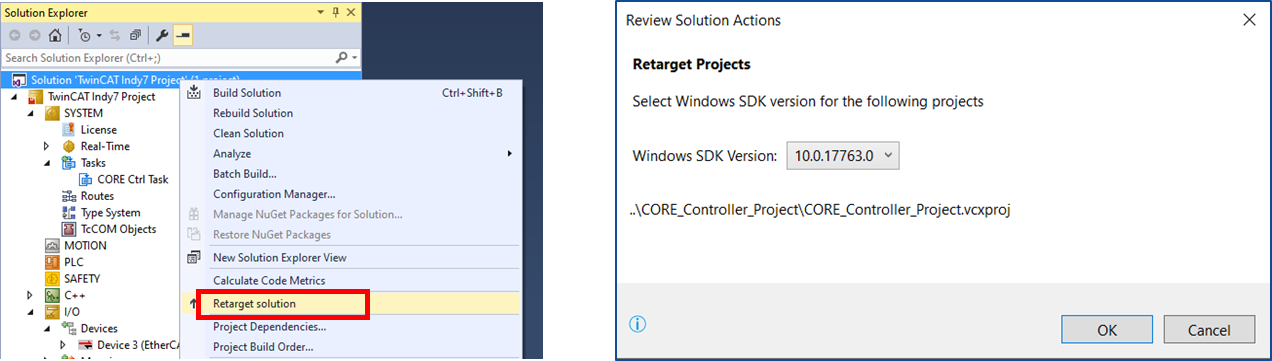
Figure 10. TwinCAT3 - Retarget TwinCAT Solution & Project
