Get Started
IndyEye is a low-cost vision solution for cooperative robots. Various image processing modules can be used to easily recognize objects and implement them in pick-and-place operations. IndyEye comes integrated with a robot and its interface can be configured to a dedicated Android app.
IndyEye Installation
Currently, IndyEye is available in three versions:
- Standalone IndyEye: Provided as a separate PC, the camera is directly connected to the USB port of the PC. It communicates with IndyCB through a local network, such as a router.
- IndyEye-LITE: Integrated with IndyCB, it features the IndyEye-LITE logo and allows the camera to be connected through the standard USB port of IndyCB.
- (Prior to 2023) IndyEye built-in IndyCB: IndyCB includes the IndyEye logo and a dedicated USB port for the camera.
The installation steps for IndyEye are as follows:
- Connect the IndyEye to the USB port on the bottom of the integrated robot according to the descriptions for each version above.
- To connect with the IndyEye app, connect an Ethernet cable to the LAN port of the IndyCB (and IndyEye) and configure the network.
- Install the IndyEye app using the provided installation file on the tablet.
IndyEye Connection
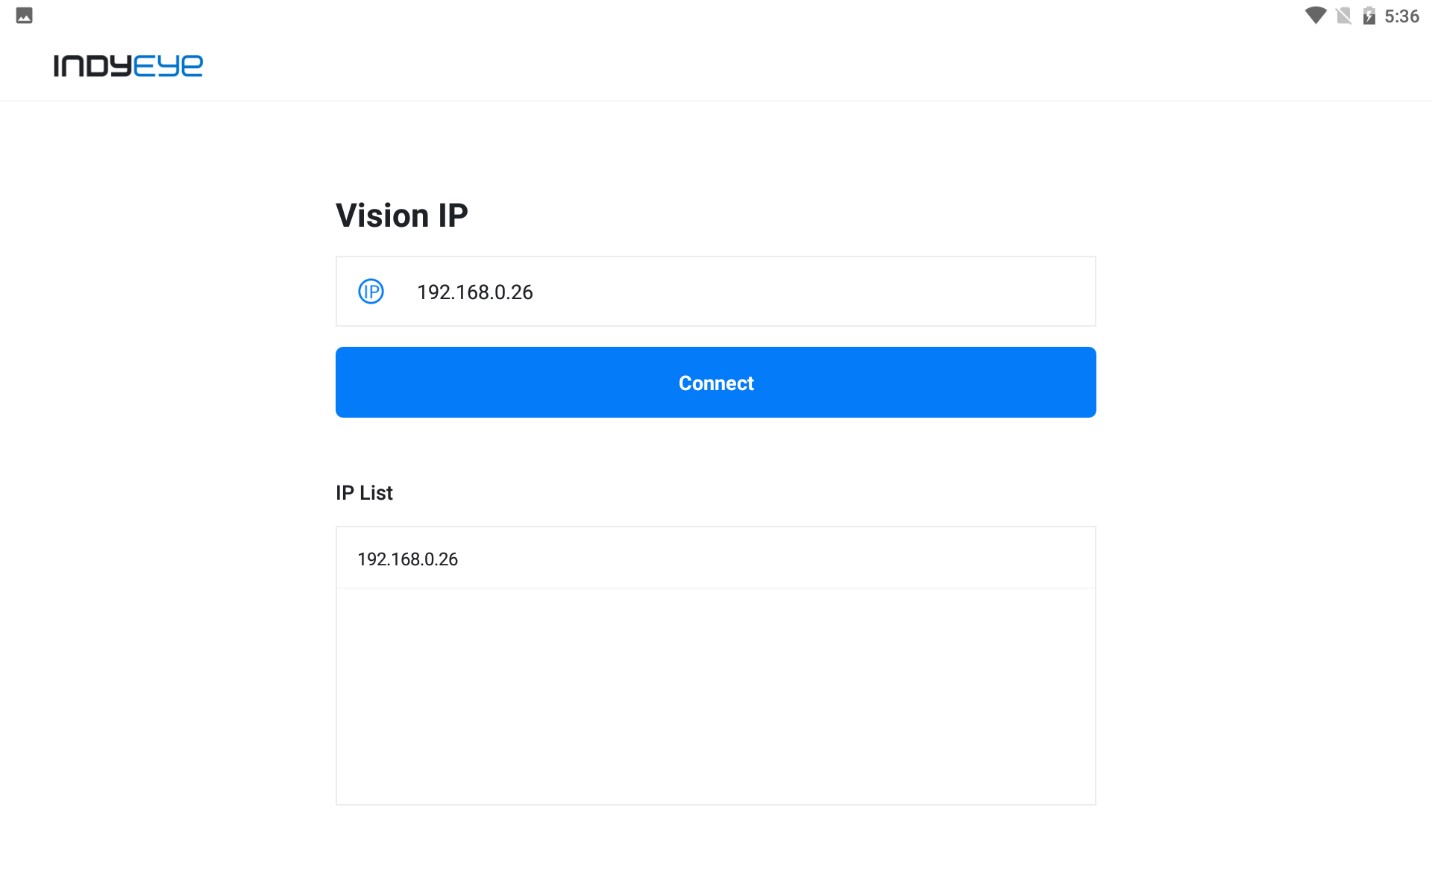
IndyEye app Main Screen
After the installation is complete, turn on the power of the IndyCB to operate the robot. A dedicated app is used for IndyEye settings. Connect by entering the IndyEye IP address on the main screen of the installed IndyEye app.
- Separate IndyEye: Use the IP of the provided separate PC. The network name is "indyeye."
- IndyEye-LITE: Use the IP of the IndyCB. The network name is "STEP-TP."
- (Before 2023) IndyCB built-in IndyEye: Use the IP of the IndyCB. The network name is "STEP-TP."

IndyEye Connection Screen
When a connection is made to IndyEye, a continuous video stream is automatically displayed on the left side of the app screen. Click the refresh icon in the upper right corner of the screen if the connection is lost or it is desired to reset the exposure setting. It’s possible to view the video in full screen mode by clicking on the full screen button at the bottom right of the screen.
Robot Connection

Robot Connection Screen
On the upper left side of the app screen, there is a Robot Connection Setup. The connection to the robot should be started to proceed with calibration or object detection using IndyEye and the robot. First, click the Connect button. When the picture below is shown on the screen as a pop-up window, select the robot model from the dropdown menu, write the IP address and click the Connect button.
- If you have a separate IndyEye PC or using IndyEye-LITE, enter the IP address of the IndyCB. This IP is the same one that you enter on the first screen of the Conty APP.
- If you have a IndyEye CB produced in 2023 or earlier, check if your IndyCB have a camera port. In this case, your IndyEye processor and IndyCP have separate IP addresses internally. Enter 192.168.137.2.
- If there is no camera port on IndyCB, you have IndyEye-LITE. (IndyEye-LITE: IndyCB-integrated version without separate address).
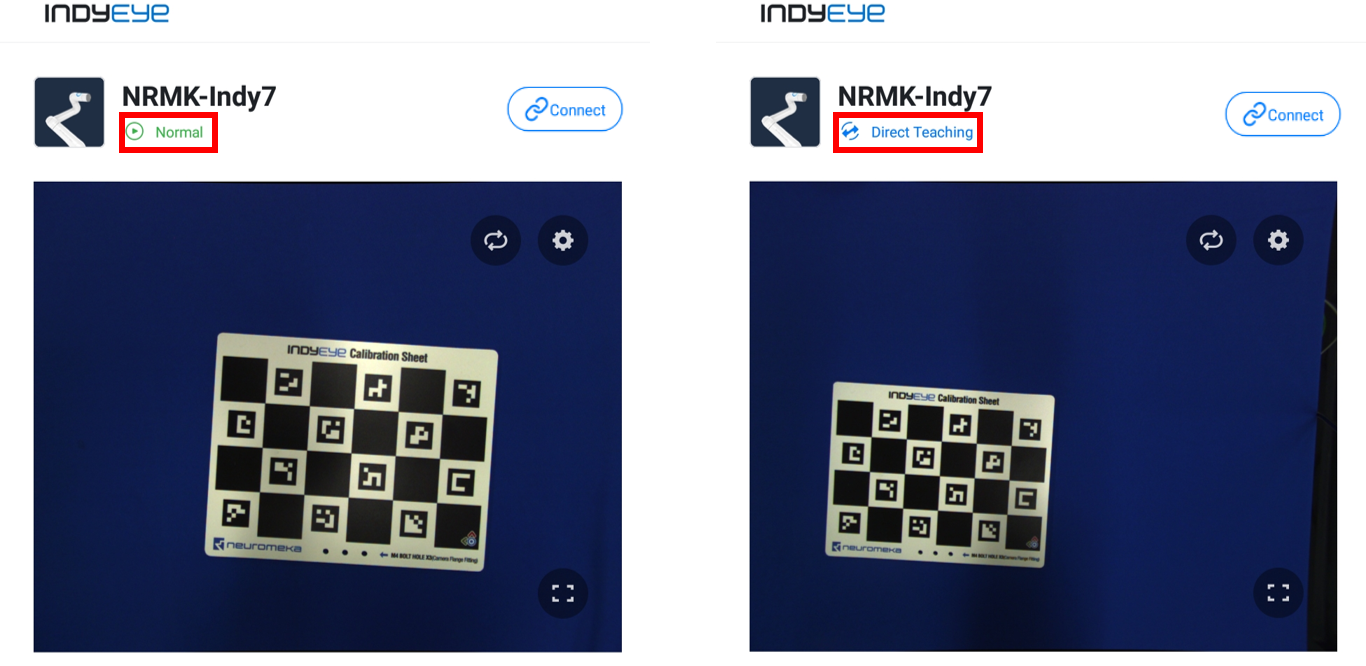
Switch to Direct Teaching mode
When a connection has been made the state will change to Normal next to the robot logo. By clicking the Normal button, it is possible to switch to Direct Teaching mode. This will be useful during calibration and other tasks where the robot needs to be repositioned.
Calibration
Calibration of IndyEye can be done using the supplied calibration sheets captured in various directions. Place the calibration sheet on a surface as shown in the figure below. Click Mode of the calibration steps to check if Mounted Camera is selected.
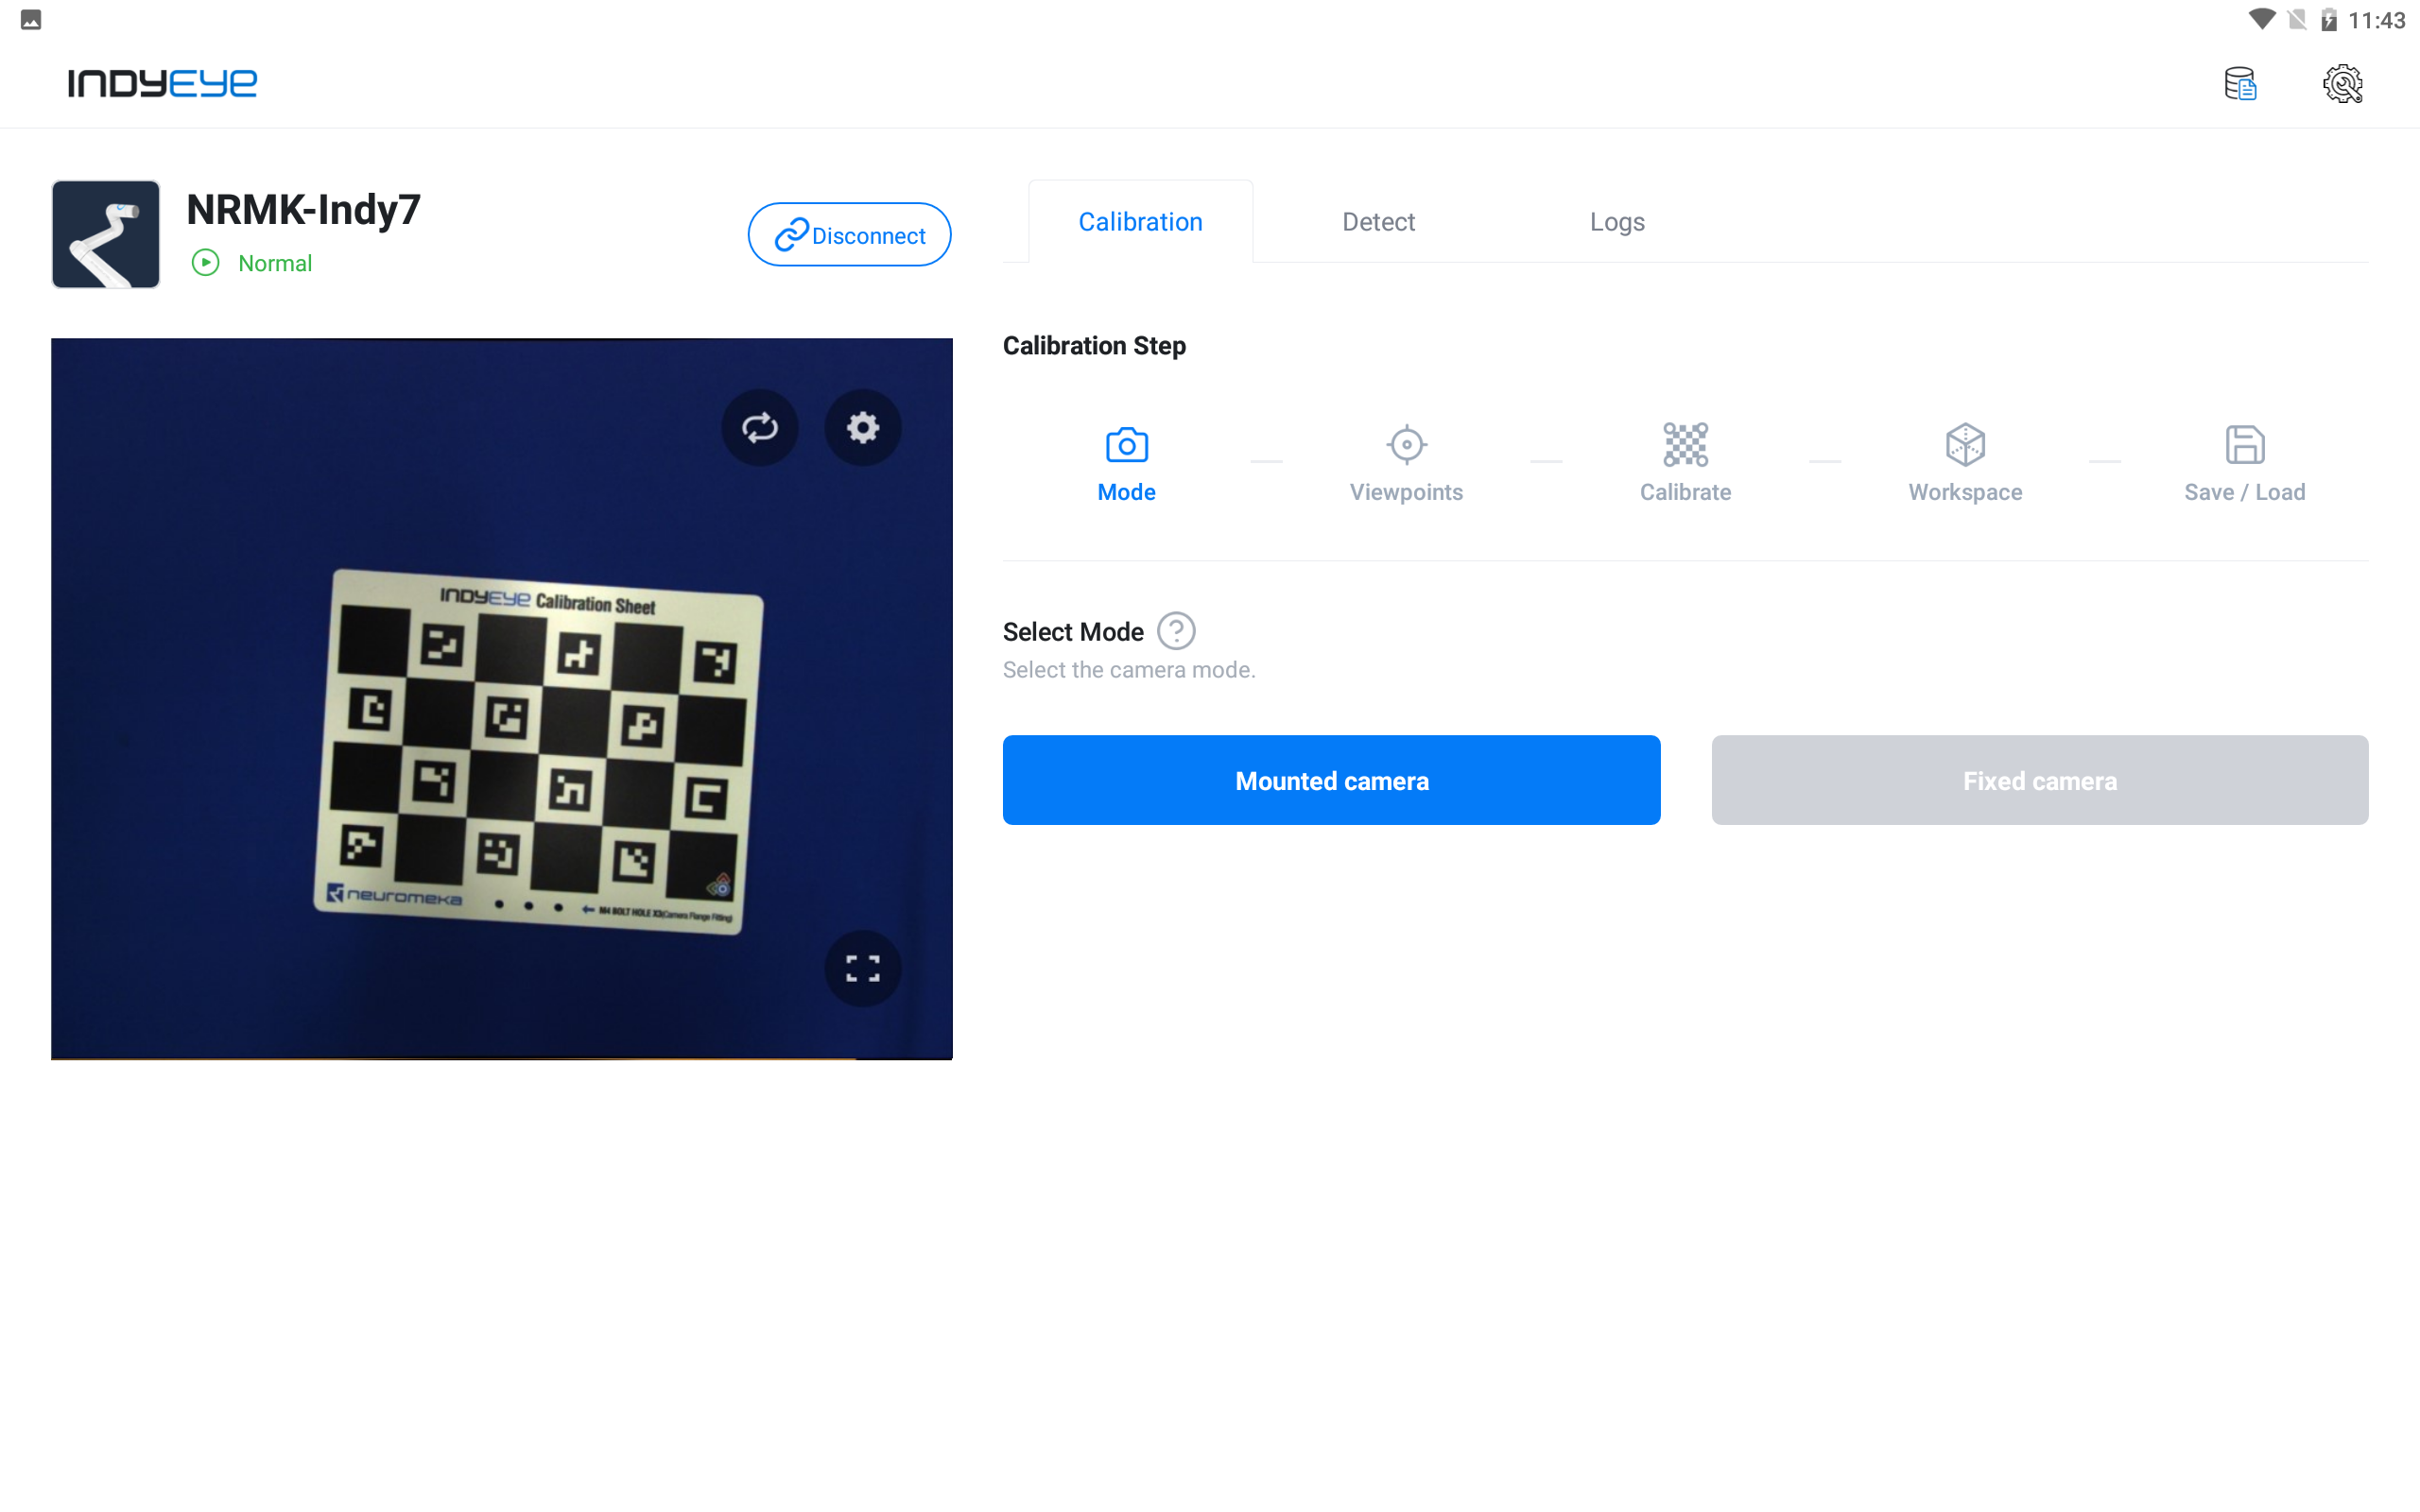
Calibration Tab
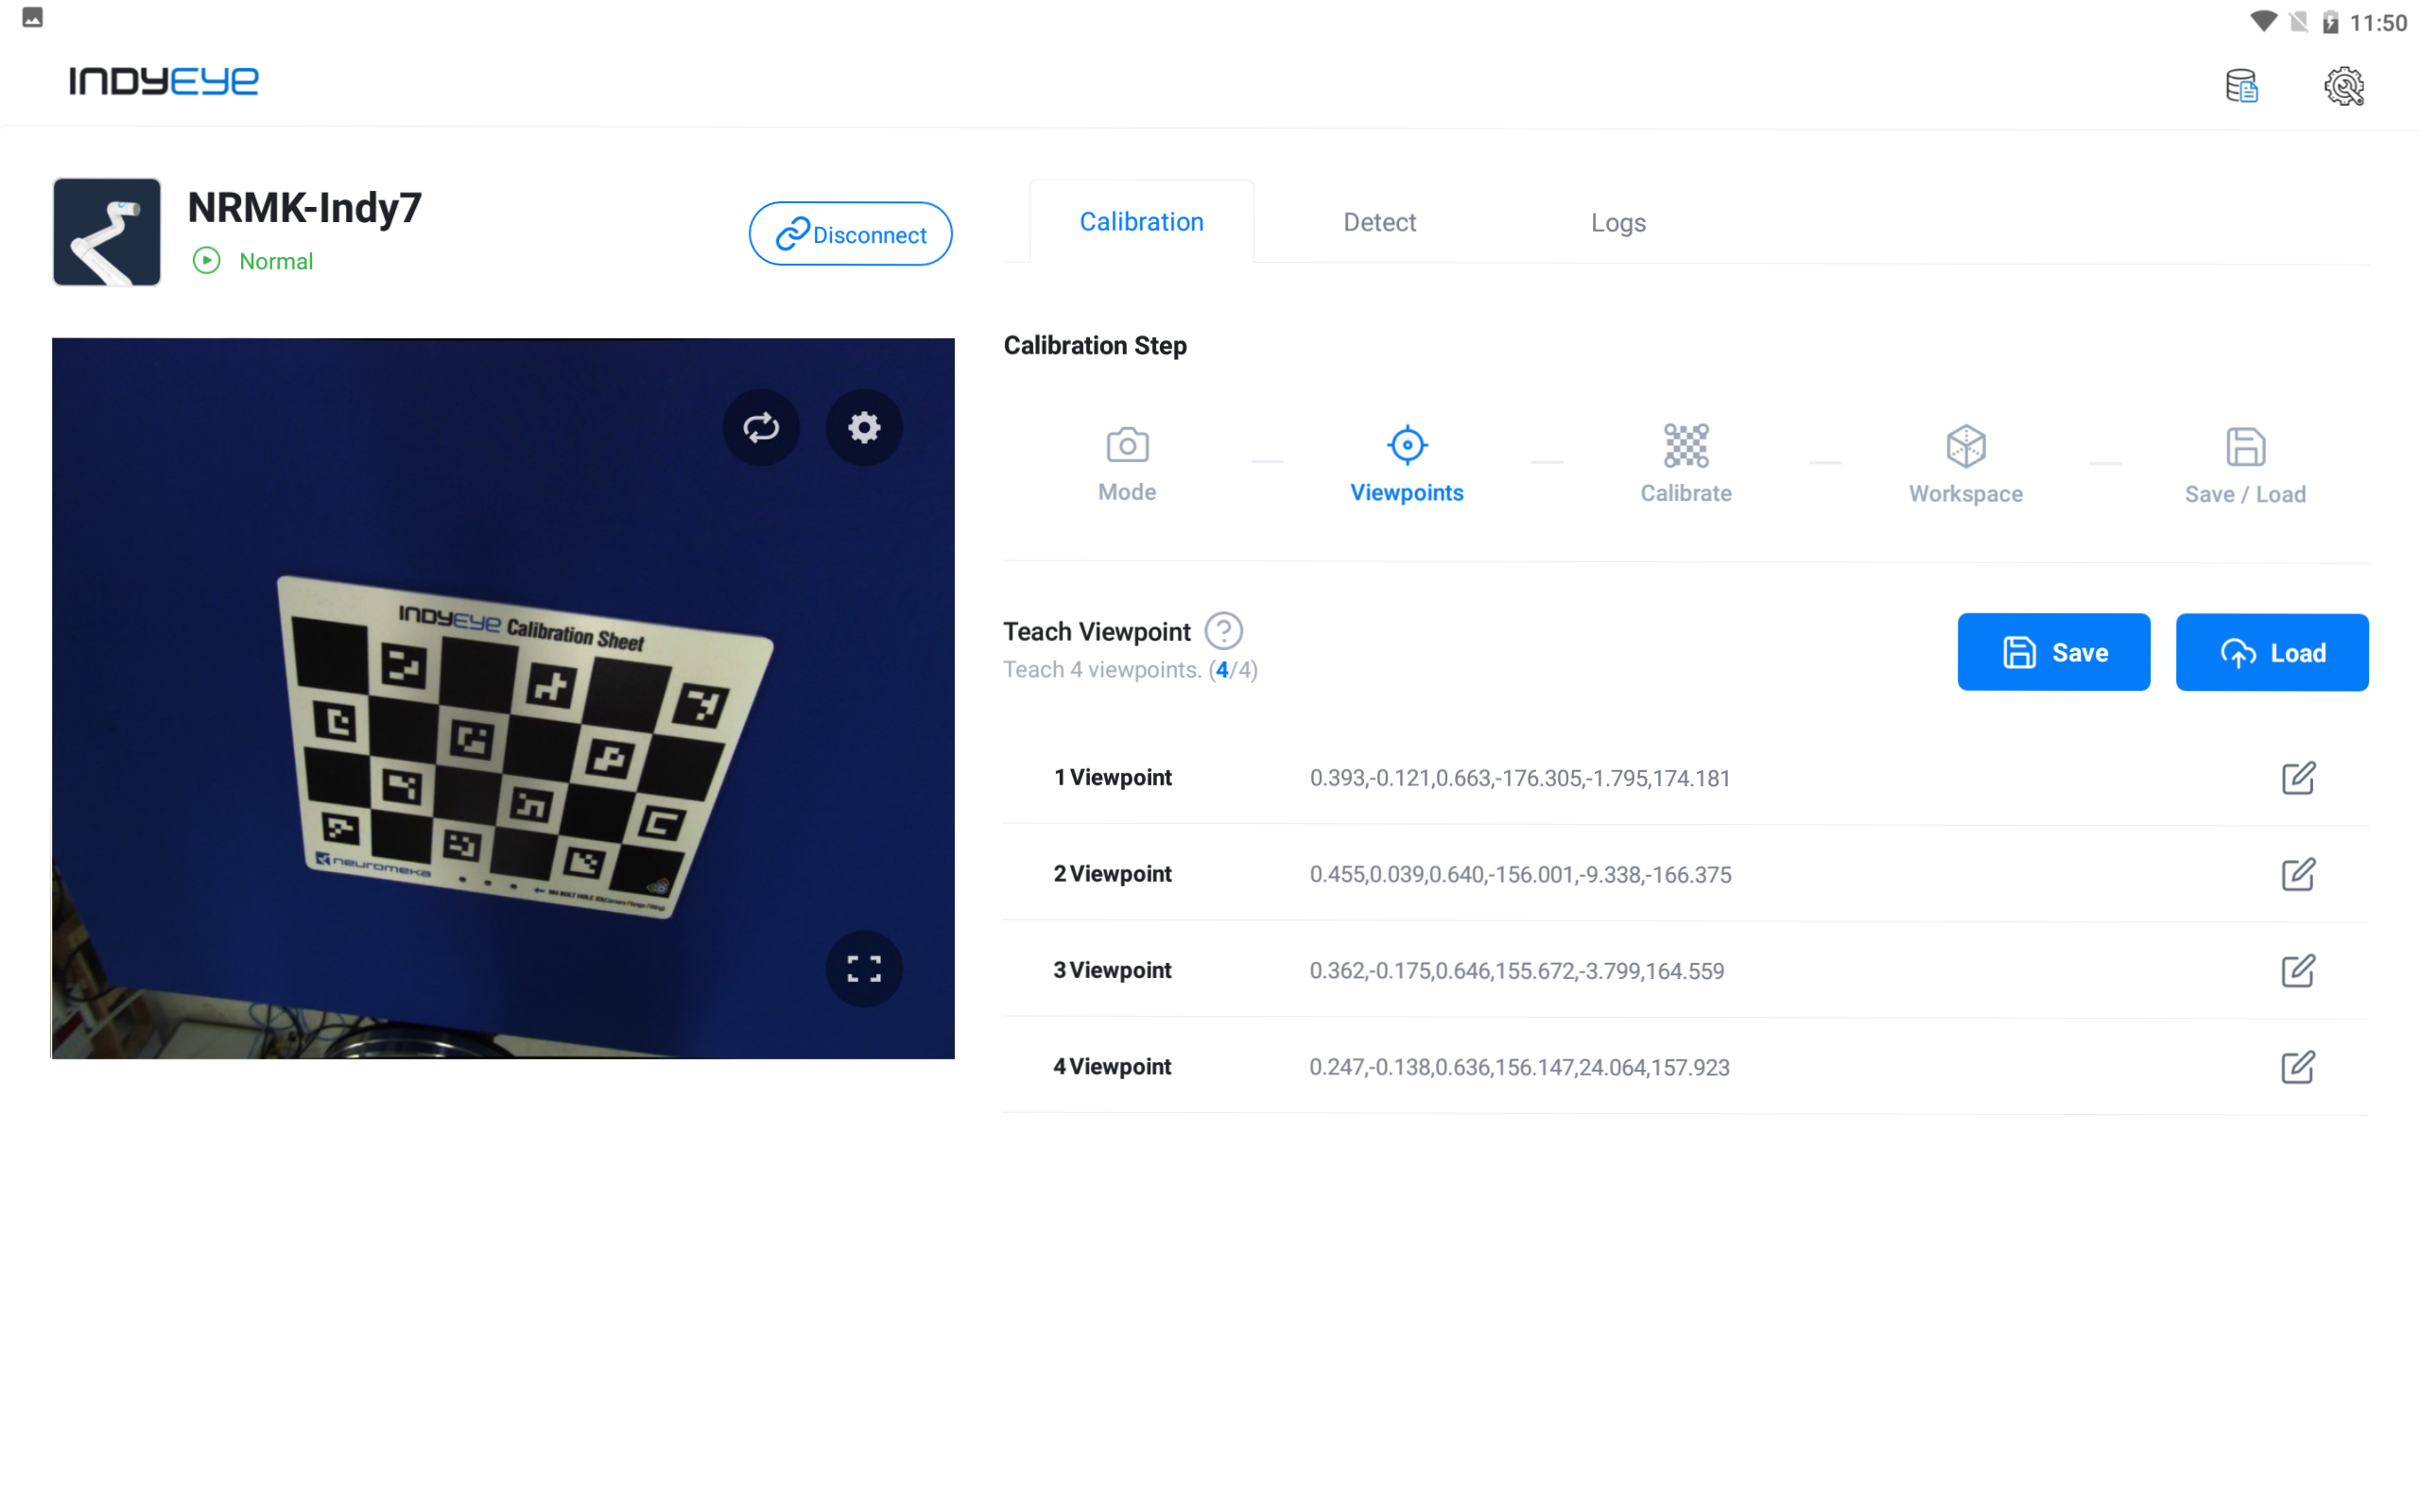
Next, click the Viewpoints tab and proceed to Base Viewpoint Teaching in order to define the robot’s movement range. Like below, move the robot to base viewpoint and click the ‘Write’ icon to save. You can use direct teaching mode or Conty to move the robot, which were explained previously. After teaching, other defined viewpoints can be saved and loaded upon further calibration procedures by using the Save and Load button. Following the teaching method below, the last joint is adjusted to place the calibration sheet at the center of the app screen.
Warning
During teaching viewpoint 2 and 4, adjust axis 6 of the robot to equalize the screen’s horizontal and vertical axis to the calibration sheet. Also, adjust the distance between IndyEye and the sheet to make the sheet take over 1/3 of the screen before calibration.
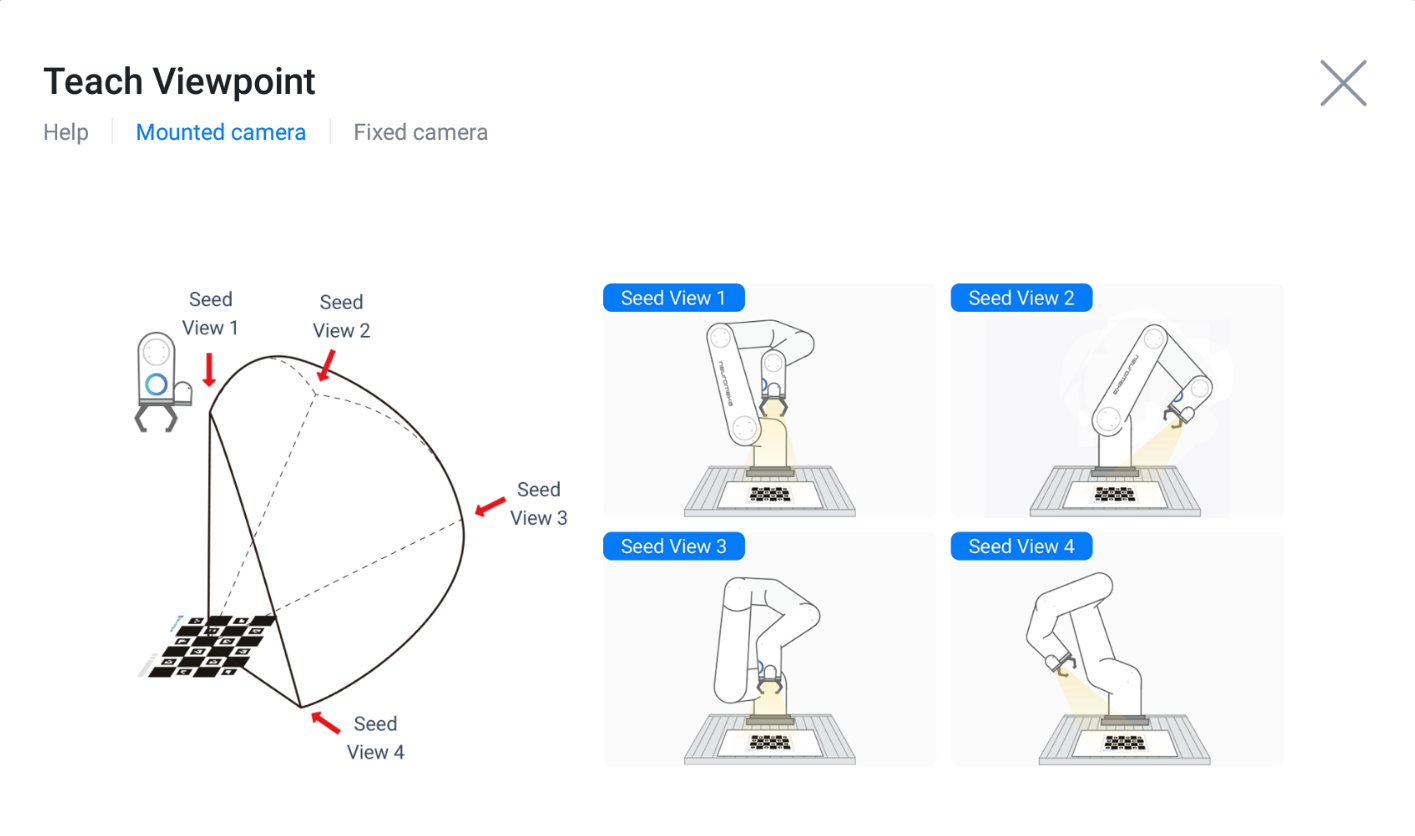

Teaching of Seed Views
Teaching of Seed Views completed
Next, in the calibration tab, click Start Calibration, and the button will change to Stop Calibration. The robot will automatically move and take pictures of the calibration sheet. It alternates between taking pictures and performing calibration calculations, and the robot may be stationary during the calibration calculations. The entire process takes about 2 to 5 minutes, and when it is completed, a message saying Calibration Complete will be displayed.
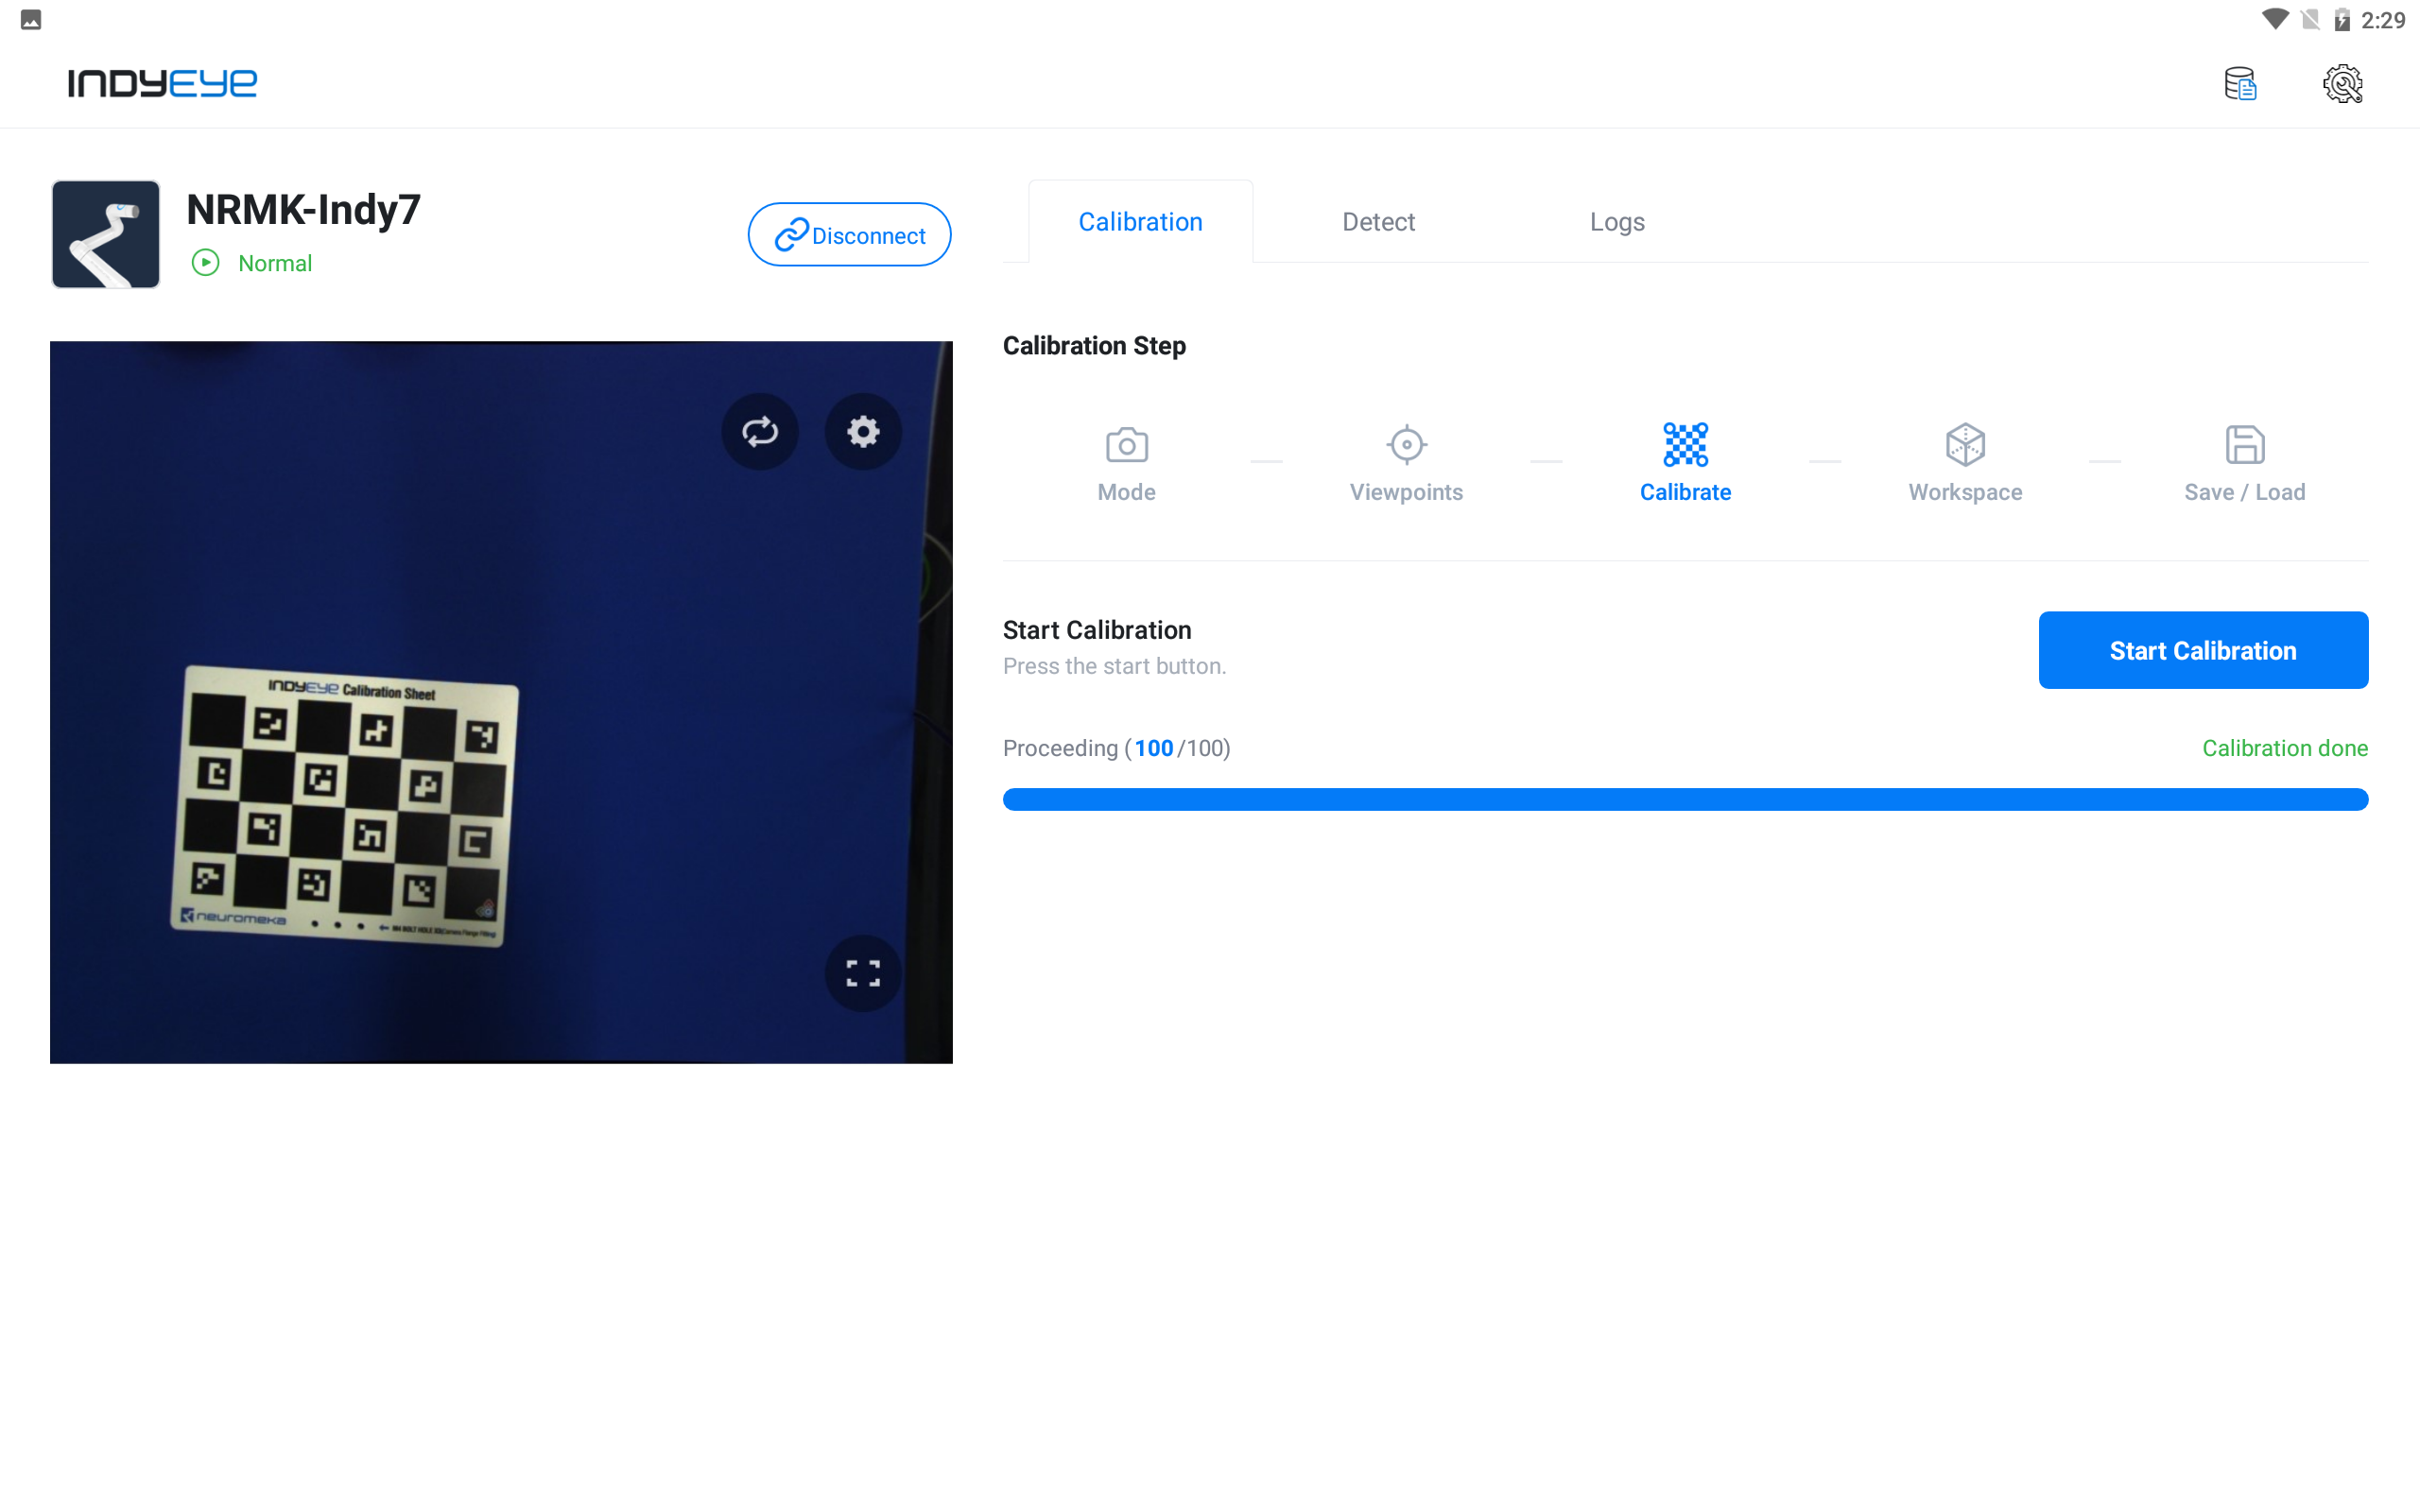
Calibration done
In the Workspace a coordinate system on top of the sheet will be displayed after clicking the Detect button. If the calibration was setup successfully the coordinate system should be positioned correctly on the sheet. Manual adjustments can be made using the dials at the bottom right of the screen. This is recommended when very precise movements or detection is desired from IndyEye.

Workspace Settings
In the Save/Load tab it’s possible to Save the current calibrations or Load previous settings. To set the settings as the default settings click Set default. The default settings can be loaded with the Load default button.

Save calibration results
Using the Graph module
IndyEye Graph Module
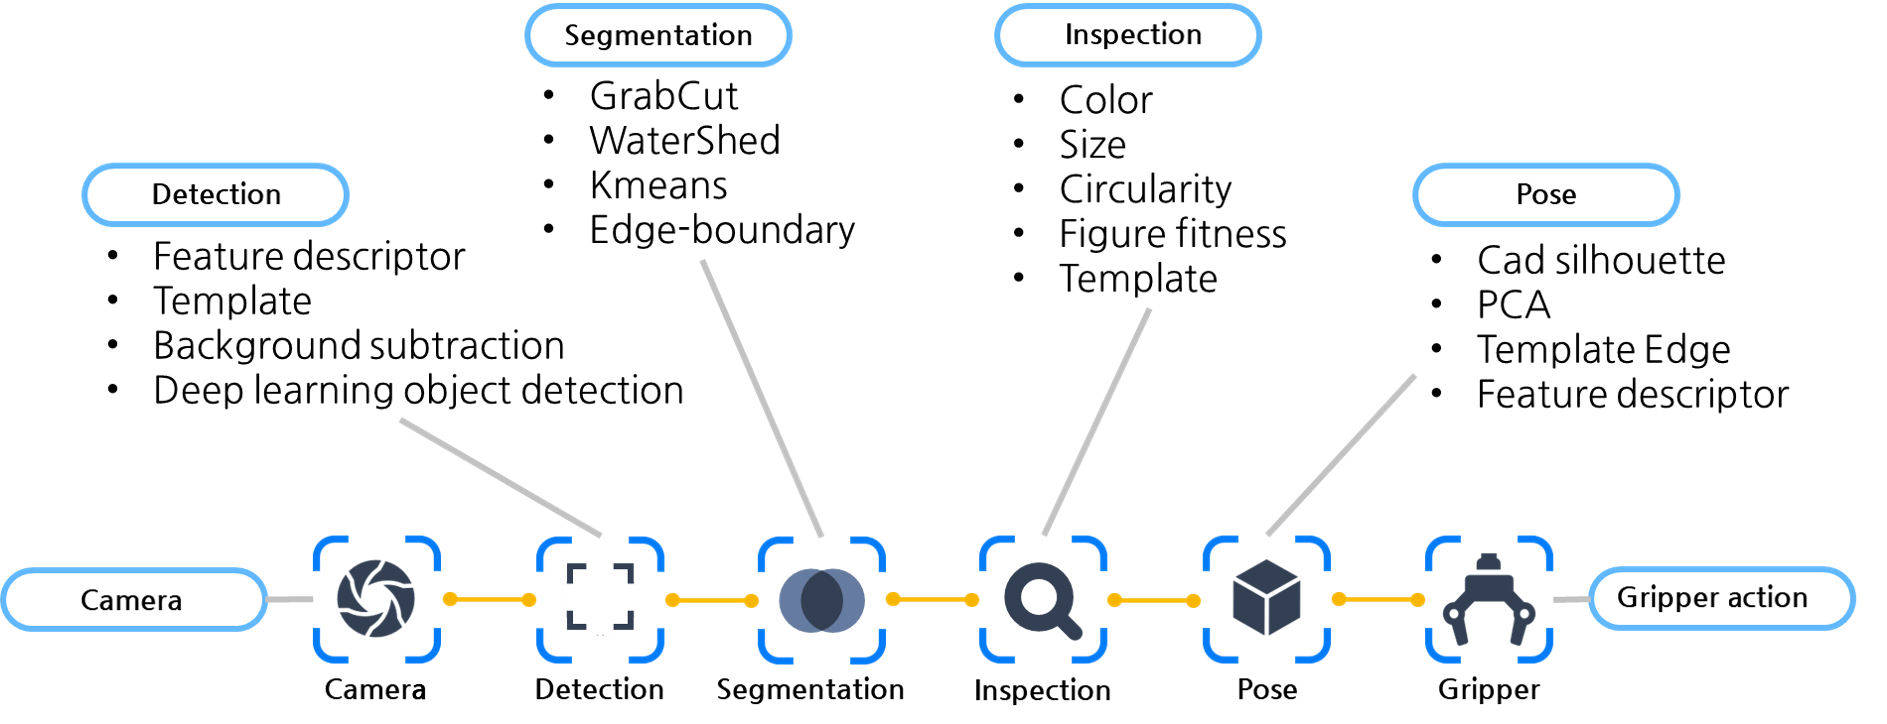
Object detection can be performed in the Detection tab with use of the Graph module, setting the detection algorithm. The basic structure is composed of an input sensor (Camera), Detection, Segmentation, Inspection, Pose and Action (i.e. gripper movement). The detection algorithm can be edited by adding and modifying each module. By clicking Modify Graph from the detection tab, all the available modules can be checked. A detailed description of each graph module can be found by clicking on the graph module list Graph Modules List or at the help icon inside the IndyEye app. Basic usage of the graph module will be introduced below through a simple detection example.
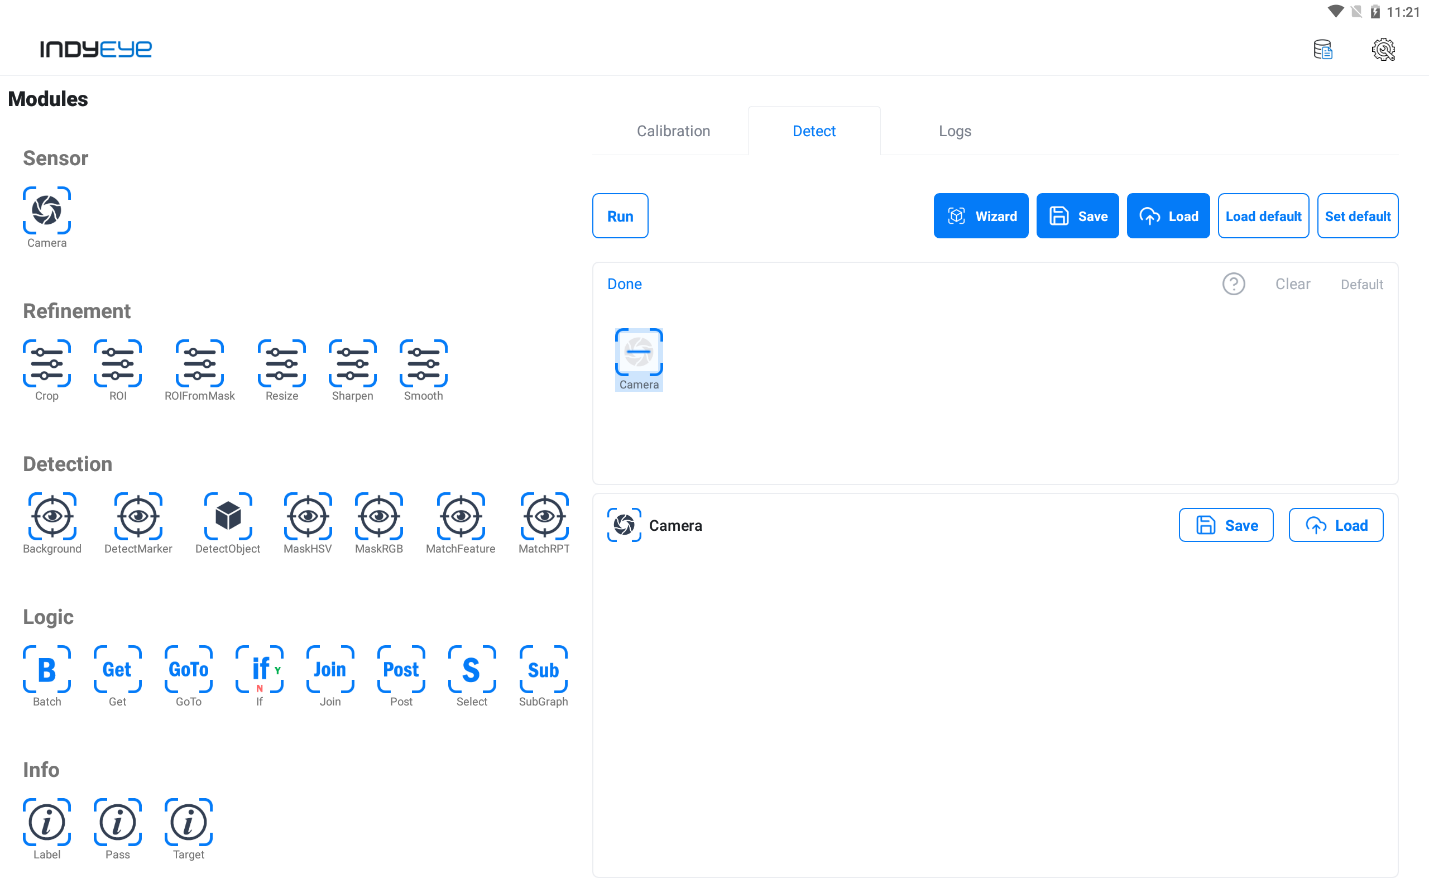
Add Camera Module
To start editing the graph, press the Graph edit button. Then the Camera module is selected as the Sensor being used. It’s possible to add a module by using drag and drop or clicking on the module to make the window below appear. Then, add DetectMarker from the Detection class. It can be added by either drag and drop or clicking the module and the window shown below.
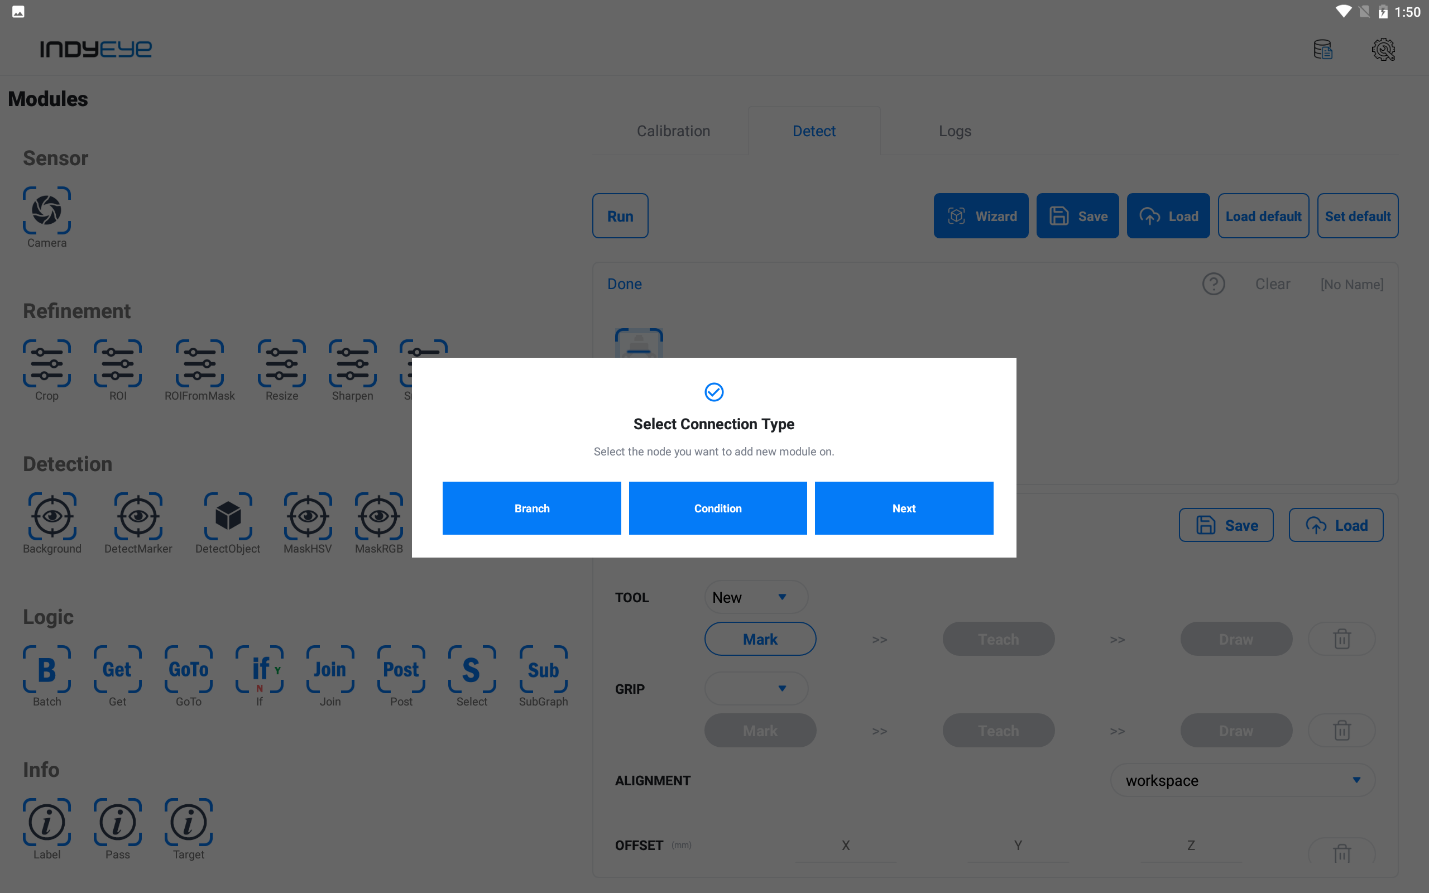
Selection of Connection Type
Next will add the module right after the previous module, Branch is used together with Switch statements and will add the module below the previous module. Condition will add a module above the previous module and will only be invoked if a condition is matched. In this (simple) example only the Next button will be used. No Refinement will be used, for Detection the DetectMarker option is chosen.

DetectMarker module settings
From the Logic class the Select module is added to the graph, which is necessary after the Detection class module. DetectMarker will detect any objects recognized as markers, with Select being the best match that can be selected. Within the Select module settings, the KEY selected is the score combined with the largest METHOD, meaning the object with the best match will be chosen. Then by pressing Save the program settings are saved.
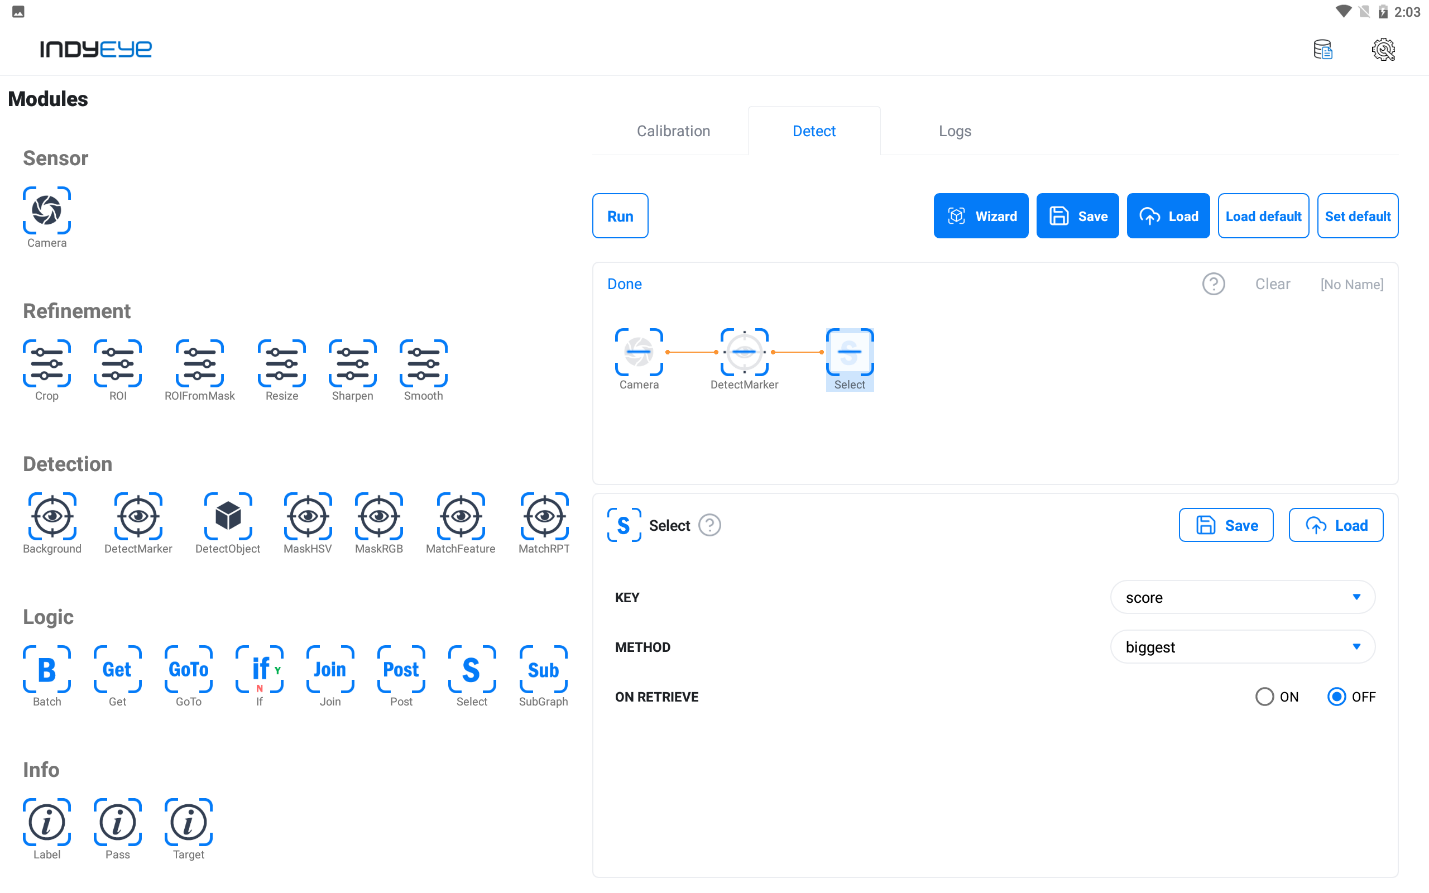
Select module settings
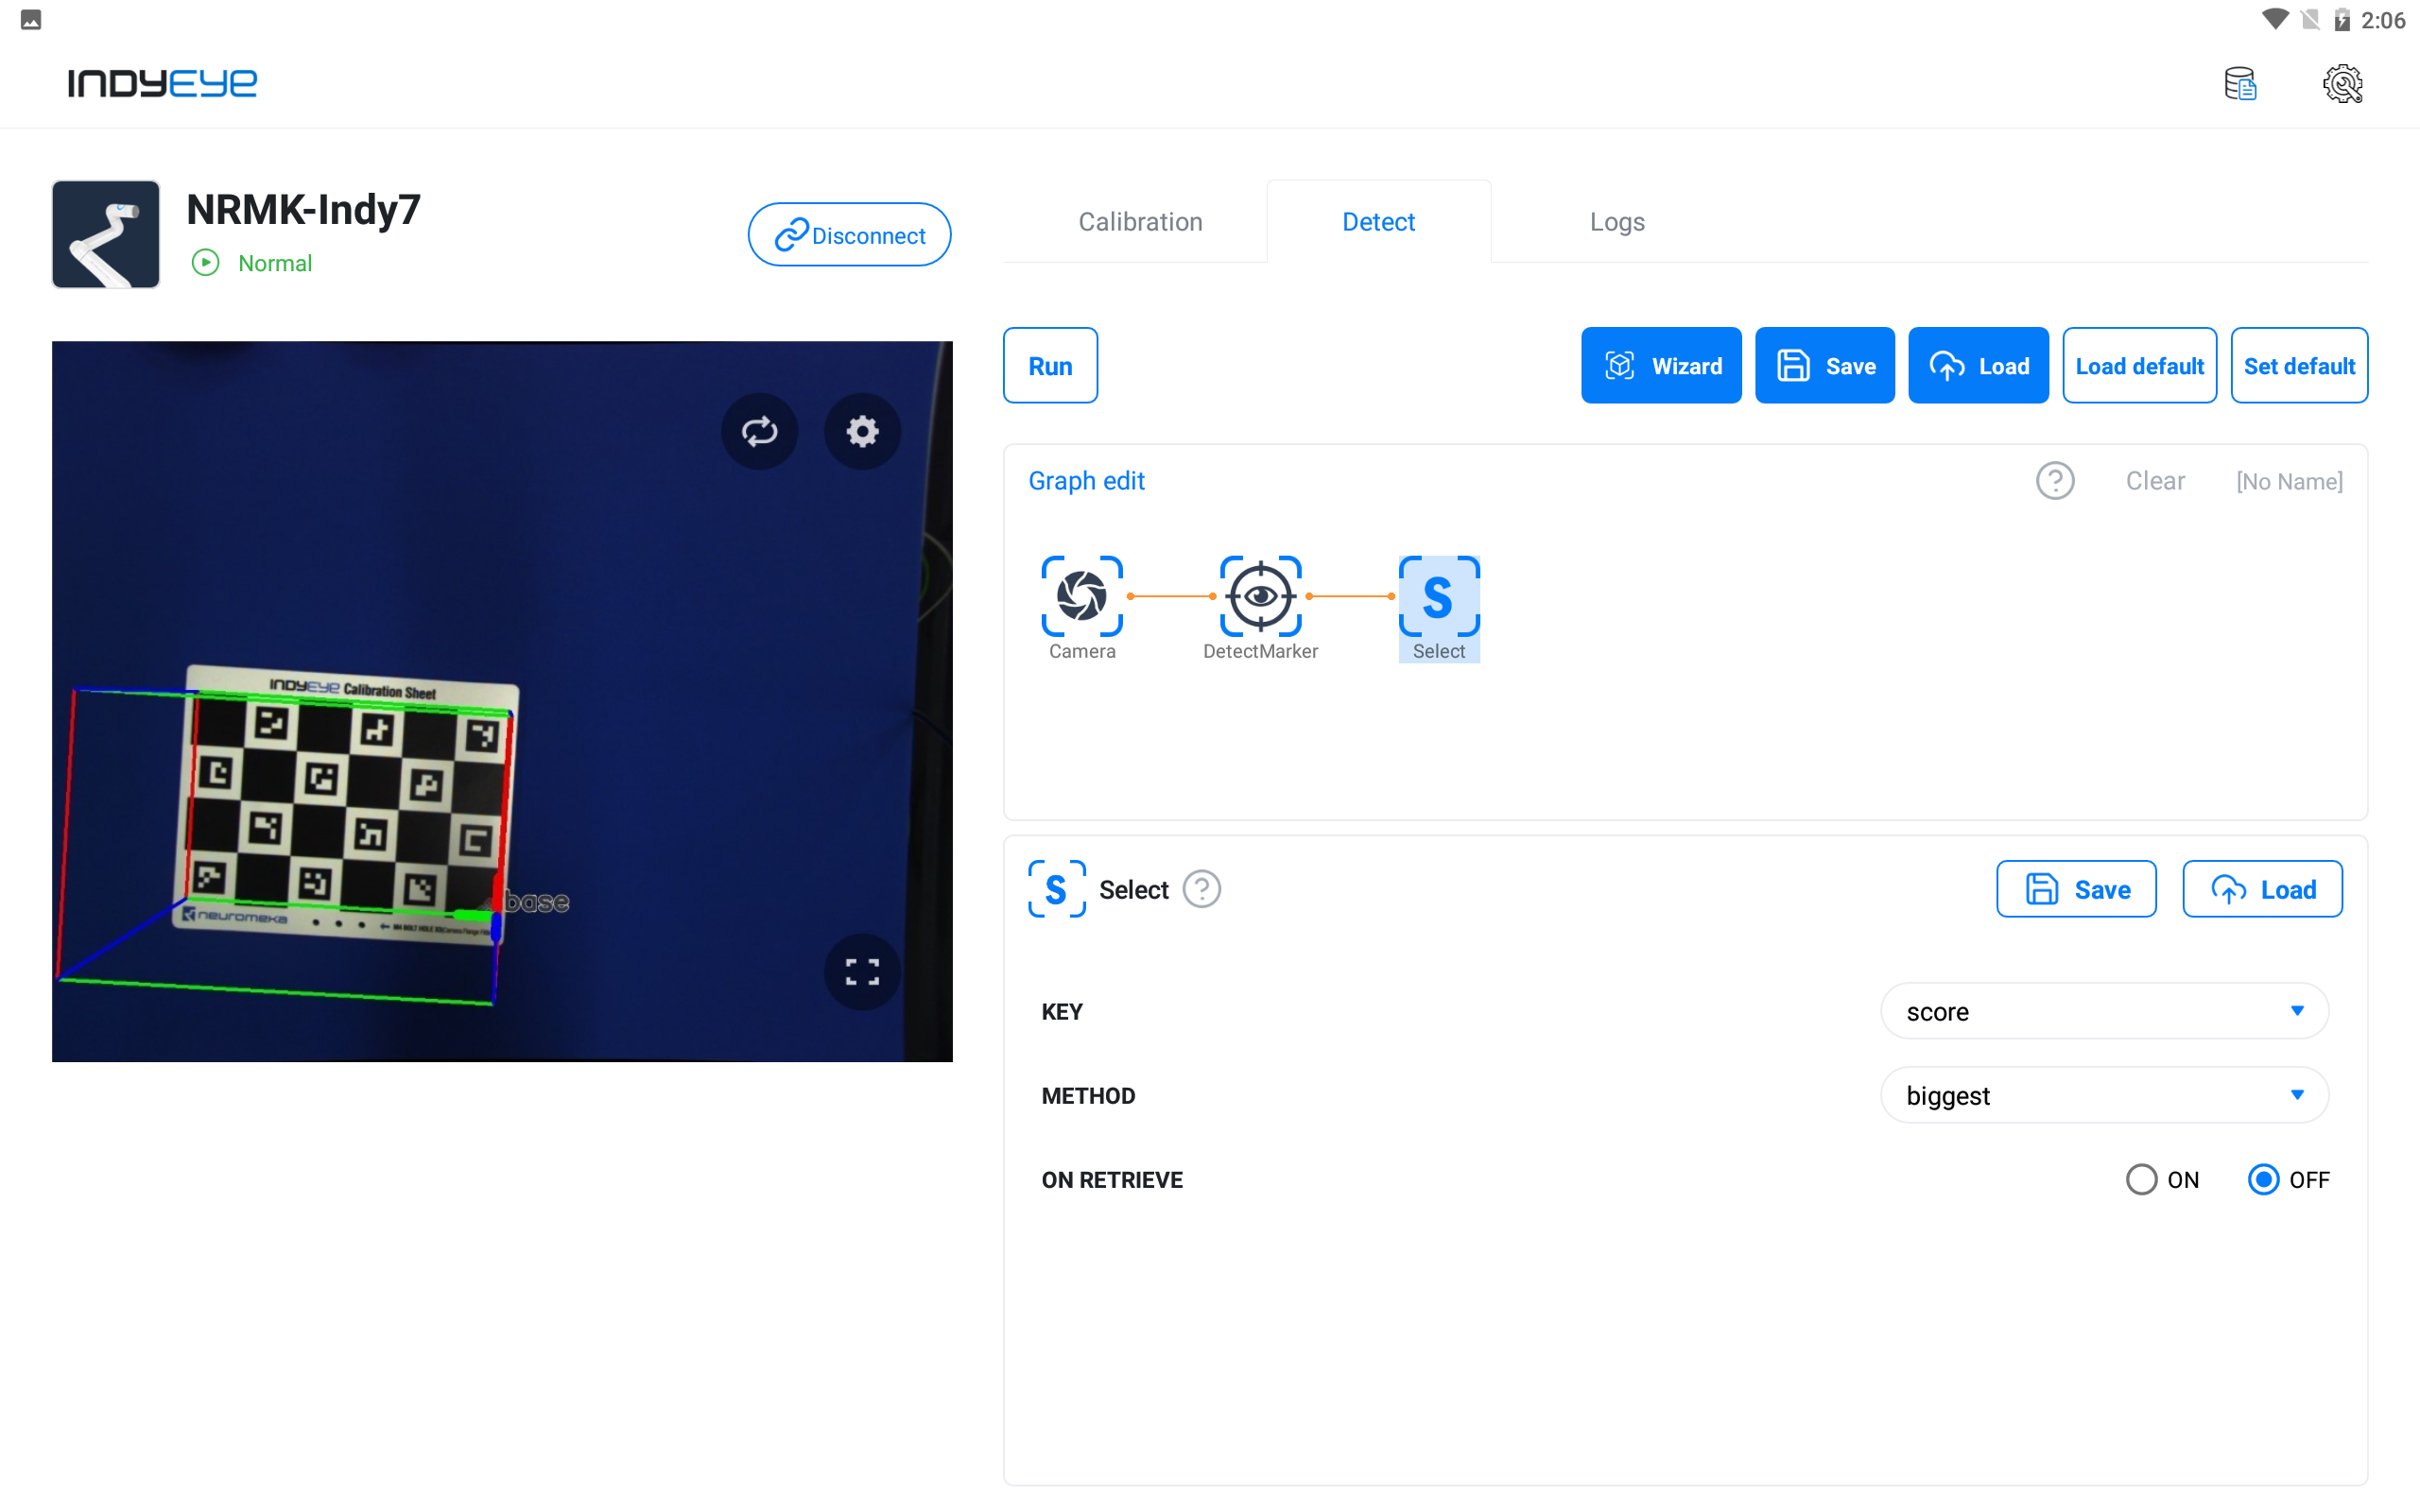
Completed Graph
Once completed, click the Run button to execute the algorithm. As expected, the sheet is recognized as the closest match for the detection through DetectMarker.
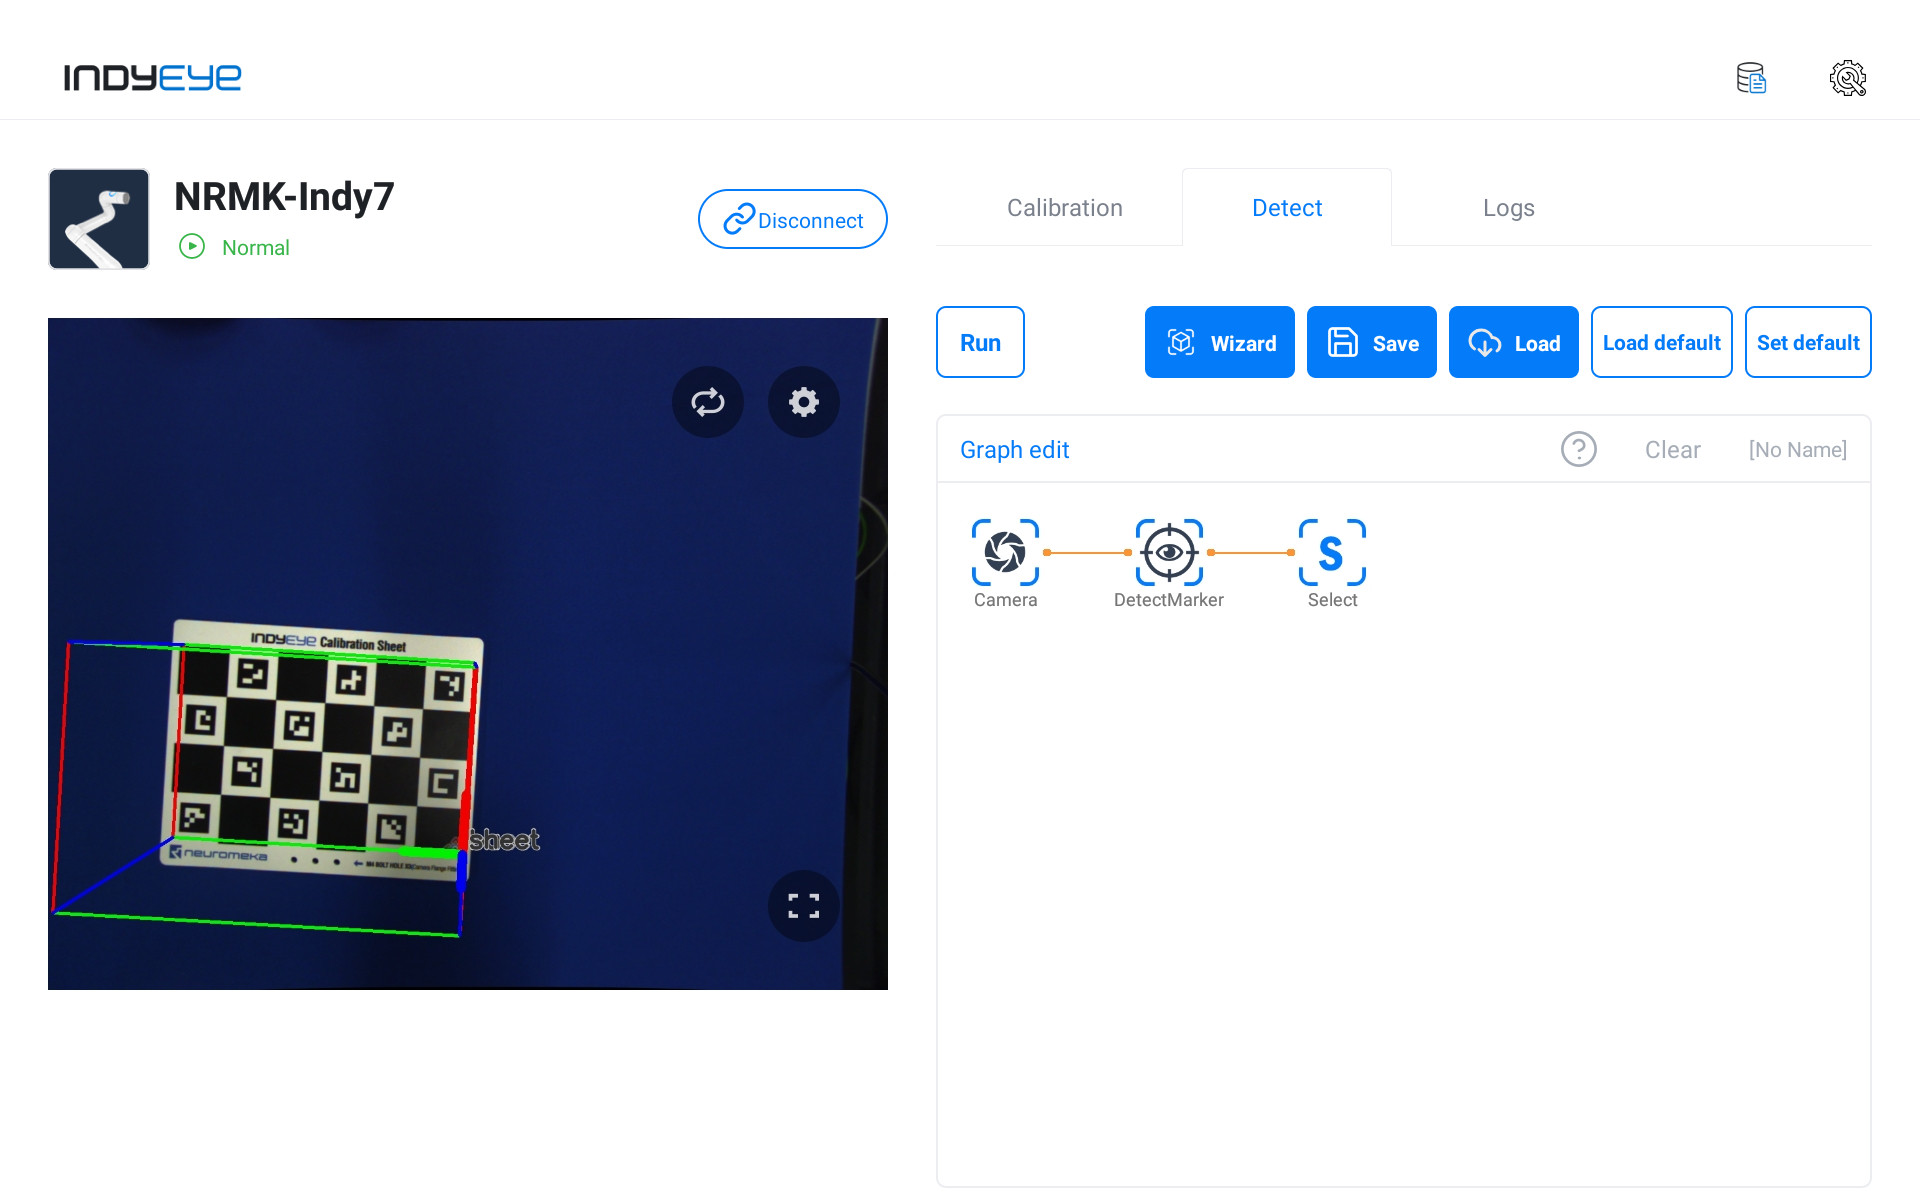
Sheet recognition results
With this short example the first chapter of IndyEye has ended. In the next chapter more advanced IndyEye tutorials such as object inspection and pick and place will be explained.
