Tutorial
Building a PD Controller Example
This tutorial provides a step-by-step guide for users to implement and build their own custom controller components within the IndySDK development environment. Component building in IndySDK utilizes CMake. For convenience, this tutorial will demonstrate using JetBrains' CLion IDE, which facilitates the use of CMake.
As an example of controller implementation, we will explain the construction of a Joint Space PD Set-point Regulation Controller, a well-known example in robotics for ensuring passivity and asymptotic stability in multi-degree-of-freedom robotic manipulators.
Creating a Component and Loading CMake
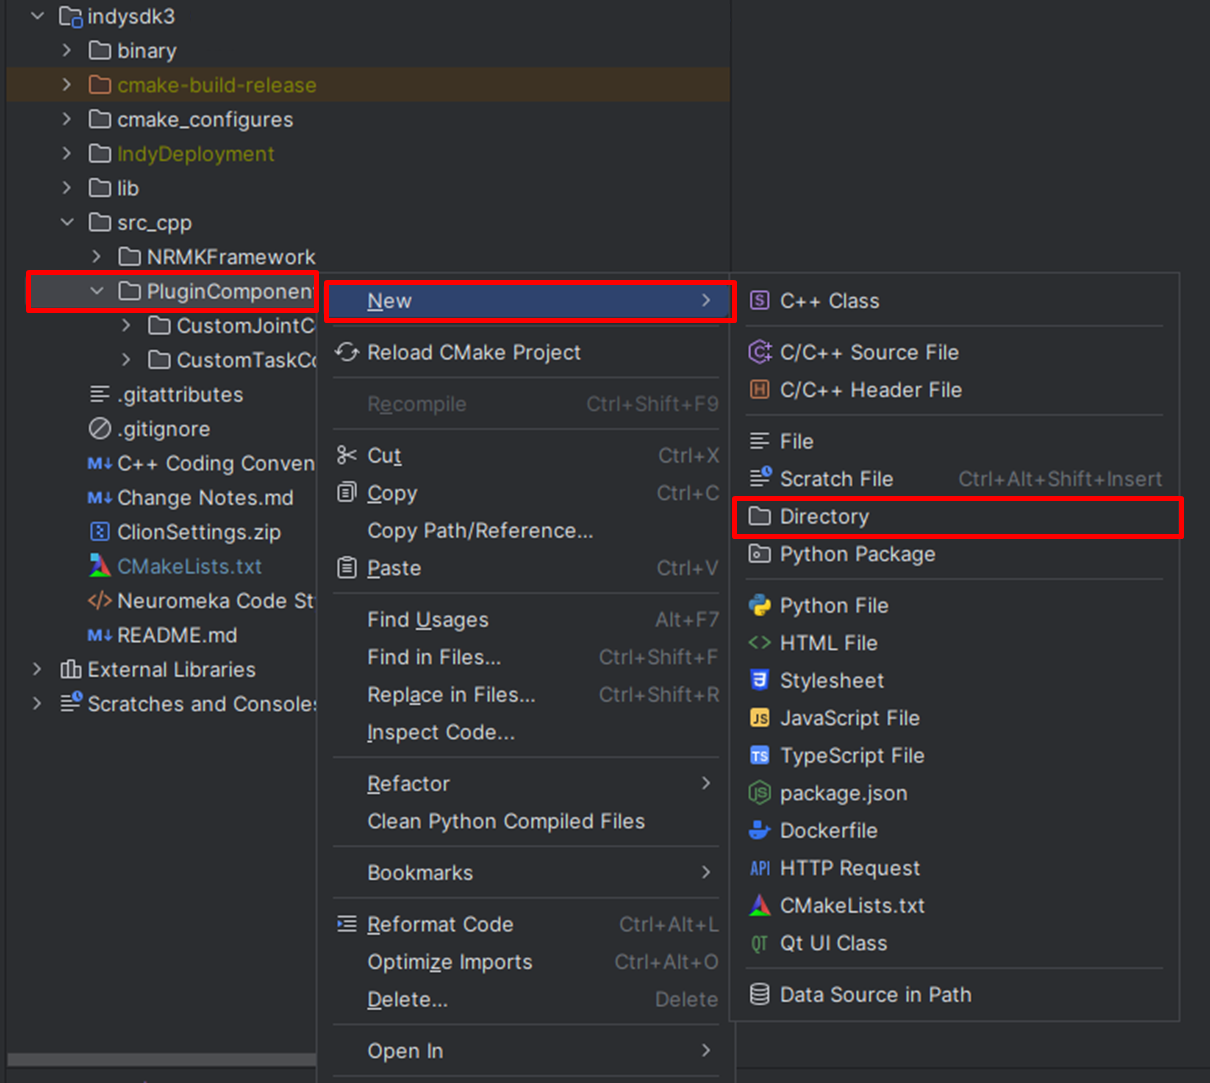
After cloning the provided Git repository project, add a new directory within the src_cpp/PluginComponents folder of the project path to create a new plugin component.
Steps to create a new plugin component folder:
- Create a new folder (
CustomPdJointController) under thesrc_cpp/PluginComponentsfolder.
Creating a New Plugin Component Folder
- Create C++ class files (
CustomPdJointController.h, CustomPdJointController.cpp) insrc_cpp/PluginComponents/CustomPdJointController.
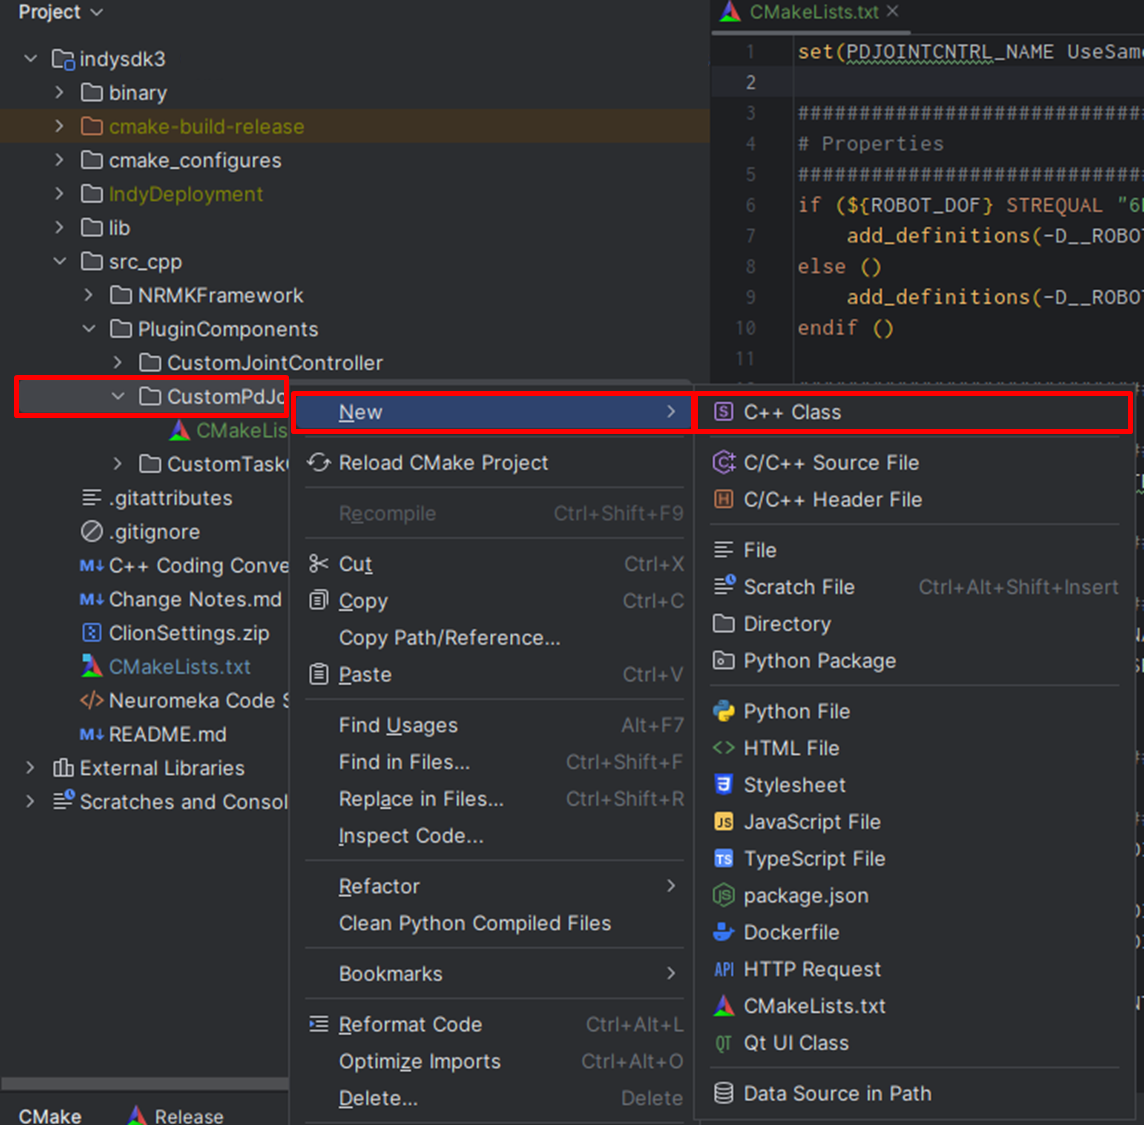
- Create a
CMakeLists.txtfile insrc_cpp/PluginComponents/CustomPdJointController.
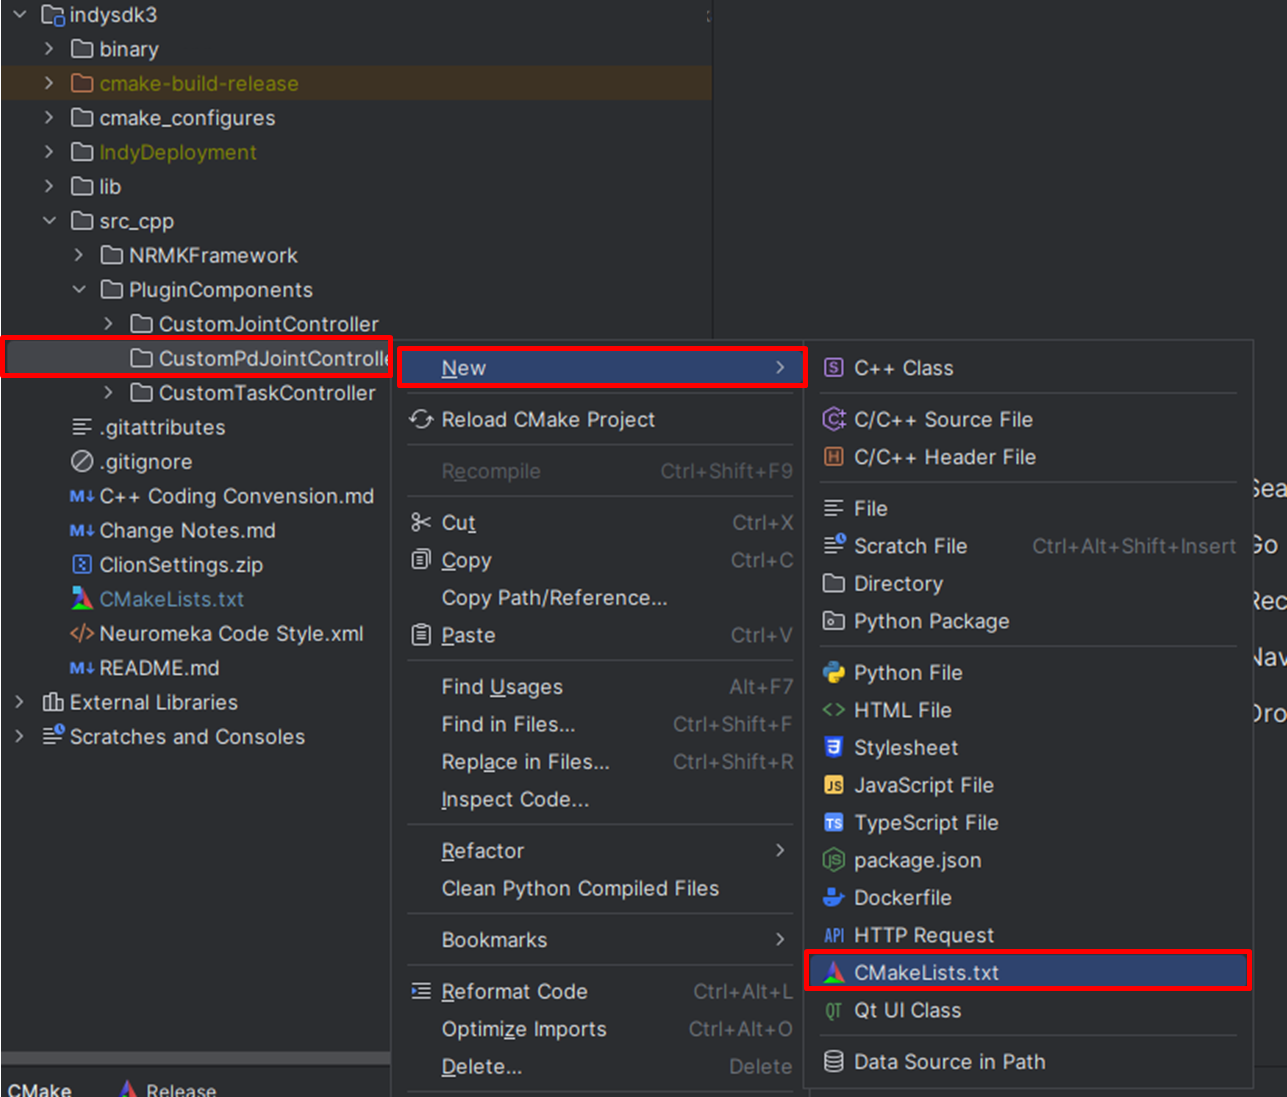
Adding CMakeLists File
- Write the code in the created
CMakeLists.txtfile as follows:
set(PDJCTRLCOMP_NAME CustomPdJointControllerCreator)

#############################################################
# Properties                                                #
#############################################################

#############################################################
# Sources                                                   #
#############################################################
file(GLOB_RECURSE PDJCTRLCOMP_SRC "*.cpp")

#############################################################
# Shared Library (Plugin)                                   #
#############################################################
add_library(${PDJCTRLCOMP_NAME} MODULE
            ${PDJCTRLCOMP_SRC}
)

#############################################################
# Libraries linking                                         #
#############################################################
target_link_libraries(${PDJCTRLCOMP_NAME} ${LIBS})

set_target_properties(${PDJCTRLCOMP_NAME} PROPERTIES SUFFIX ".comp")
set_target_properties(${PDJCTRLCOMP_NAME} PROPERTIES PREFIX "")

install (TARGETS ${PDJCTRLCOMP_NAME} DESTINATION ./PluginComponents)
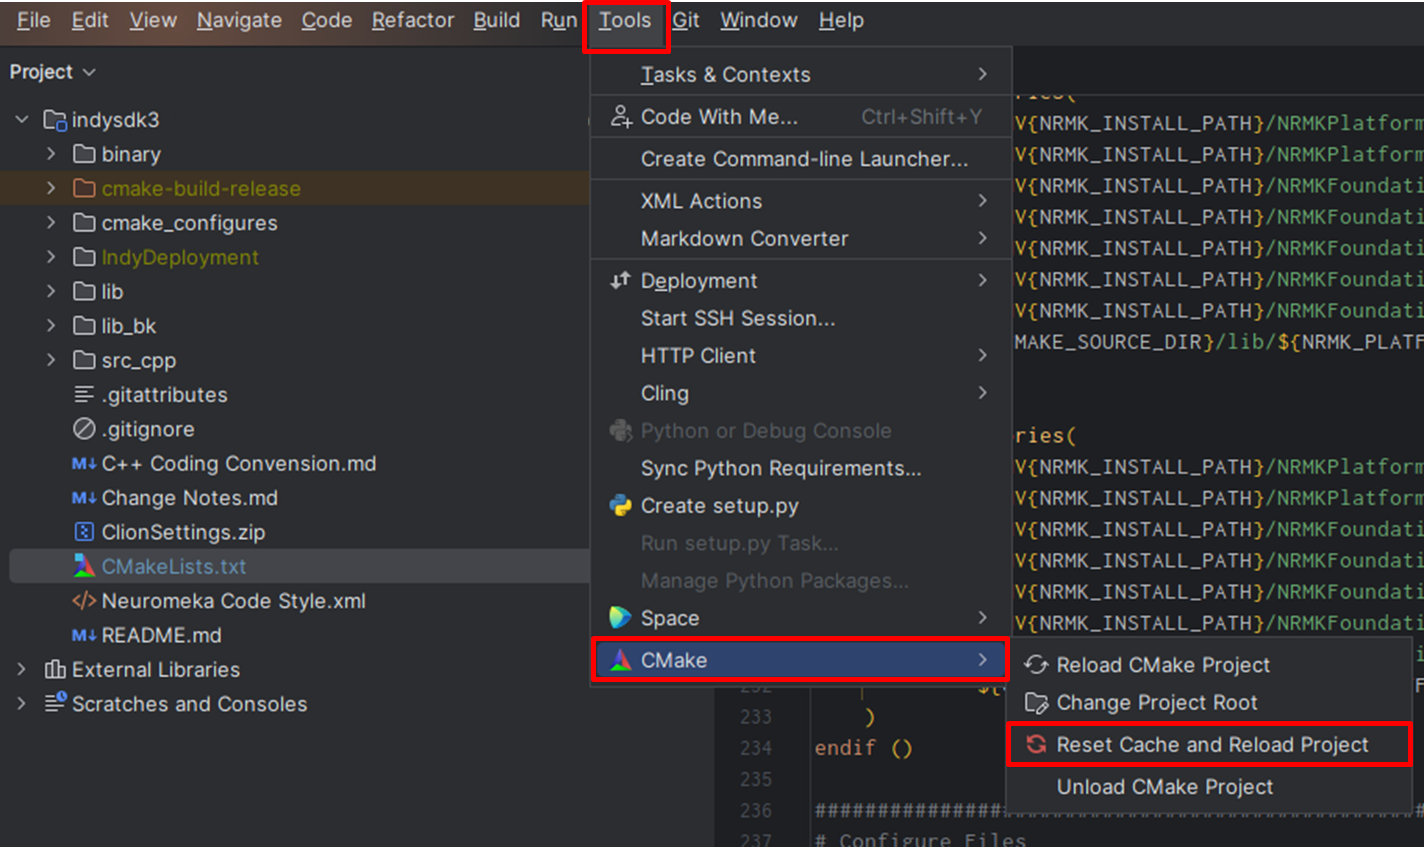
- Use
Tools>CMake>Reset Cache and Reload Projectto load CMake.
Component Template
Create header and source file templates for the joint space PD controller component build.
Header File Template
#pragma once

/**< Necessary includes */
#include <NRMKFramework/AbstractComponent/ControlAlgorithm.h>
#include <NRMKFramework/GlobalDefinitions.h>
#include <Controller/PositionController.h>

#include <Poco/ClassLibrary.h>
#include <Poco/ClassLoader.h>
#include <Poco/MetaObject.h>

template<typename ROBOT>
class CustomPdJointController : public NRMKControl::ControlAlgorithm<ROBOT>
{
    // Type definitions for clarity and ease of maintenance
    typedef NRMKControl::ControlAlgorithm<ROBOT> AlgorithmBase;
    typedef typename AlgorithmBase::ControlGains ControlGains;
    typedef typename NRMKControl::ControlAlgorithm<ROBOT>::MotionData MotionData;
    typedef typename NRMKControl::ControlAlgorithm<ROBOT>::ControlData ControlData;
    typedef typename ROBOT::JointVec JointVec;
    typedef typename ROBOT::JointMat JointMat;

public:
    /**< Constructor and member functions */
    CustomPdJointController() = default;
    virtual void initialize(ROBOT& robot, double delt) override;
    virtual void reset(ROBOT& robot) override;
    virtual void compute(ROBOT& robot, const LieGroup::Vector3D& gravityDir,
                         const MotionData& motionData, ControlData& controlData) override;

private:
    JointVec _kp = this->gain0;
    JointVec _kv = this->gain1;
};

/**< Class creator to facilitate dynamic loading if necessary */
class CustomPdJointControllerCreator : public NRMKControl::ControlAlgorithmCreator
{
    CONTROL_CREATOR_BODY(CustomPdJointController)
};
Source File Template
The source file contains definitions for functions declared in the header file. Here, users are expected to implement their controller.
#include "CustomPdJointController.h"

template<typename ROBOT>
void CustomPdJointController<ROBOT>::initialize(ROBOT &robot, double delt)
{
    /**< Initialization logic for the controller */
}

template<typename ROBOT>
void CustomPdJointController<ROBOT>::reset(ROBOT &robot)
{
    /**< Reset logic for the controller */
}

template<typename ROBOT>
void CustomPdJointController<ROBOT>::compute(ROBOT &robot, const LieGroup::Vector3D &gravDir,
                                             const MotionData &motionData, ControlData &controlData)
{
    /**< Retrieve the updated gains by gRPC protocols */
    _kp = this->gain0;
    _kv = this->gain1;

    /**< Compute gravitational torque based on the robot's current configuration and gravity direction */
    robot.idyn_gravity(gravDir);
    JointVec tauGrav = robot.tau();

    /**< Calculate the PD control torque */
    JointVec tauPD = _kp.cwiseProduct(motionData.motionPoint.qd - robot.q()) - _kv.cwiseProduct(robot.qdot());

    /**< Combine PD and gravitational torques for the final control command */
    controlData.controlTorque.tau = tauPD + tauGrav;
}

/**< Manifest to allow dynamic loading of the control algorithm */
POCO_BEGIN_MANIFEST(NRMKControl::ControlAlgorithmCreator)
POCO_EXPORT_CLASS(CustomPdJointControllerCreator)
POCO_END_MANIFEST
Note
The class name CustomPdJointController and the Creator CustomPdJointControllerCreator in the template are used as examples. Please ensure consistent naming and use of class names and Creators when implementing your custom component.
Creator Declaration and Definition
The class name CustomPdJointController and Creator CustomPdJointControllerCreator are provided as examples for consistent naming and usage in your custom component development. The Creator class must have a POCO Manifest declaration in the header file, and be defined in the cpp file as follows.
Header File
// Class creator to facilitate dynamic loading if necessary
class MyCustomJointControllerCreator : public NRMKControl::ControlAlgorithmCreator
{
    CONTROL_CREATOR_BODY(MyCustomJointController)
};
cpp file
POCO_BEGIN_MANIFEST(NRMKControl::ControlAlgorithmCreator)
POCO_EXPORT_CLASS(MyCustomJointControllerCreator)
POCO_END_MANIFEST
Implementing PD+Gravity Compensation Controller
Now, based on the provided template, you can implement the joint space PD (Proportional-Derivative) controller and feedforward gravity compensation control algorithm.
Here is an implementation of the compute function:
Additionally, the gain value is initialized to 0 when this controller is executed. Please set the gain value through gain tuning before using it.
template<typename ROBOT>
void CustomPdJointController<ROBOT>::compute(ROBOT &robot, const LieGroup::Vector3D &gravDir,
                                             const MotionData &motionData, ControlData &controlData)
{
    /**< Retrieve the updated gains by gRPC protocols */
    _kp = this->gain0;
    _kv = this->gain1;

    /**< Compute gravitational torque based on the robot's current configuration and gravity direction */
    robot.idyn_gravity(gravDir);
    JointVec tauGrav = robot.tau();

    /**< Calculate the PD control torque */
    JointVec tauPD = _kp.cwiseProduct(motionData.motionPoint.qd - robot.q()) - _kv.cwiseProduct(robot.qdot());

    /**< Combine PD and gravitational torques for the final control command */
    controlData.controlTorque.tau = tauPD + tauGrav;
}
- PD Control Gains Setting: Initialize proportional (kp) and derivative (kd) gain matrices. Configure individual proportional and derivative gains for each joint. The specified gains are for illustration, and you are expected to adjust PD gains appropriately for optimal performance.
- Gravity Torque: The robot's method
idyn_gravitycalculates gravity torque.
Building and Running the Component
To ensure the newly created plugin component directory, in this case, CustomPdJointController, is recognized and compiled, it must be included in the project's CMakeLists.txt file.
For this, modify the ../src_cpp/CMakeLists.txt file as follows:
#############################################################
# Build & Install
#############################################################
# Tasks
add_subdirectory(src_cpp/PluginComponents/CustomJointController)
add_subdirectory(src_cpp/PluginComponents/CustomTaskController)
add_subdirectory(src_cpp/PluginComponents/CustomPdJointController)
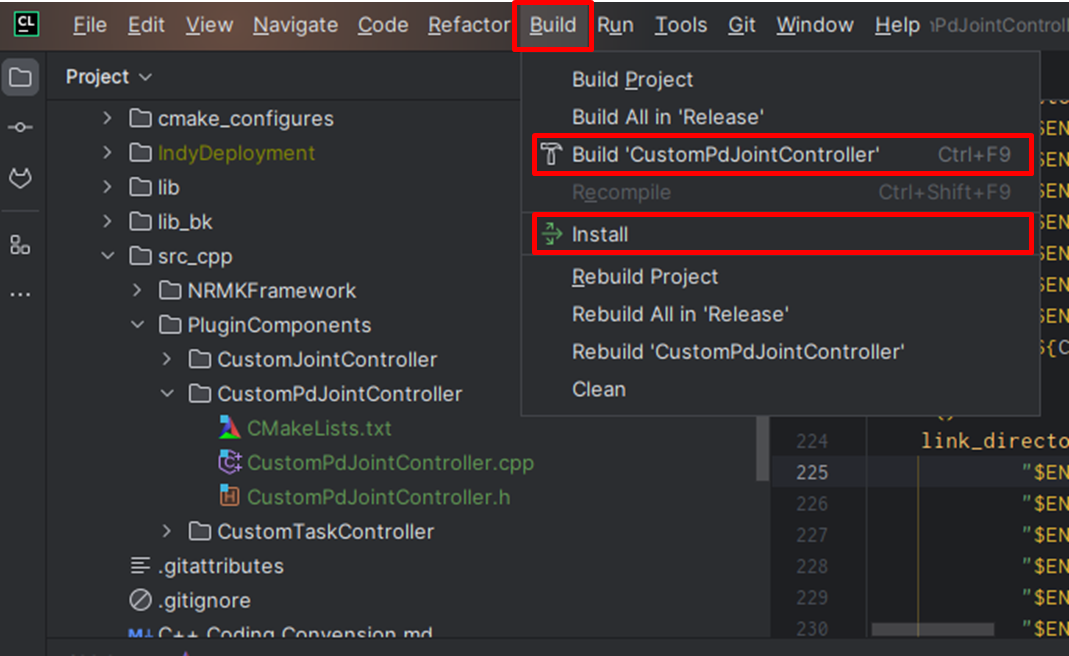
- Use
Tools>CMake>Reset Cache and Reload Projectto load CMake. - Build the project components through the
Buildmenu.
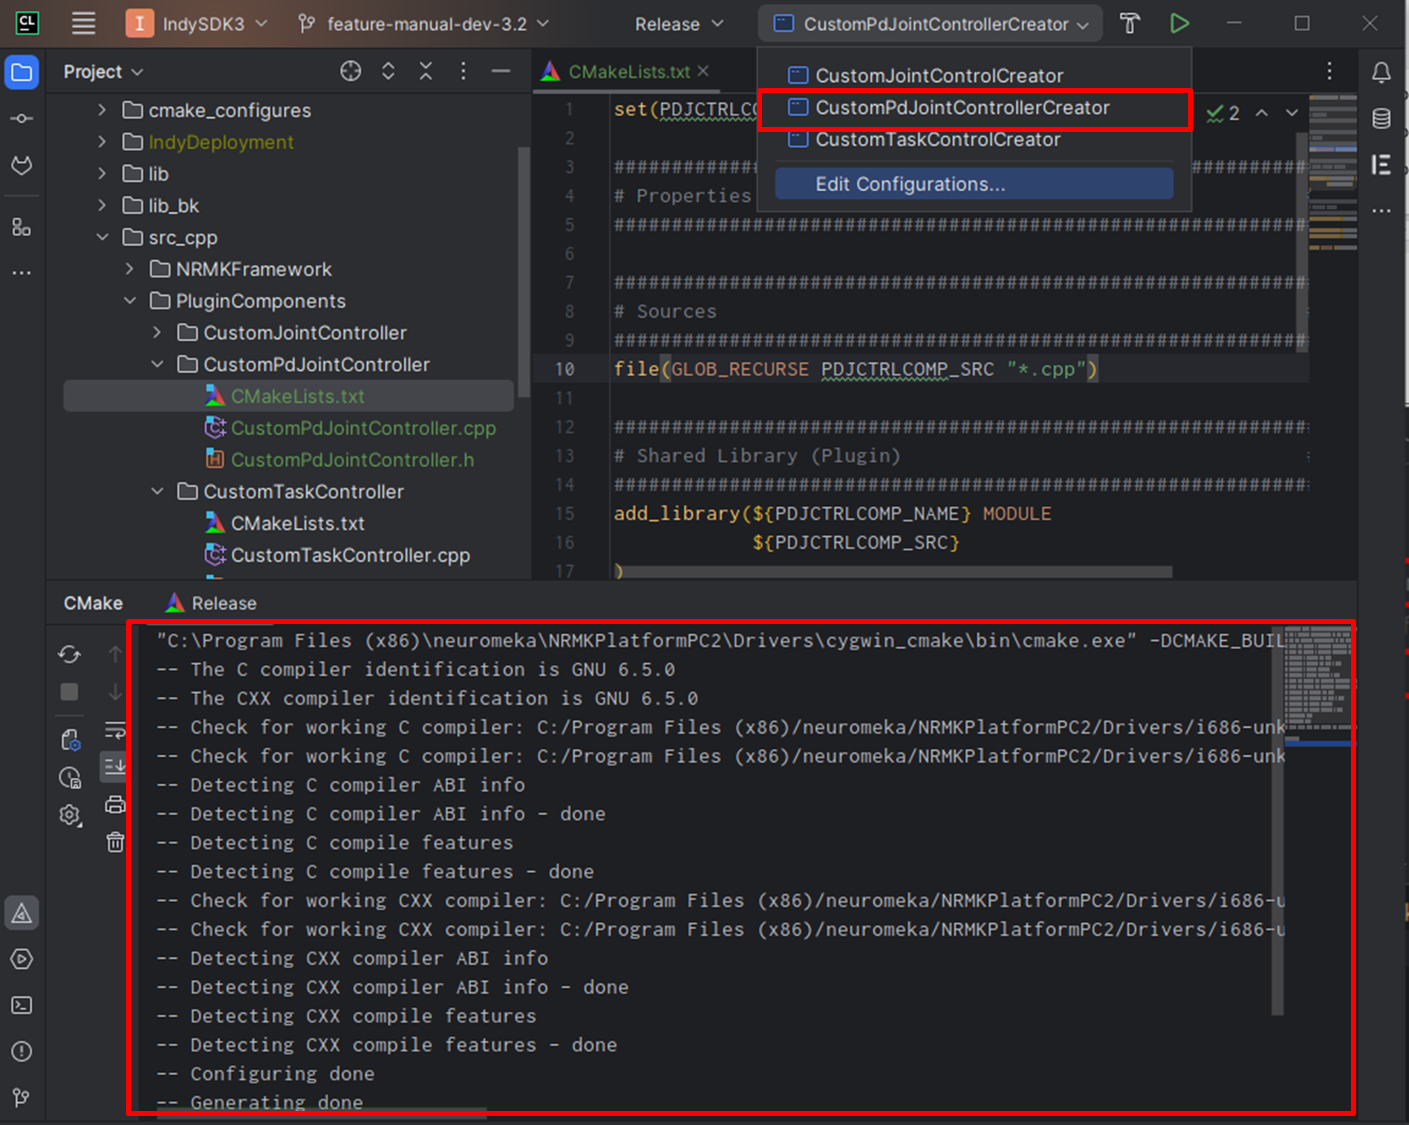
- Use
Build>Installto generate the component installer files, which are installed in the specified output directory (../IndyDeployment/PluginComponents/) as set inCMakeLists.txt.
- Upon completion of
Install, the necessary files are copied to the correct location../IndyDeployment/PluginComponents/for runtime use.
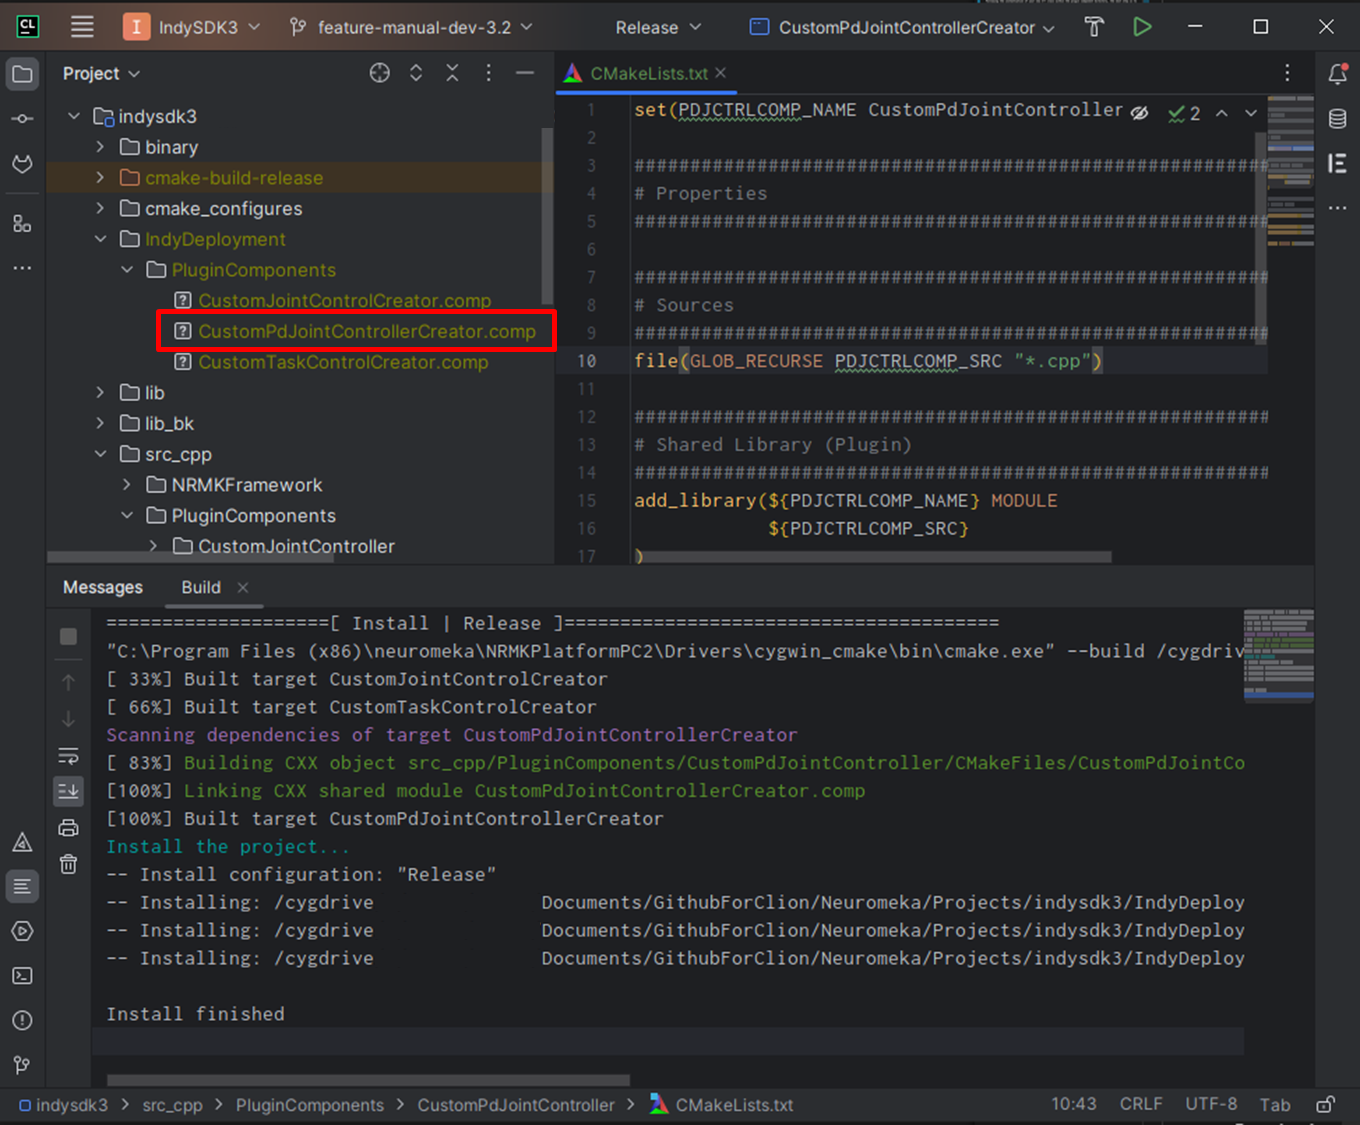
- Finally, by placing the created component file
CustomPdJointControllerCreator.compin the STEP path/home/user/release/IndyDeployment/PluginComponents, you can run the robot using the component controller you built.
