Installation and Configuration (Windows)
Sales
IndySDK is provided exclusively to non-profit organizations such as research institutes and universities. You can use IndySDK after obtaining a user license through an agreement with Neuromeka. For more details, please contact us via email at technical-support@neuromeka.com.
Overview of the Indy Development Ecosystem
The Indy development ecosystem is designed to streamline the creation and implementation of control algorithms for the Indy robot. To develop custom control algorithms, start by using IndySDK to write your code. CMake simplifies project configuration and dependency management. You can then choose to build your project in CLion for a feature-rich development experience or use the terminal for greater control. Finally, the IndyDCP3 communication protocol enables your custom algorithms to communicate with the robot, allowing for real-time testing and refinement. Below are the key components in the IndySDK ecosystem:
-
IndySDK: The IndySDK is a collection of APIs that allow developers to create, implement, and test their own control algorithms. It facilitates interaction with the Indy robot through IndyDCP3, making it easier to manage tasks like motion control, sensor integration, and data processing.
-
CMake: CMake is a powerful build system that helps manage the compilation process for your project. It generates build files based on the project's configuration, allowing you to customize how your application is built and linked with the IndySDK and other dependencies.
-
CLion and Terminal: CLion is an integrated development environment (IDE) that provides a user-friendly interface for working with C++ projects. It integrates seamlessly with CMake, offering features like smart code completion and debugging tools. Alternatively, for users comfortable with command-line interfaces, the terminal allows for direct control over the build process using CMake commands.
-
IndyDCP3: IndyDCP3 allows for communication between the Indy robot and external systems. It provides a structured framework for sending commands and receiving data, enabling real-time control and monitoring of the robot.
-
Supporting Tools and Resources: The IndySDK GitLab repository contains example codes and READMEs that guide you through API usage to ensure users understand how to implement their algorithms effectively.
By understanding how these components interact, you will be better prepared to install and build your project successfully. The following sections will guide you through the specific steps needed to set up your development environment and begin working with the Indy SDK.
Installation Files
Please download and install the files in the order provided via the links below. The installation environment differs between STEP2 and STEP3 users, as well as between Windows and Linux users. Please ensure you proceed with the installation corresponding to the controller you are using and the OS of your development PC.
Note
Please note which controller version you are using:
- STEP2: This is the default controller responsible for the real-time control of the standard Indy lineup. If you're using an IndyCB, you are most likely using STEP2.
- STEP3: Designed for advanced research and development, STEP3 is a higher-performance controller. It is primarily used in models like the IndyRP-2.
1. Install PlatformSDK
2. Install IndyFramework
3. Install NRMKFoundation-UpdatePack3.2
See the following sections for detailed instructions on how to install the files and build the IndySDK development environment using CMake on both Ubuntu and Windows platforms.
Installing Files in Windows
1. Verify Installation:
After successfully installing the files, navigate to the C:\Program Files (x86)\neuromeka directory. You should see the following folders created in that location:
- NRMKFoundation
- NRMKPlatformPC2 (STEP2)
- NRMKPlatformPC3 (STEP3)
2. Updating NRMKFoundation:
- In the
C:\Program Files (x86)\neuromeka\NRMKFoundationfolder, place the files obtained from extractingNRMKFoundation-UpdatePack3.2downloaded from the previous step. Overwrite the existing files.
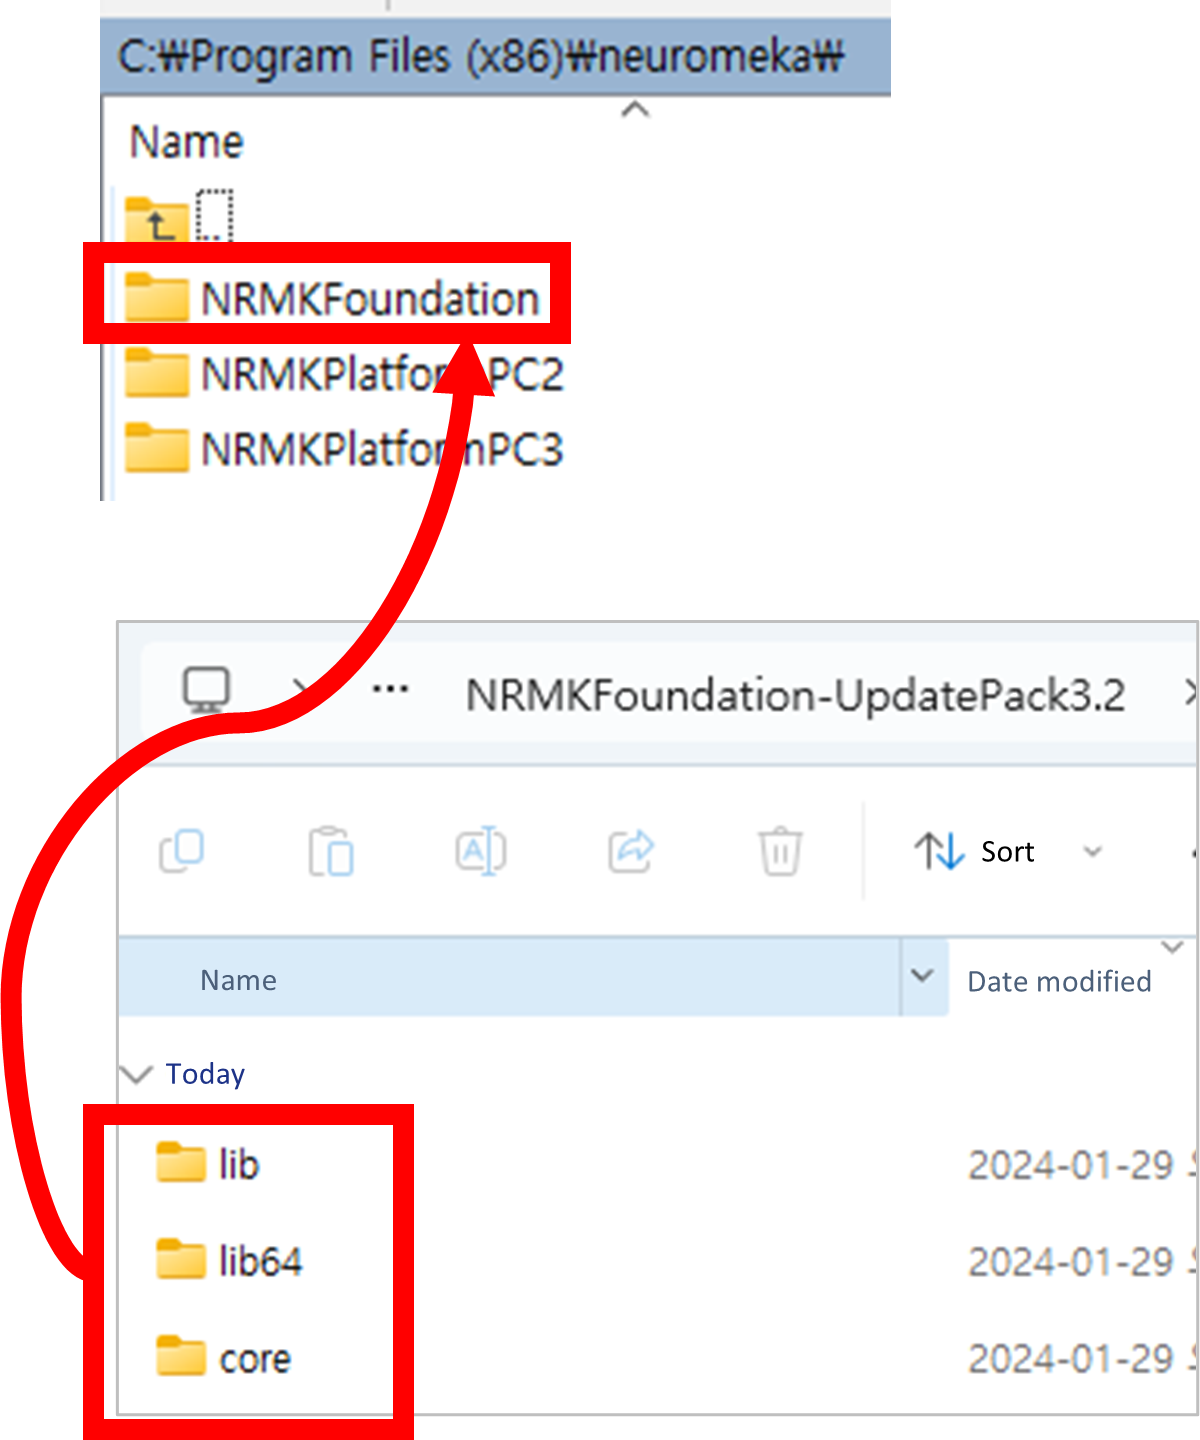
Overwriting Existing Files
IndySDK Development Environment for Windows
- The IndySDK development environment utilizes CMake, a cross-platform, free, and open-source software tool for build automation, testing, packaging, and installation of software.
-
The following sections outline two example build methods:
Windows Terminal
1. Download the source code from the IndySDK GitLab Repository.
- The IndySDK GitLab repository includes a range of APIs that make it easy to create, implement, and test your own control algorithms in both simulation and real-world scenarios. For guidance, examples of API usage can be found in the
../src_cpp/PluginComponentsdirectory, with READMEs explaining the algorithms. - To begin using the IndySDK, you need to download the source code from the GitLab repository. In this example, we reference the indysdk3-feature-example-hotfix6 branch, but please confirm the appropriate branch with your sales representative prior to completing this step.
2. Open Windows Command Prompt
- Press
Win+R, typecmd, and press Enter to open the Command Prompt.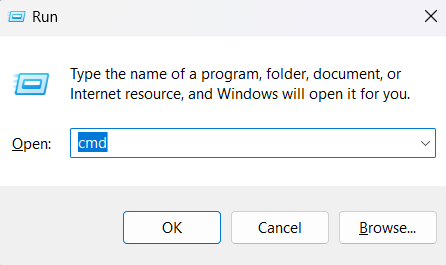
Open Windows Command Prompt
3. Navigate to the Source Directory
- Navigate to the source directory in the Command Prompt:
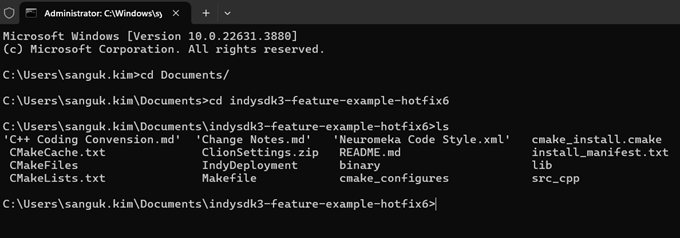
Navigate to the Source Directory
4. Build Commands
- Execute the following commands in the terminal to build the project, based on your control box type:
- For STEP2 Control Box, run the following commands:
- For STEP3 Control Box, use these commands instead:
- What these commands do:
- First command: Configures the project with CMake. It sets the build to Release mode (optimized for performance) and specifies the control box type with NRMK_PLATFORM=STEP2 or STEP3. The . at the end means the current directory (meaning the CMake project files are located in the current directory).
- Second command: Compiles the project using the CMake configuration from the previous step. It targets the 'install' stage, meaning the software will be compiled and then installed. The -j 4 option instructs the system to use 4 parallel tasks (threads), which speeds up the build process by allowing multiple tasks to run simultaneously.
5. Verify Build Completion
- When the build is complete, the built files will be saved in your SDK code repository under
your_source_directory/IndyDeployment/PluginComponentsas a comp file type.
CLion
The SDK uses CLion as its Integrated Development Environment (IDE) to enhance the development experience for C and C++ projects. CLion provides features like smart code completion, real-time code analysis, and integrated debugging capabilities.
CLion integrates with CMake, allowing developers to manage their project builds directly within the IDE. When a project is opened in CLion, it automatically detects the CMake configuration files (CMakeLists.txt) and uses them to configure the project. Developers can build, run, and debug the project easily, as CLion calls CMake to generate the necessary build files and manage the build process.
Prerequisites
- Before setting up the CLion build environment, ensure you have the following installed:
1. Download the source code from the IndySDK GitLab Repository.
- The IndySDK GitLab repository includes a range of APIs that make it easy to create, implement, and test your own control algorithms in both simulation and real-world scenarios. For guidance, examples of API usage can be found in the
../src_cpp/PluginComponentsdirectory, with READMEs explaining the algorithms. - To begin using the IndySDK, you need to download the source code from the GitLab repository. Please contact your sales representative to confirm which branch you should use (e.g., indysdk3-feature-example-hotfix10).
2. Configure CMake in CLion
The following steps explain how to set up the development environment in CLion and configure the build system for the project.
Configure CMake in CLion
Note
The positions of icons may vary depending on the version of CLion. If you can’t find the necessary compile buttons, please check your settings, including:
- Toolbar Visibility
- Restoring Default Layout
- Ensuring proper CMake configurations
- Verifying that your project has a valid CMakeLists.txt
- Ensuring CLion is up to date
a. Launch the CLion application to start working on your project.
b. Navigate to the source code file you downloaded from GitLab. This is where you'll make edits to or build your project.
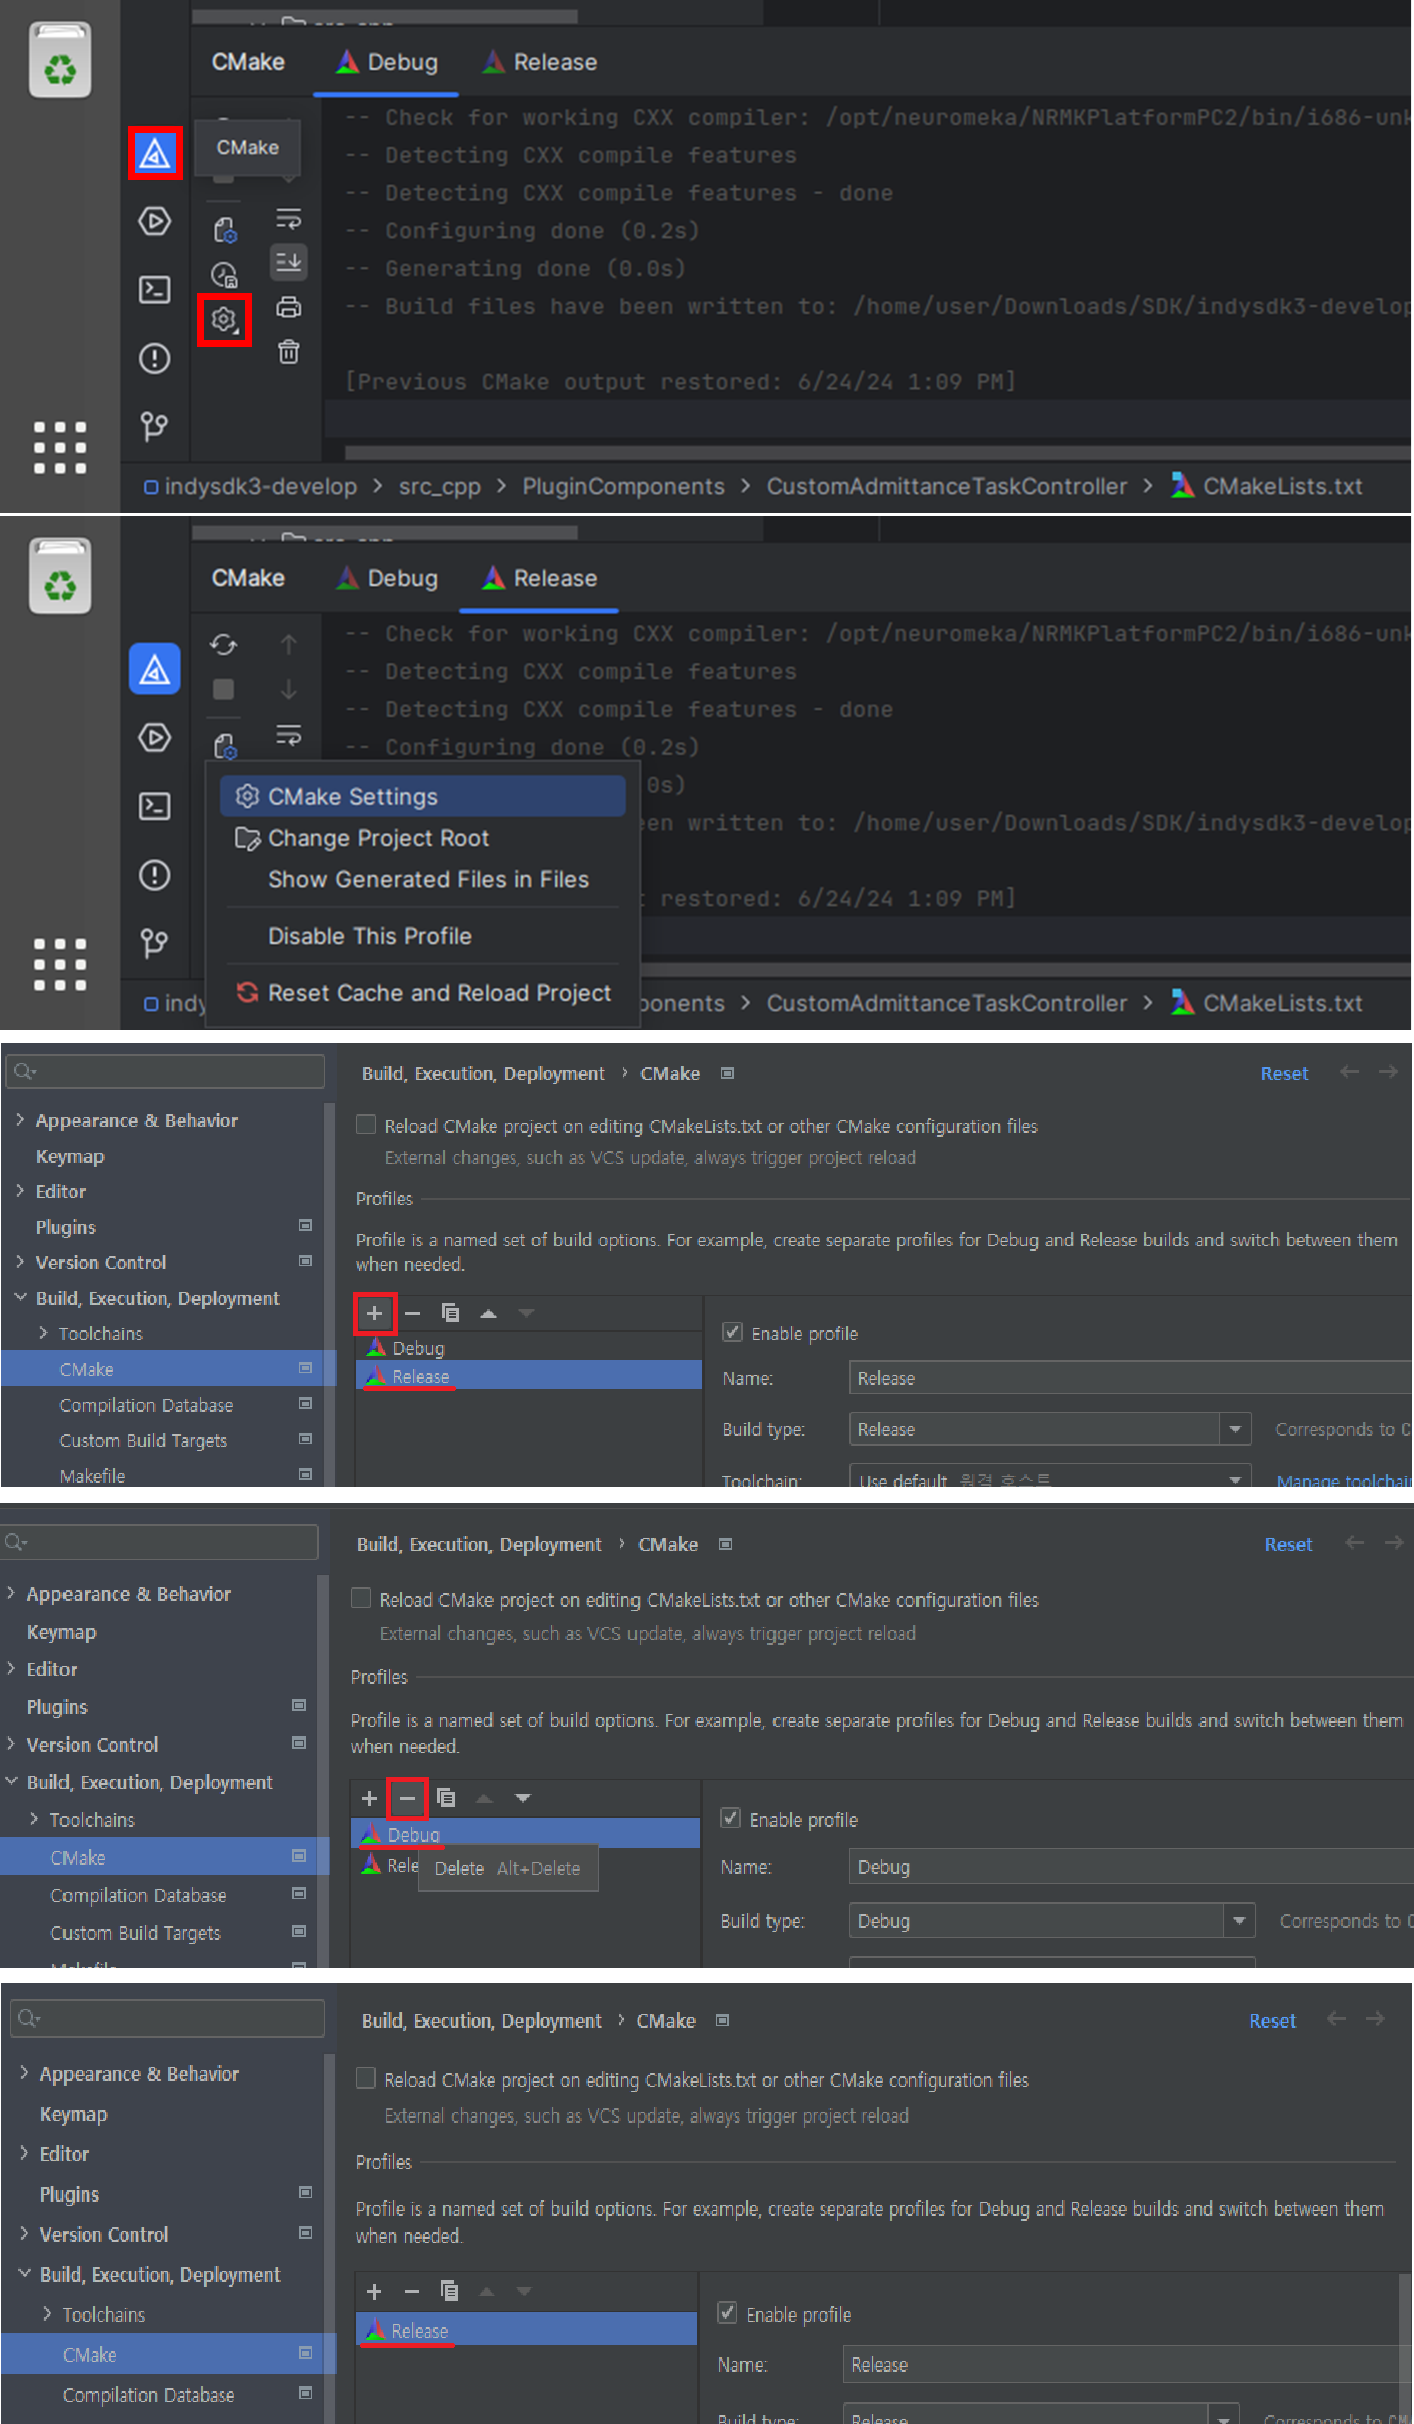
c. Click the
CMakebutton to manage the build system settings.d. Click the
Gearicon (Settings) to access project configurations.e. Select
CMake Settingsto adjust the build configuration for the project.f. Click the
+button to add a new configuration. Select Release to optimize the project for final deployment.3. Modify CMake Configuration

Modify CMake Configuration
a. Open the
CMakeLists.txtfile.b. Change the
NRMK_PLATFORMto match the STEP used (STEP2 or STEP3).c. Save the changes.
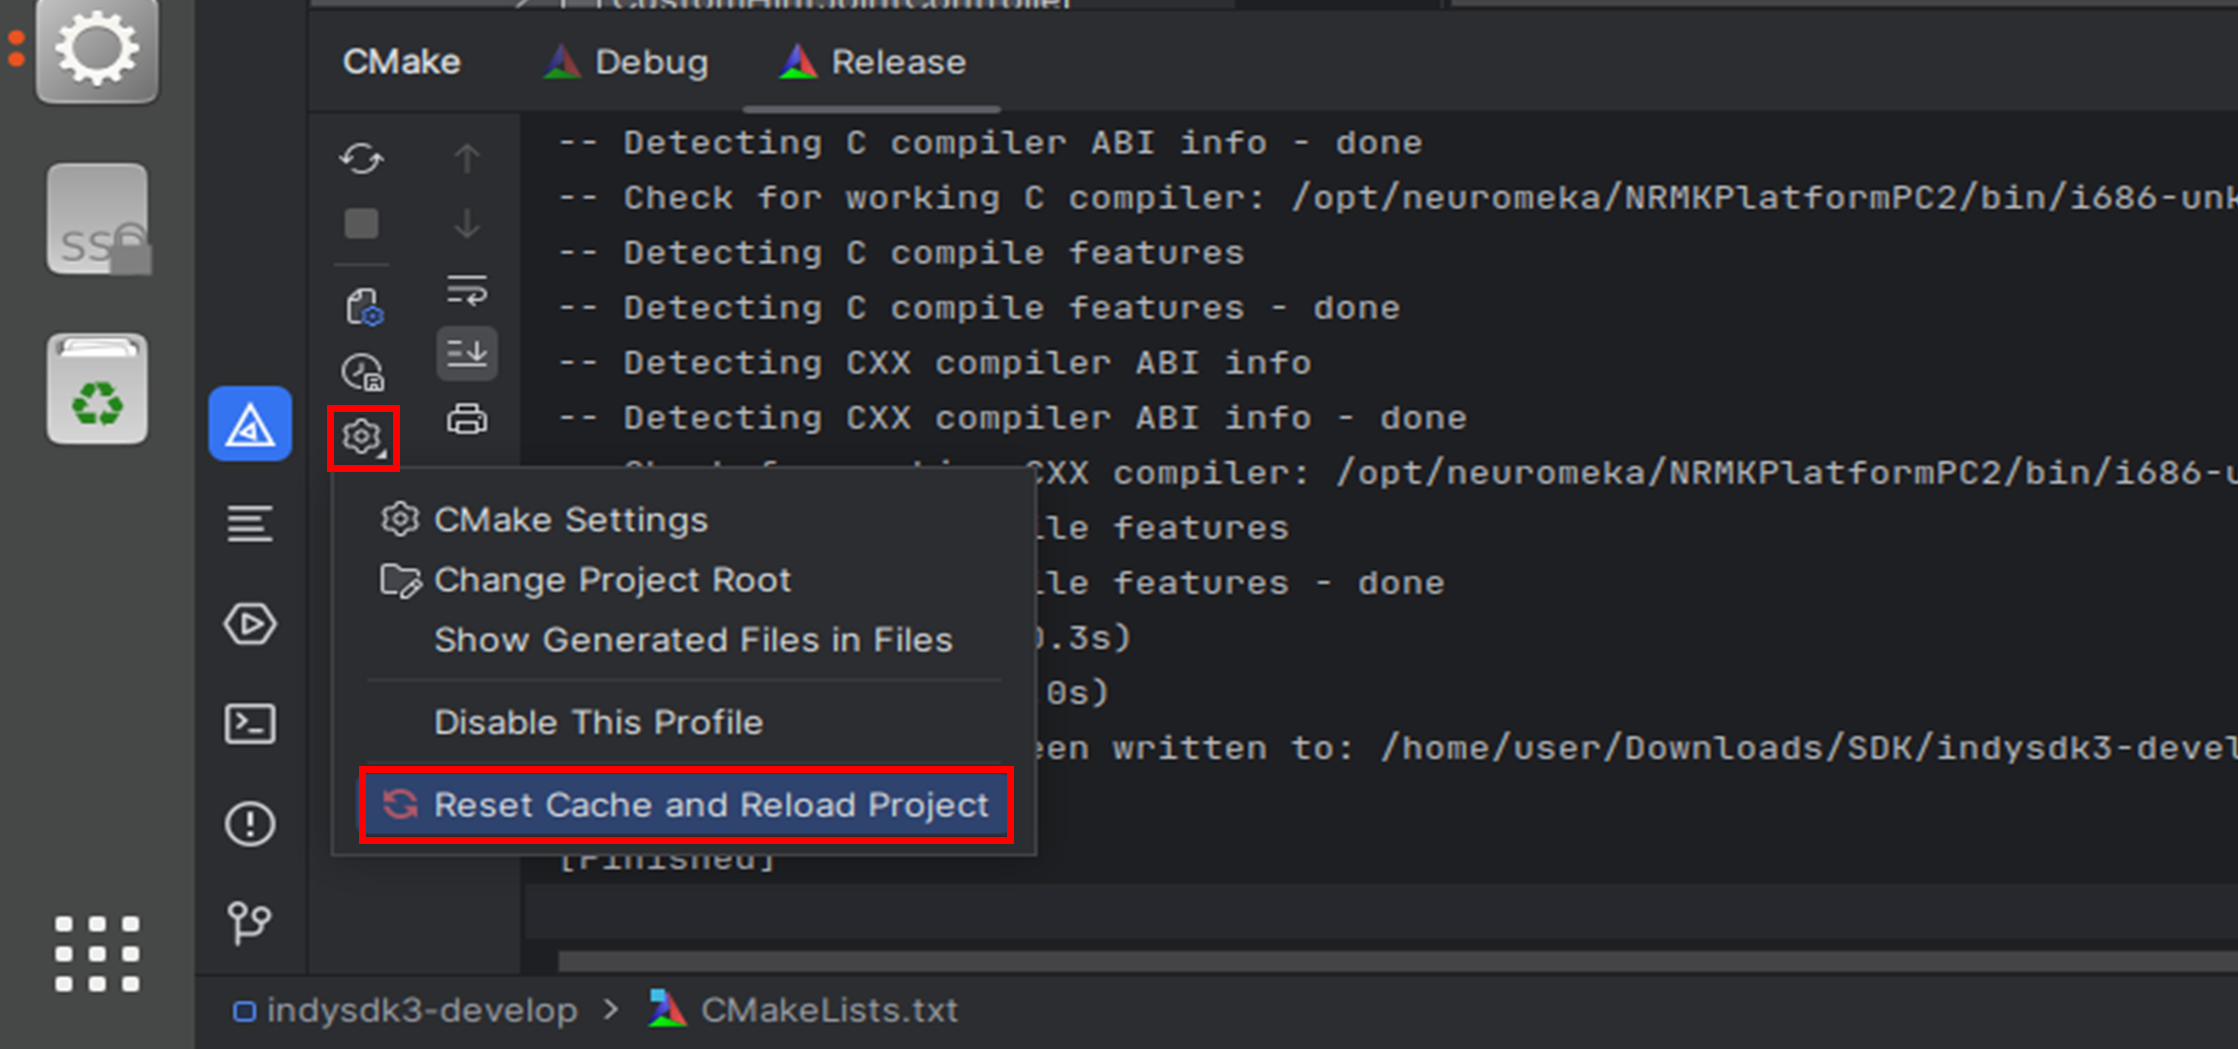
4. Complete CMake Setup
Complete CMake Setup
a. Click the
Gearicon.b. Select
Reset Cache and Reload Project5. Build the Project
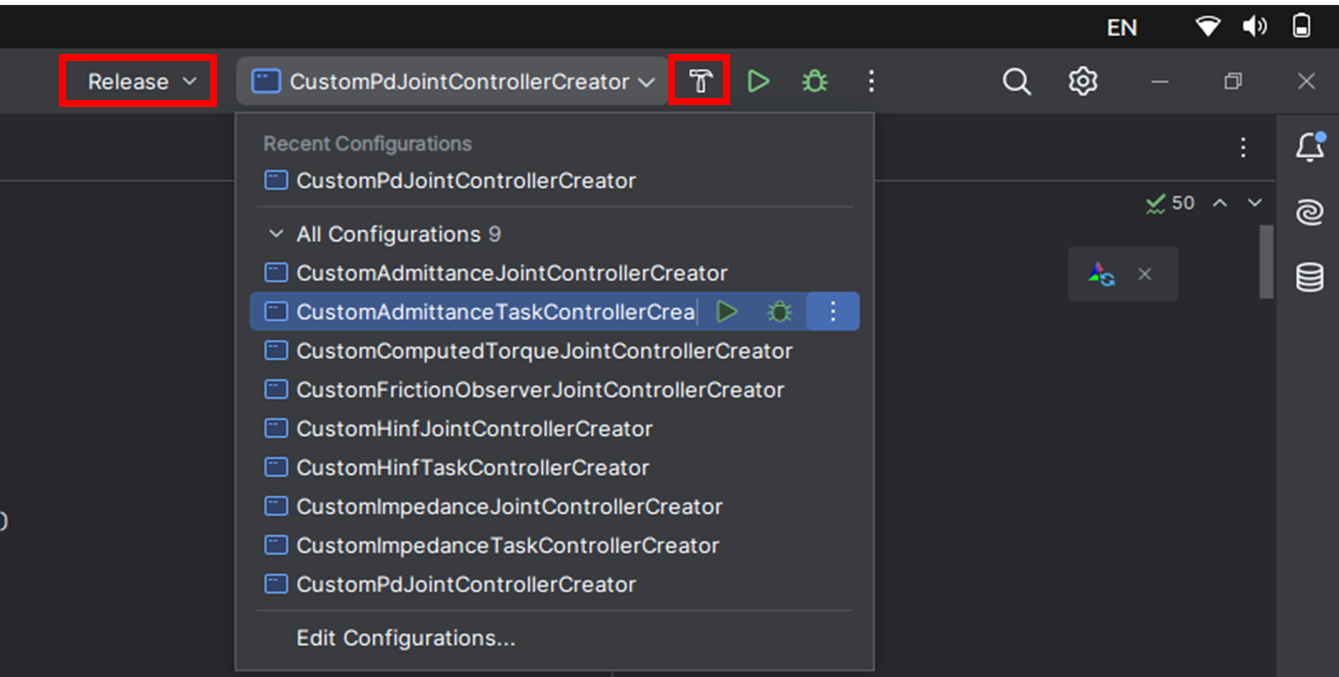
Build the Project
a. Select the Controller you want to build in the drop down.
b. Click the
Hammerbutton to start the build.6. Verify Build Completion
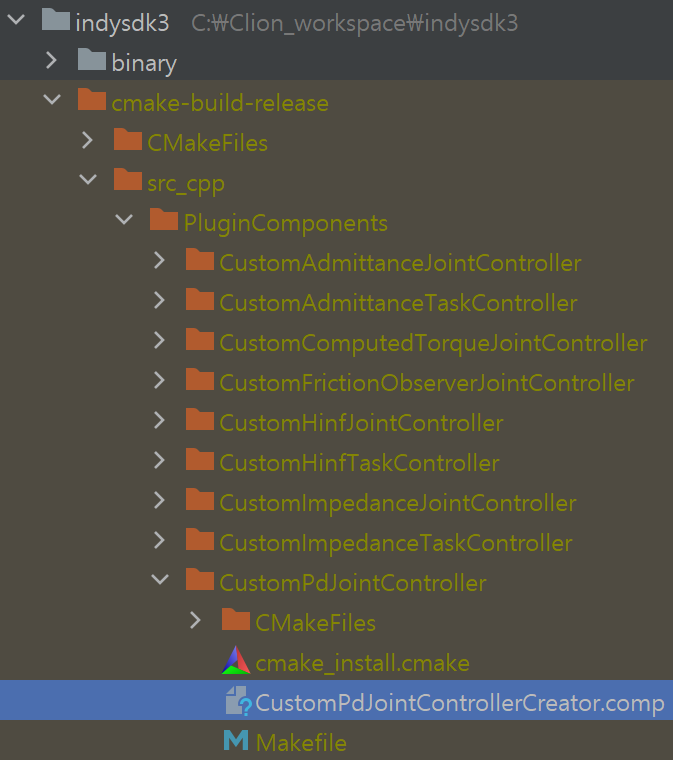
Verify Build Completion
a. When the build is complete, the built file will be saved in the
cmake-build-release/src_cpp/PluginComponentsfolder. - The IndySDK GitLab repository includes a range of APIs that make it easy to create, implement, and test your own control algorithms in both simulation and real-world scenarios. For guidance, examples of API usage can be found in the
