Object recognition model
Data collection
Data collection for object detection (pick and place)
Data collection is essential for learning deep learning algorithms. For creating a dataset for the object detection model, a CAD (.stl) file is required per object. Please prepare the stl file using a 3D scanner or separate CAD software.
- IndyEye Web: Upload the CAD files of the objects to learn
- Connect to
{IndyEye Server IP}:8088/webfrom your computer's web browser. - Click on the CAD tab
- Click the Upload button to upload the CAD (*.stl) files to the IndyEye server.
- Connect to
- App: Preparing to create learning data
- Connect the robot
- Click the Training tab
- App: Import CAD model
- Set the task's name (training dataset name)
- Click the Add button in the object list to add the CAD files of the objects to train.
- App: Adjust CAD model position
- Go to the Object tab and adjust the position of the added CAD model until it completely overlaps with the actual object on the screen.
- You can press the Edit button to display the positioning panel.
- If the CAD model drawn on the screen completely overlaps with the actual object, touch the Save Object Posture button.
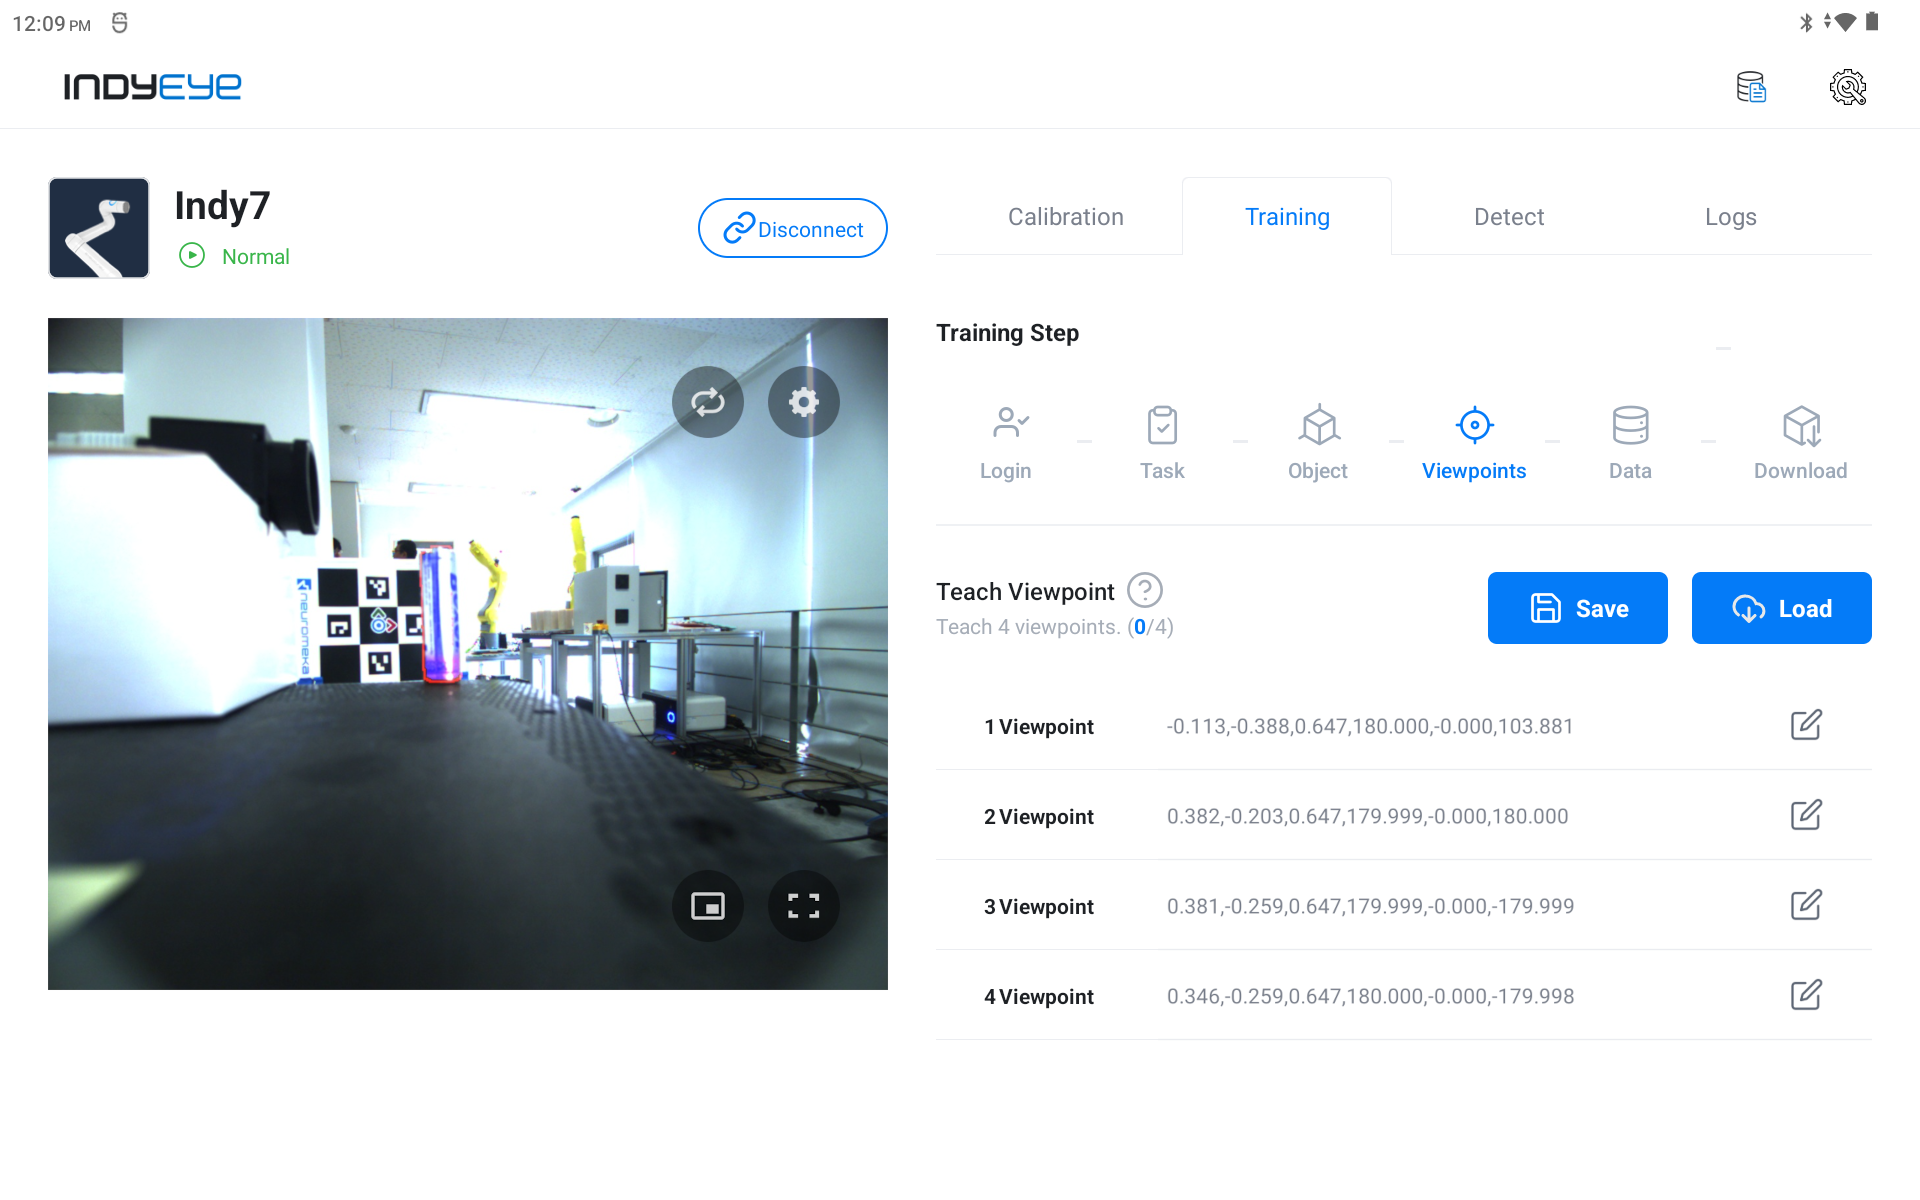
- App: Robot viewpoint settings
- Set the viewpoint range for capturing the training data
- ※ If the CAD model and the actual object do not overlap after moving the viewpoint, go back to the Object tab and adjust the position of the CAD model until they match.
- App: Generate training data
- Go to the Data tab and touch the Start button
- The robot moves automatically, takes pictures of the work and saves the data.
- ※ If the CAD rendering on the screen does not match, press the stop button to stop the generation.
Using the trained model
Training and downloading the trained model
Note
As of IndyEye version 0.6.1, one type of pretrained model is provided when using a separate IndyEye.
Custom model learning is provided only when serviced directly by Neuromeka.
Object detection
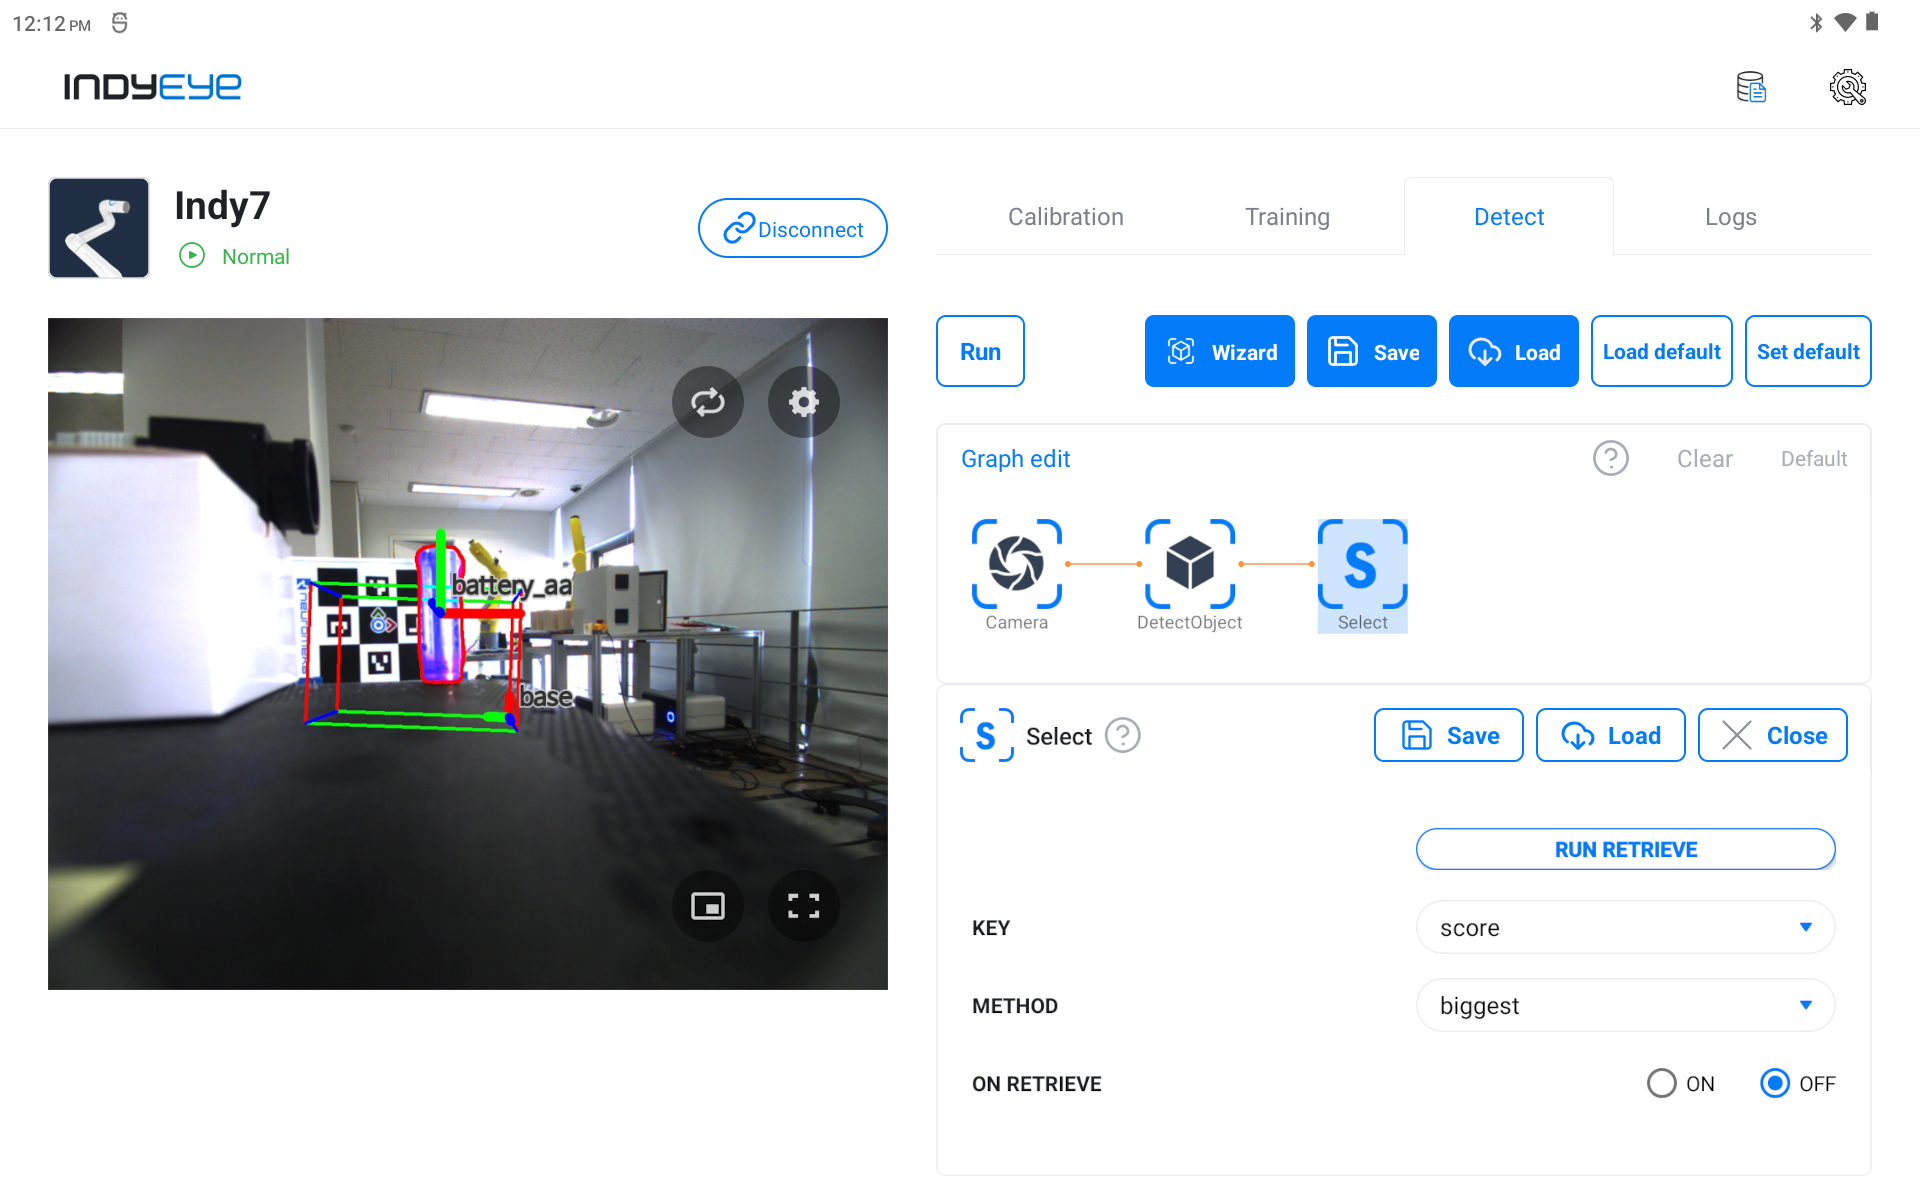
Once the model has been downloaded, you can select it in the DetectObject module.
Note
Only one DetectObject module can be used at a time.
- Go to the Detect tab.
- Add the DetectObject module to the graph and select the MODEL variable as the model you want to use.
- After waiting for the model to load, press the Run button to check the model recognition results.
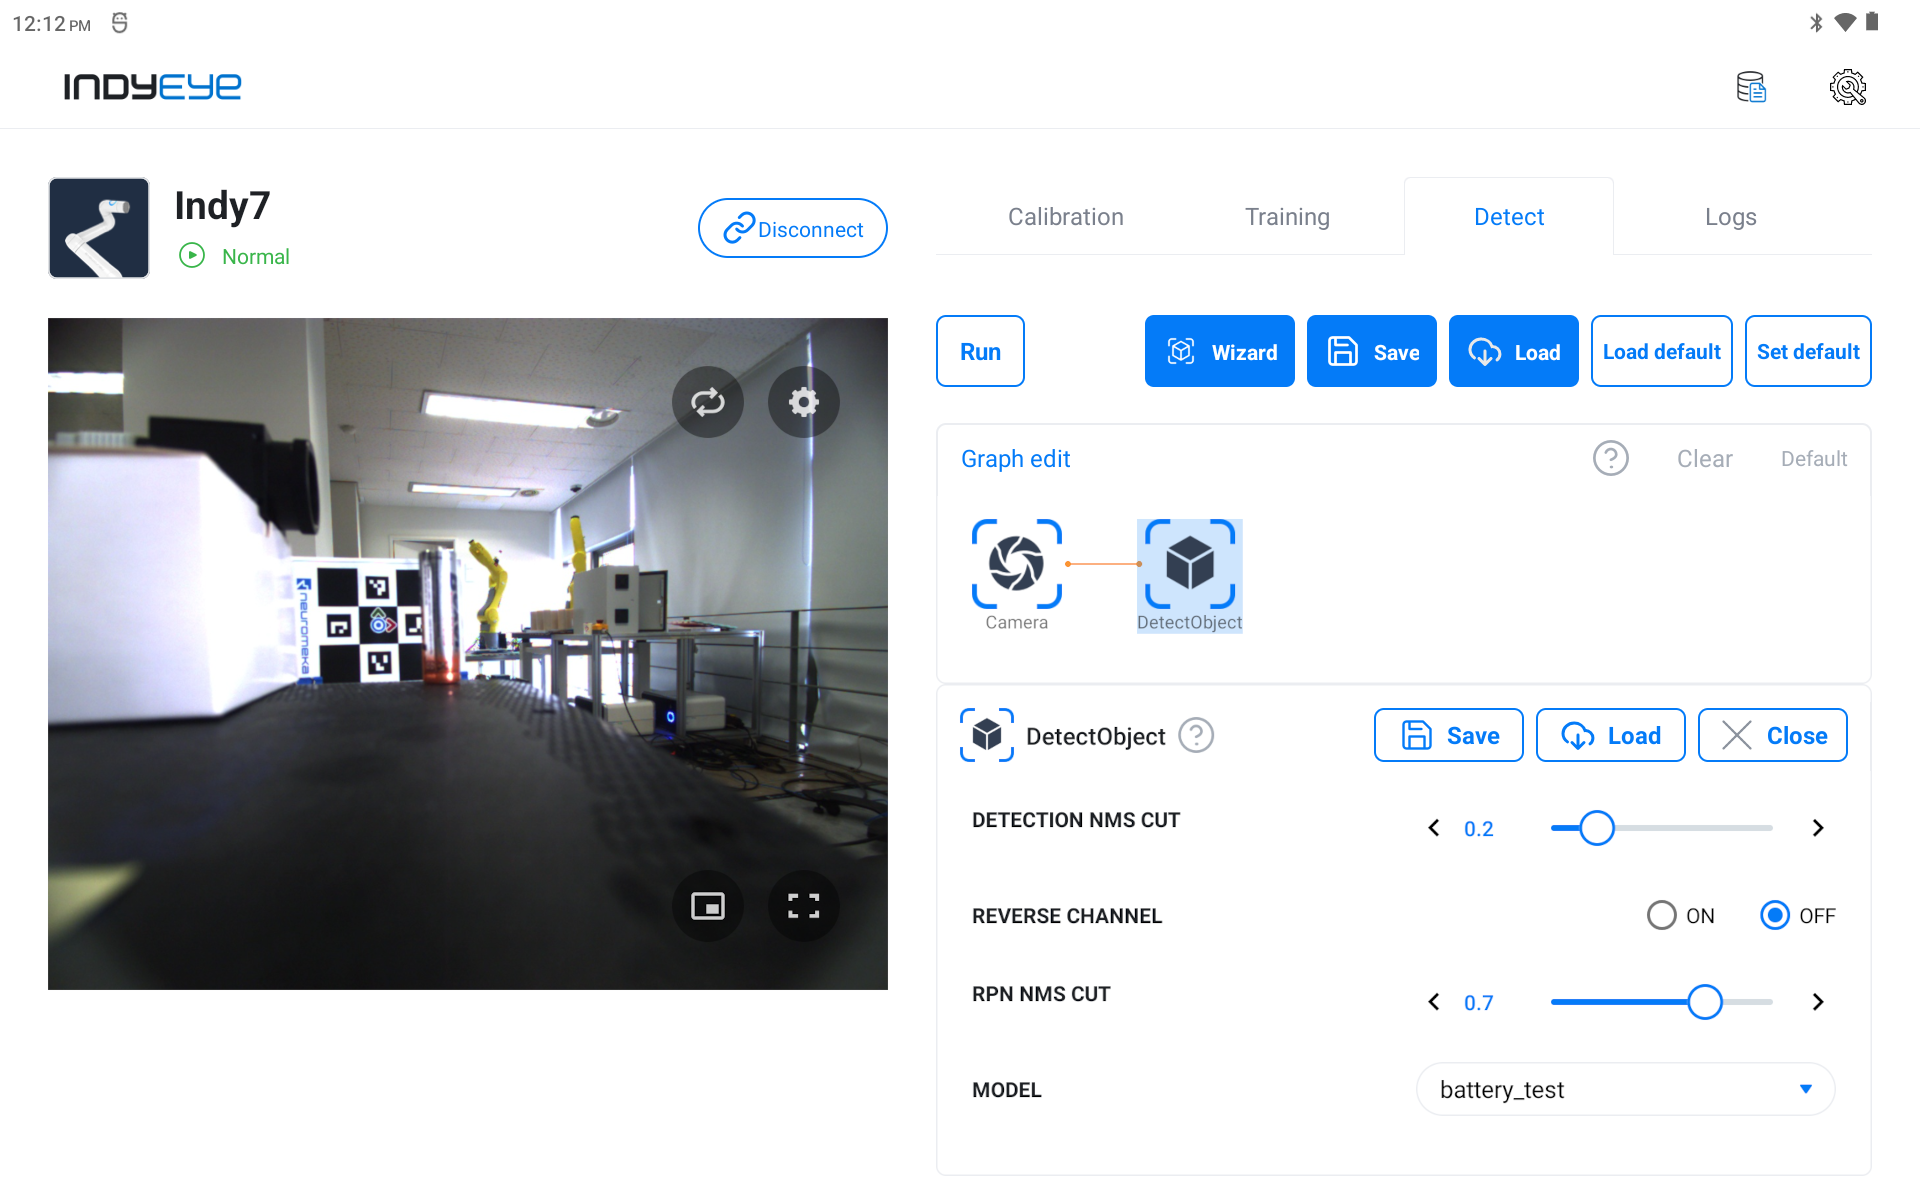
DetectObject Module
| Option name | Type | Description |
|---|---|---|
| 'CONFIDENCE_CUT' | float, 0.0 ~ 1.0 | This is the lower limit of detection confidence. Detection results with higher confidence than this value are considered valid. |
| 'DETECTION_NMS_CUT' | float, 0.0 to 1.0 | For detection results that overlap more than the set value, the one with the highest confidence is selected. |
| 'REVERSE_CHANNEL' | bool | Whether to reverse the input image channel order. When selected, the RGB channels will be reversed for detection. |
| 'RPN_NMS_CUT' | float, 0.0 to 1.0 | This is an upper bound on the degree of overlap of the regions to attempt detection. The smaller it is, the more it tries to detect different overlapping areas. |
| 'MODEL' | string | The name of the model to use. |
