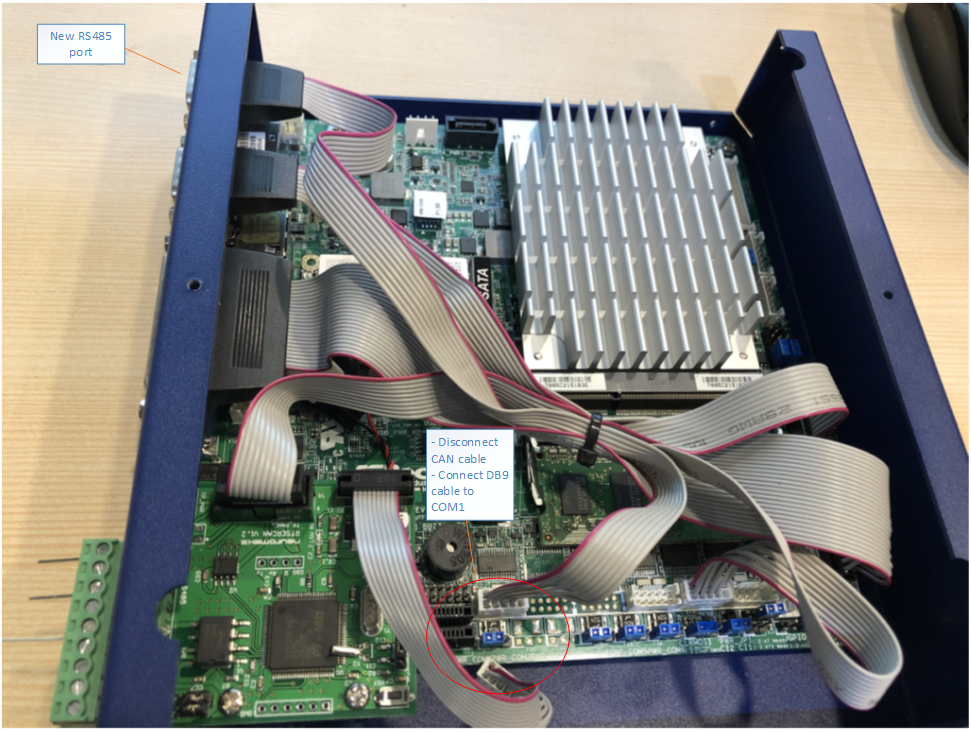
RS485 on STEP2 blue cover
On the blue version, “RS485 / CAN” port is only used for CAN. Unfortunately, RS485 and CAN is only available on COM1 port. As a result, to use RS485 we need to open the cover of STEP-PC2 then disconnect the cable for CAN and connect another cable for RS485. Here we will setup one of DB9 port as RS485 port.

COM1 connection on STEP-PC2 Blue
First, disconnect CAN cable, then connect DB9 cable into COM1 port instead.
Change COM1 connection to use RS485
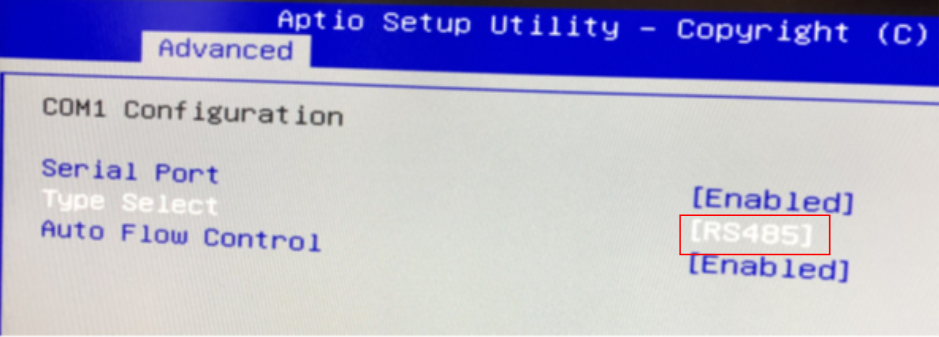
Then, go to BIOS settings and change COM1 type to RS485:
-
From BIOS screen, navigate to Advanced > Super IO Configuration > COM1 Configuration
-
Select COM1 port type [RS485]
Base on COM1 Port Pin Definition, we can determine connection pin of new RS485 port.
| PIN | RS232 | RS422 | RS485 |
|---|---|---|---|
| 1 | DCD | TX- | RTX- |
| 2 | RXD | RX+ | N/A |
| 3 | TXD | TX+ | RTX+ |
| 4 | DTR | RX- | N/A |
| 5 | GND | GND | GND |
| 6 | DSR | N/A | N/A |
| 7 | RTS | N/A | N/A |
| 8 | CTS | N/A | N/A |
| 9 | +5V/+12V | +5V/+12V | +5V/+12V |
| 10 | NC | NC | NC |

Now we can check new RS485 port by using a “USB to RS485” cable to connect STEP-PC2 Blue to Windows PC and send / receive data.
- On STEP-PC2 Blue, open minicom and configure as below:
1 2 3 | |
- On Windows PC, open Teraterm (or another terminal program) and setting serial port the same as in minicom:
1 2 3 4 5 6 | |
- Verify RS485 working or not by typing on one terminal then check receiving characters on the other side.
